
This Post May Contain Affiliate Links. Please Read Our Disclosure Policy.

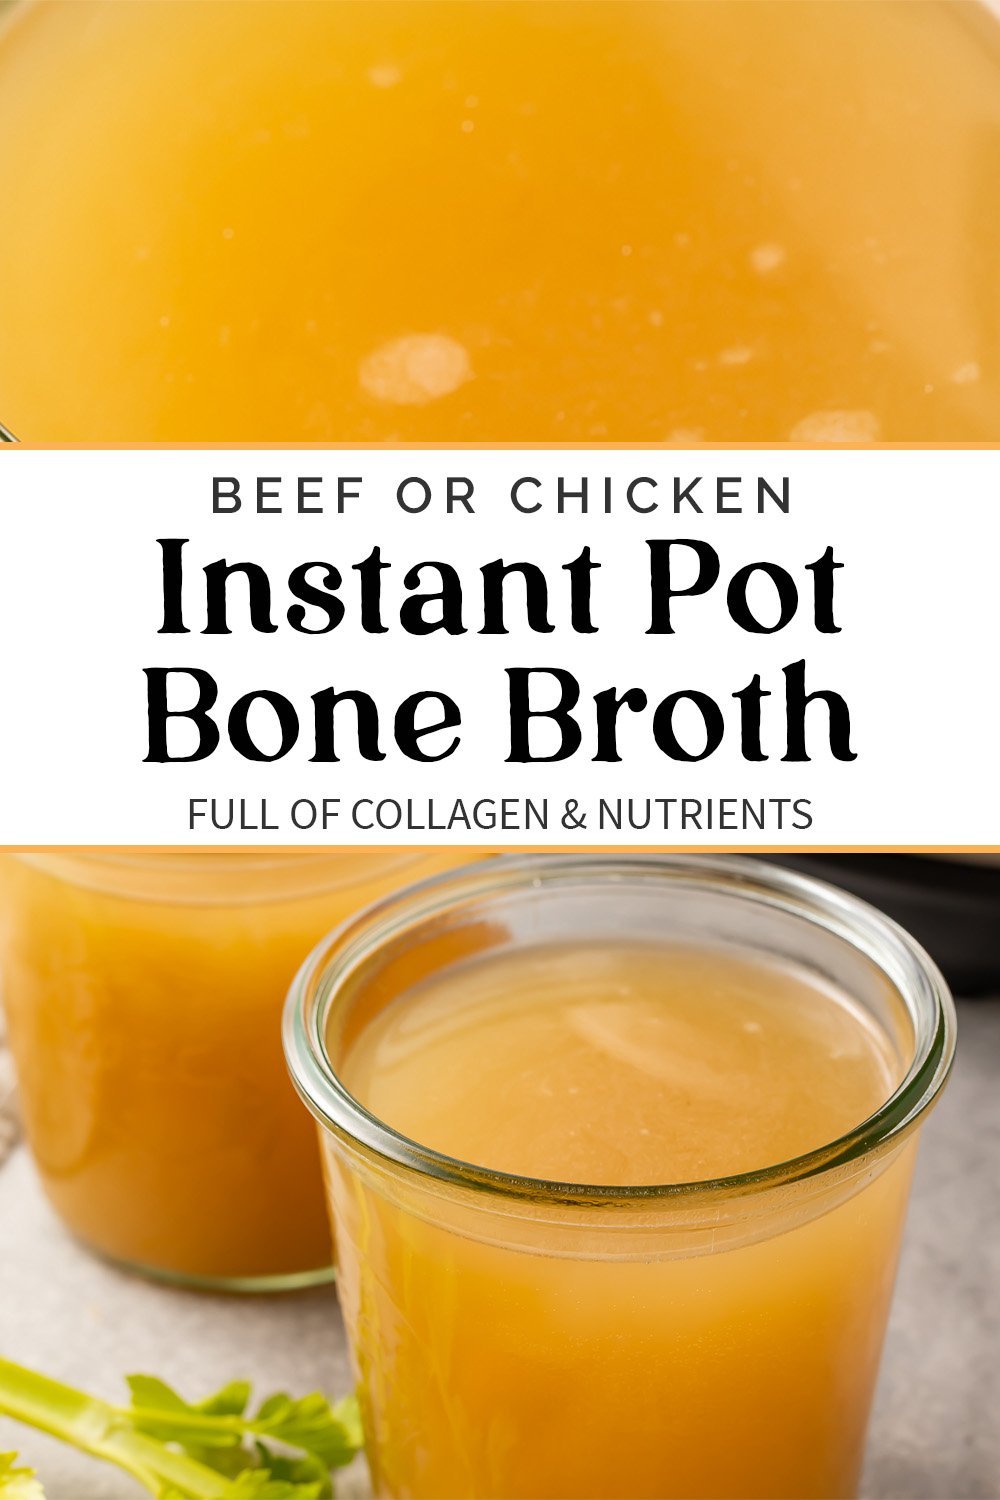
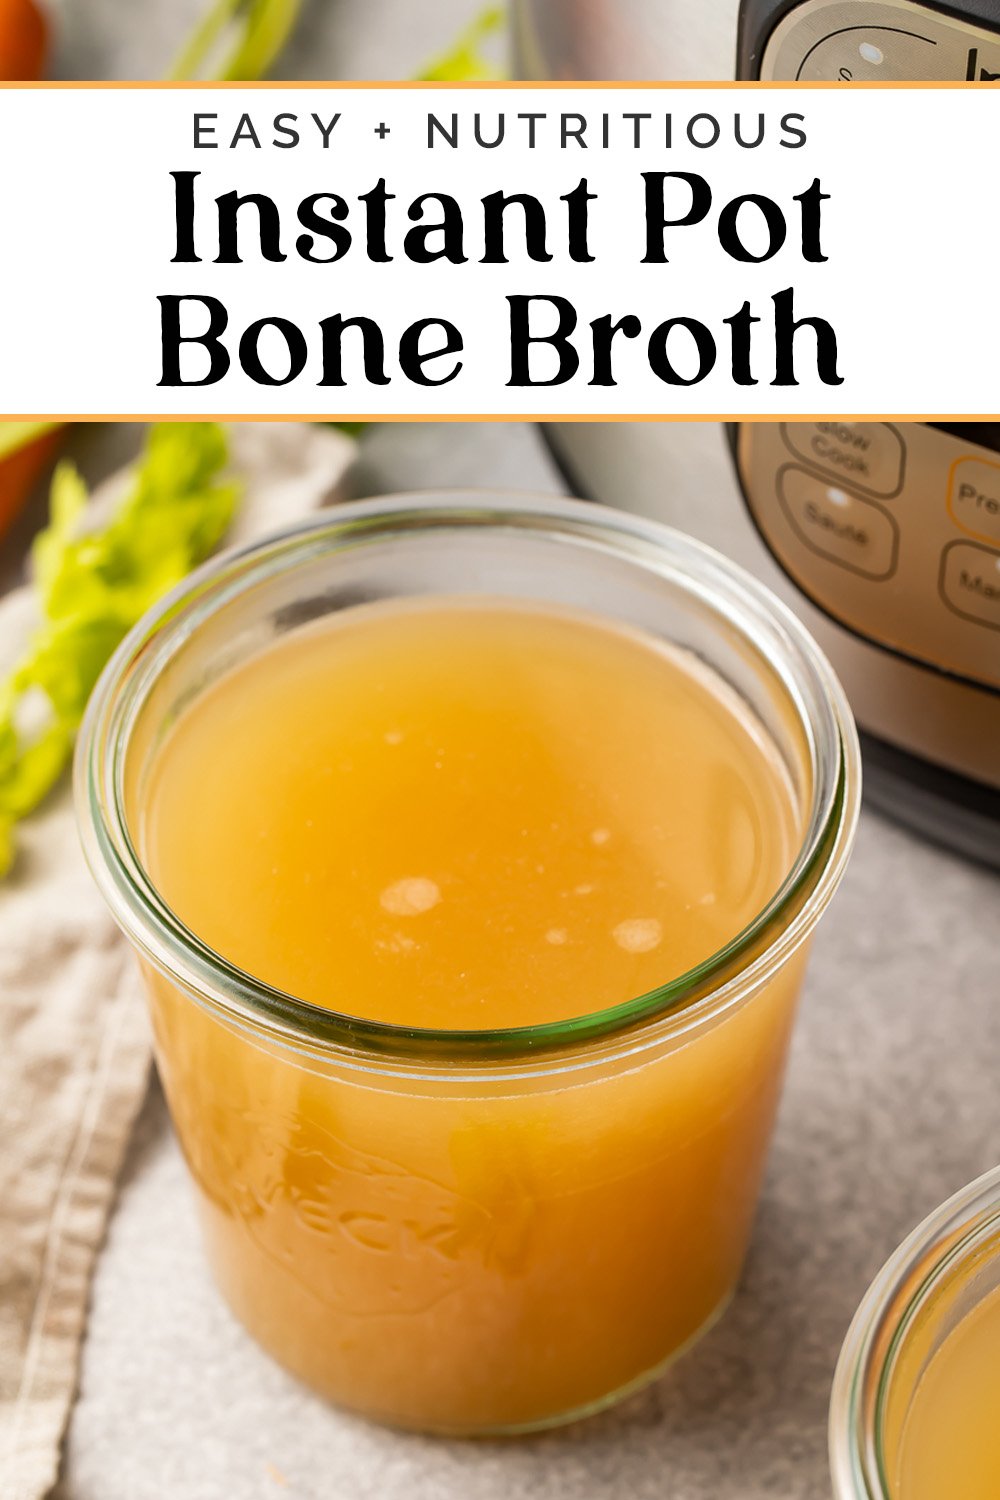
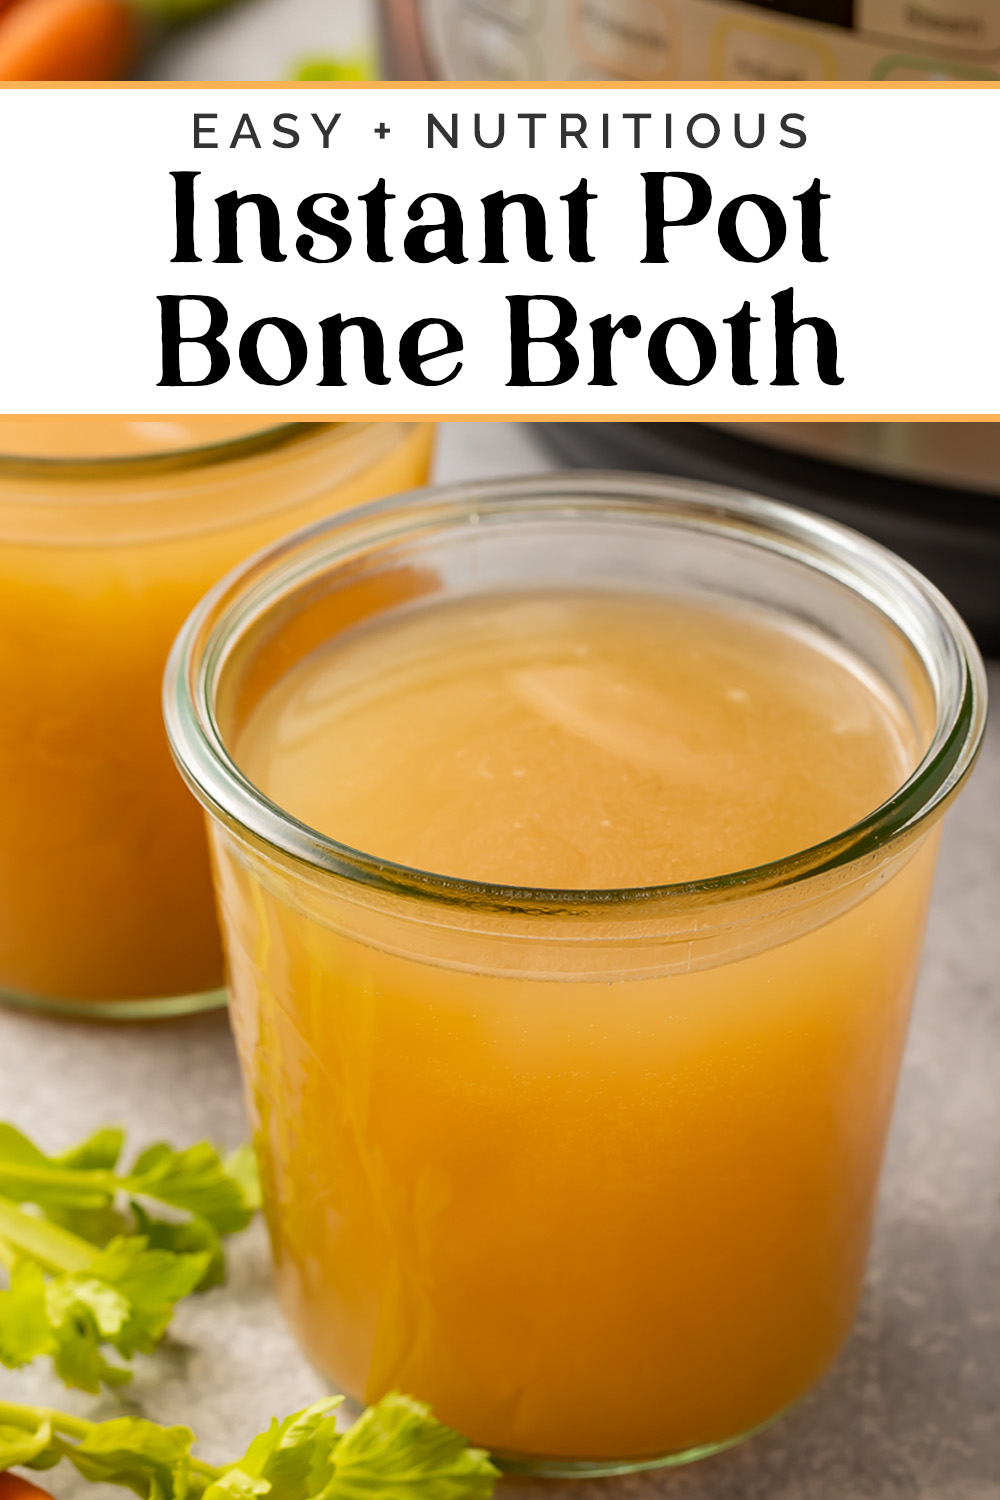
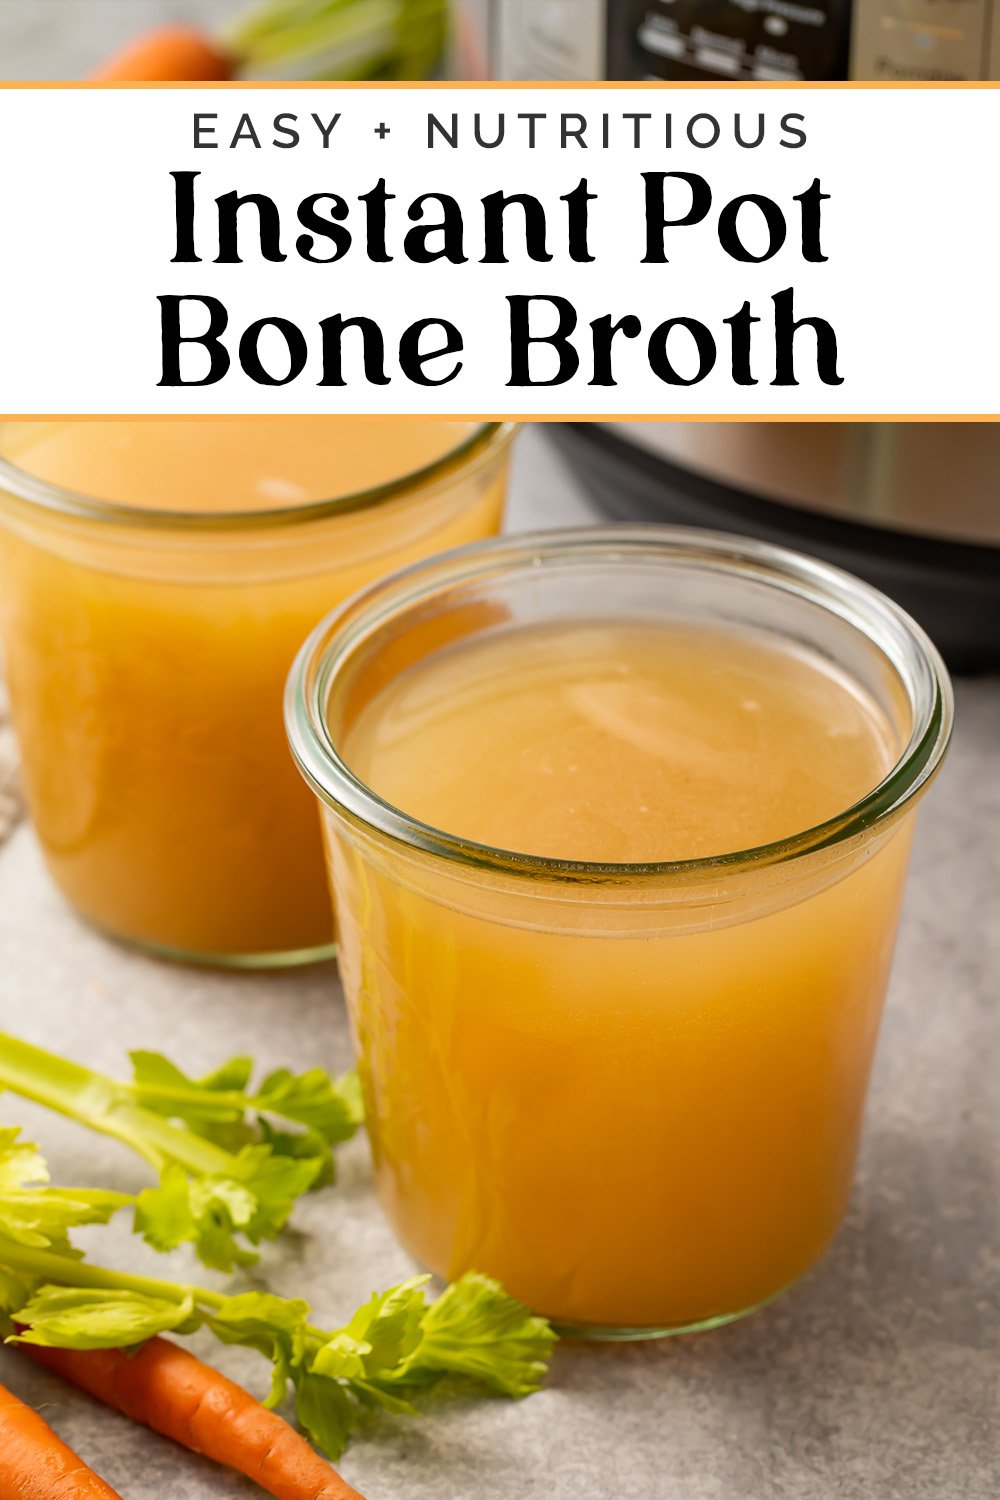
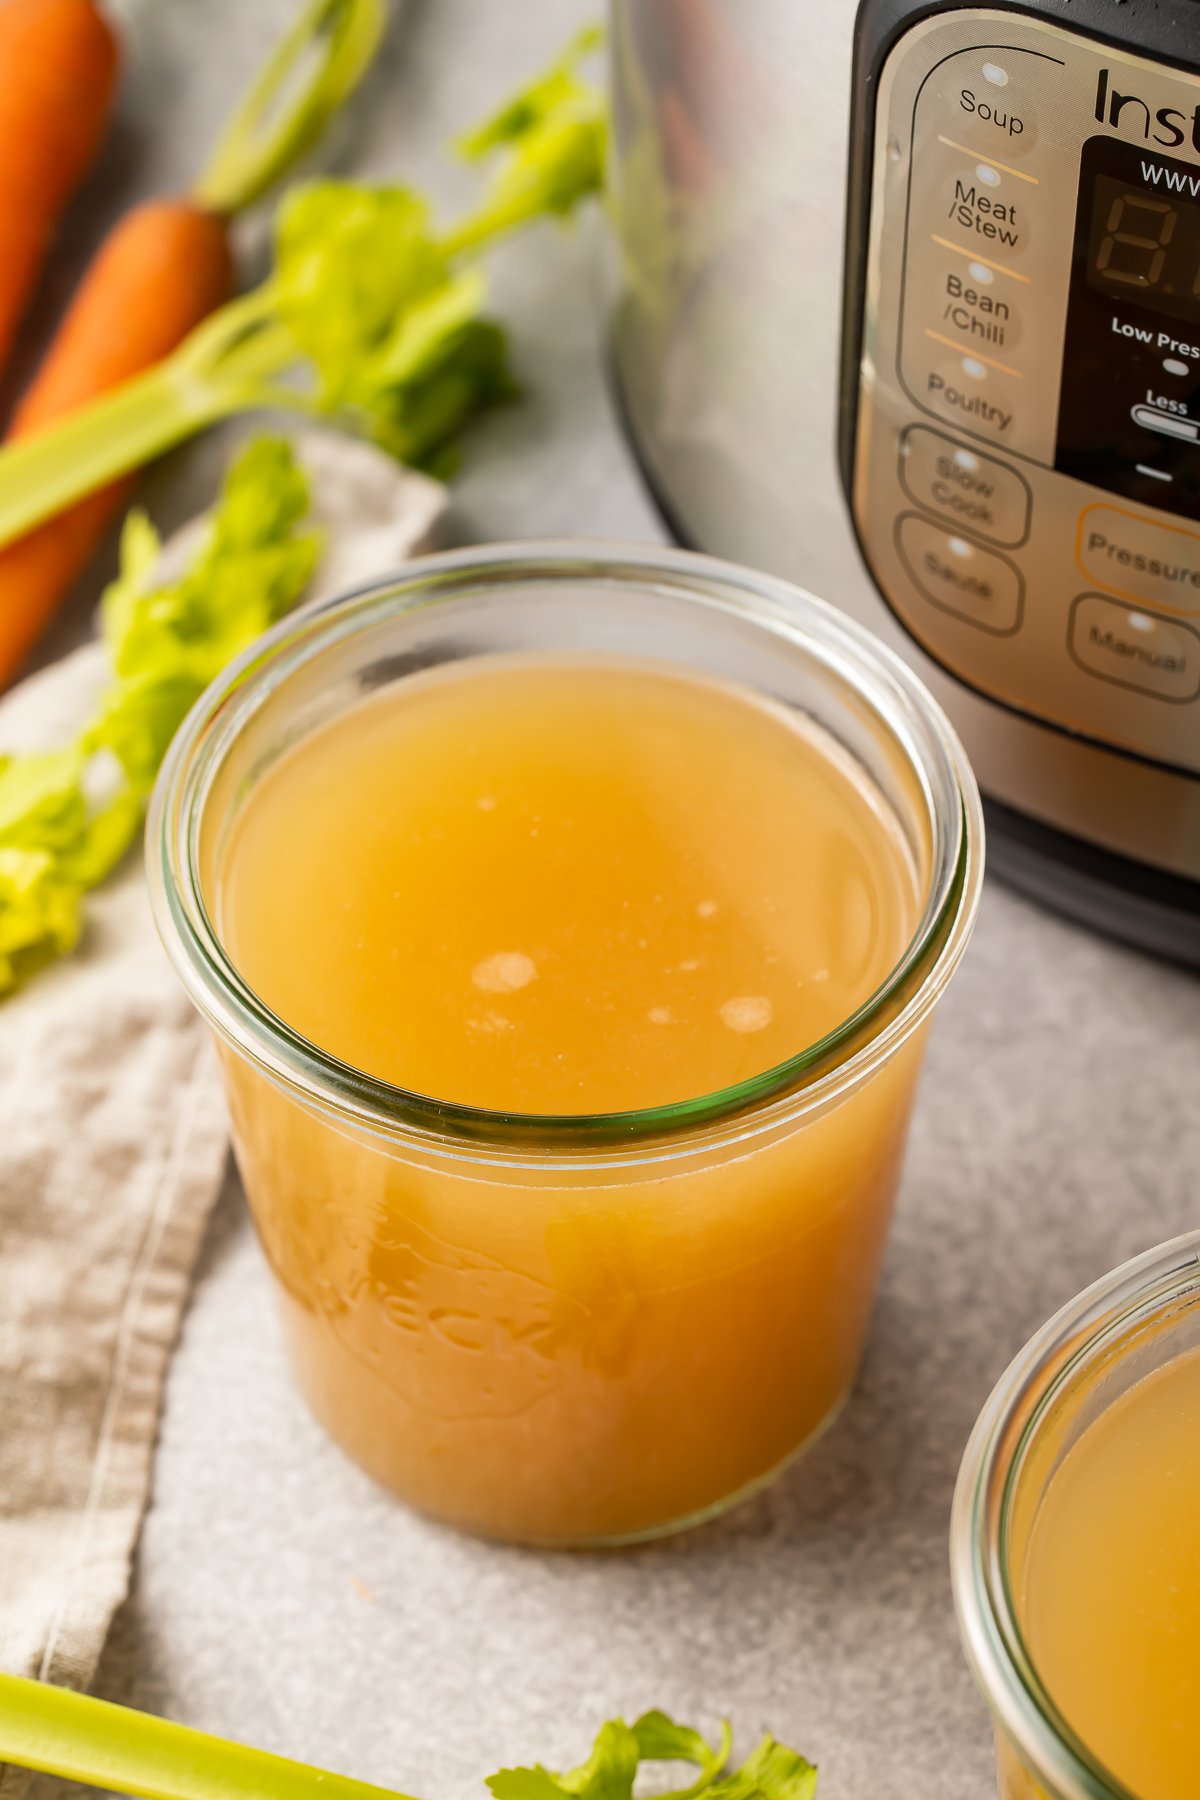
Instant Pot bone broth is as easy to make as it is on your wallet. Rich in delicious nutrients, proteins, and collagen, homemade pressure cooker bone broth also gives your recipes an extra level of flavor – or you can sip a mug of warm bone broth just like it’s coffee or tea. Once you know how to make your own bone broth at home, you’ll want to make it (and use it) all the time!

🍖 What Makes This Recipe So Good
- Ever found yourself wondering what to do with the carcass of the turkey you grilled for Thanksgiving, or the whole chicken you cooked in the air fryer last week, or those marrow bones you’ve been eying at the store? Instant Pot bone broth solves all those problems. It’s an easy, delicious way to use every part of the protein you buy, which is great for your wallet and better for the planet. You literally can’t lose here.
- Warm, soothing, gelatinous bone broth is basically self-care in a mug. I’ve completely replaced after-dinner drinks with a warm cup of broth, which relaxes me before bed and makes me feel amazing in the morning.
- Even if it did nothing for my spirit, I’d absolutely keep drinking it for the physical benefits. Drinking straight bone broth helps heal your gut and funnels more nutrients into your body, which is especially ideal if you’re on any sort of diet or just struggling to eat enough nutritious foods through the day.
- You don’t HAVE to drink bone broth straight out of a mug. No, no. You can use it in any recipe where you’d ordinarily use chicken broth, beef broth, or vegetable broth, and in a lot of recipes where you’d just use water. Boiling pasta or chicken, cooking rice or quinoa, making homemade soup, making gravy… it’s SO versatile!
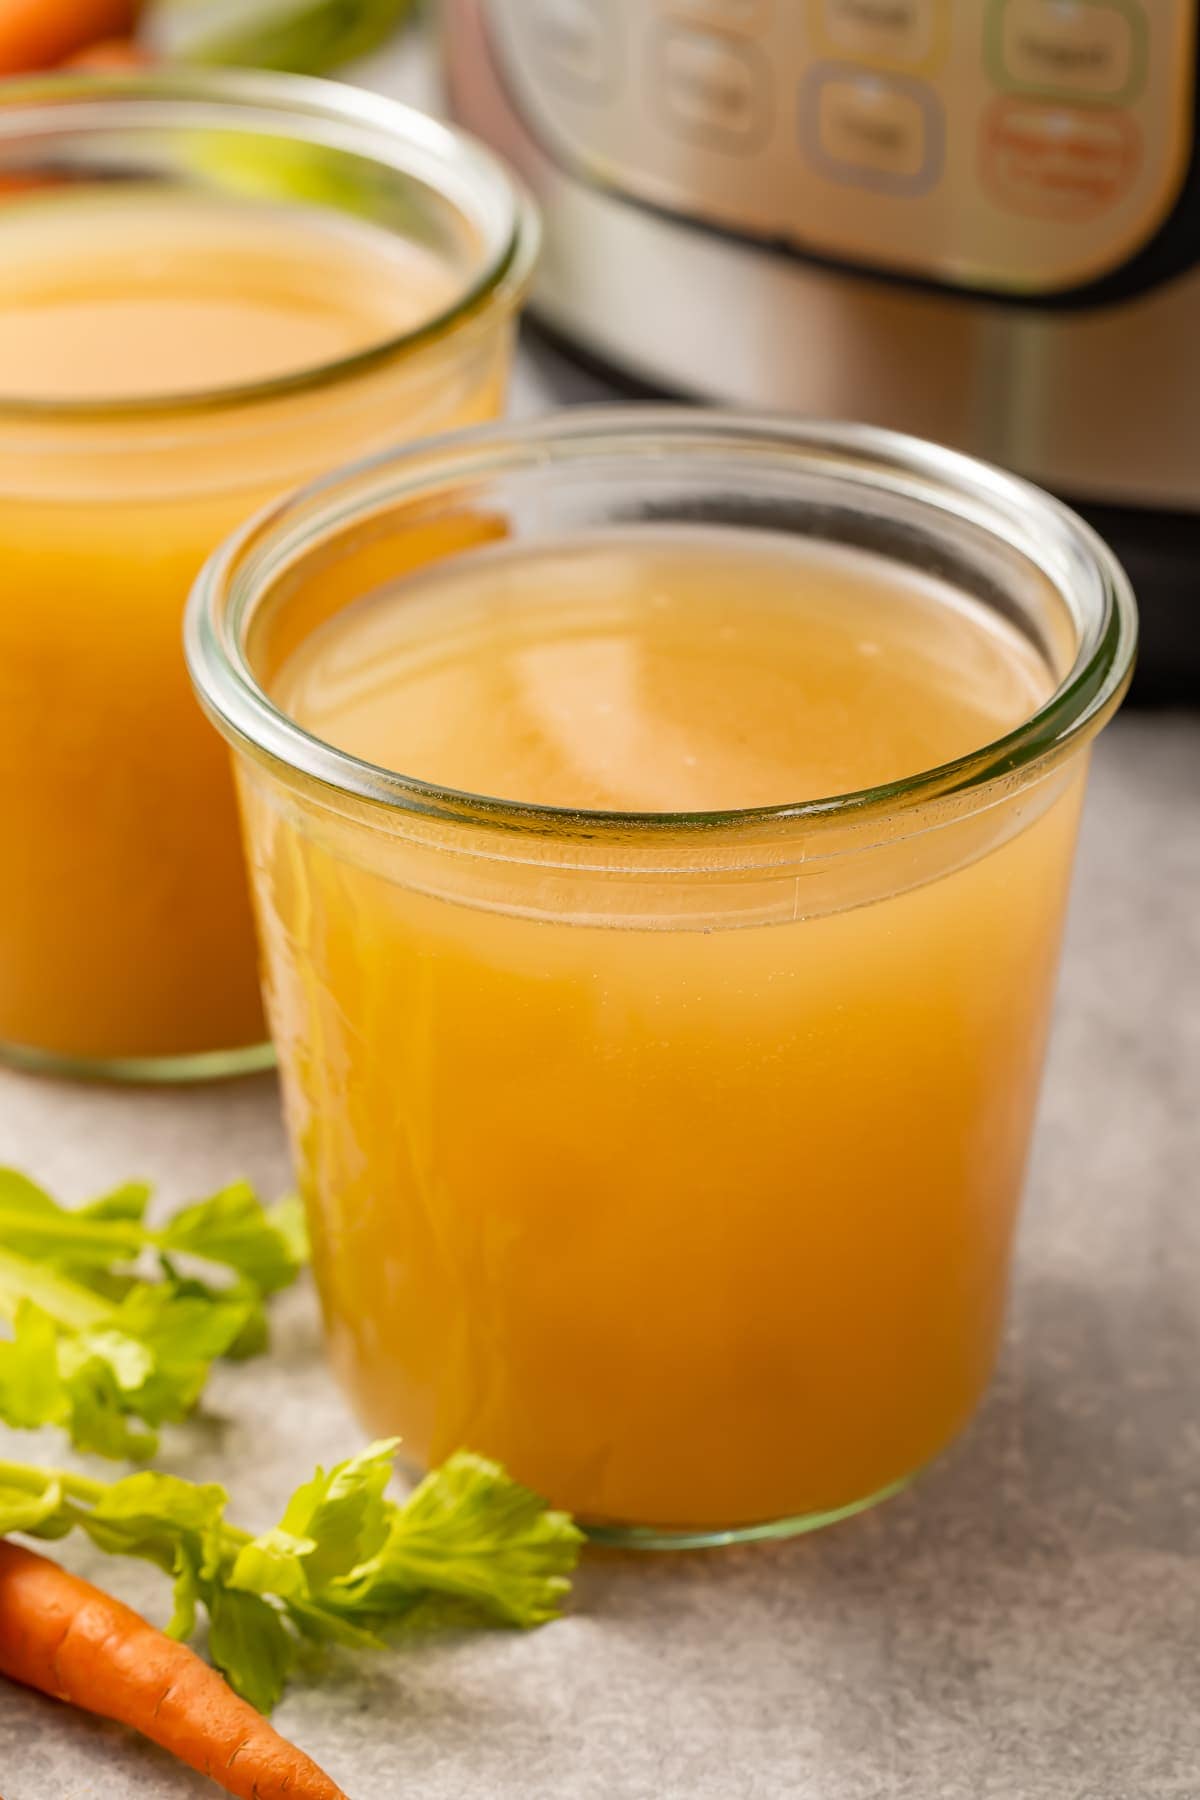
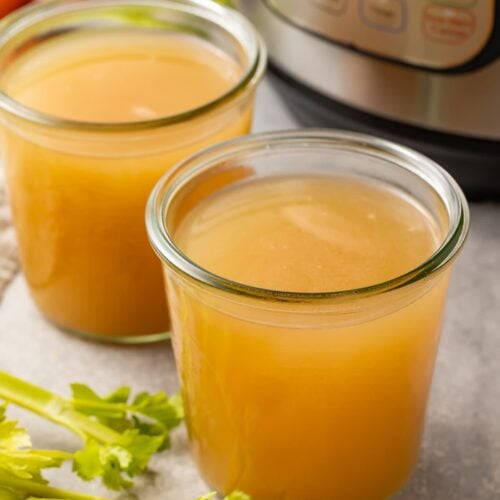
- It’s a great make-ahead recipe that’s perfect for meal prep and freezer meals! I like to seal a week’s worth in a large jar to keep in the refrigerator, then freeze the rest in sealed plastic bags, laying flat on the bottom shelf of the freezer. Instant Pot bone broth can be frozen up to one year, so it’s great to have on hand for whenever you might need it.
🦴 Key Ingredients
Bones – You can play around with the type of bones you use for your bone broth, but I highly recommend using marrow bones and gelatinous bones (like feet!), so you get plenty of gelatin and collagen. I prefer these over regular chicken bones, actually.
Sea Salt – Himalayan pink salt or Celtic sea salt work wonderfully in this recipe because they contain the trace minerals your body needs, and they’re reflective of the minerals in our bodies. Legit healthy food!
You Gellin’?
In addition to vitamins, nutrients, and proteins, Instant Pot bone broth produces something truly magical – GELATIN.
Gelatin helps improve overall gut health and digestion, helps you feel full longer, and it helps protect your joints and reduce joint pain. It helps improve sleep quality, can give your mood a little boost (naturally!), can improve cognitive abilities and skin health and heart health and bone strength.
Uhhhhhh, well IN THAT CASE!
👩🏼🍳 Chef’s Tips
- So, just a heads up. It’s absolutely possible to overcook Instant Pot bone broth. I don’t say that to panic you – just to make you aware! Keep an eye on your cook time and especially your depressurizing time. Overcooked bone broth will taste bitter and I can’t imagine it’d be very enjoyable.
- You’ll want to boil the chicken feet for 5 minutes or so before using them in the Instant Pot. Boiling them just helps remove any impurities from the skin. 5 minutes is long enough to do the trick without cooking the feet or extracting too many nutrients from them before you start your broth.
- Technically, yes, you can reuse the bones for multiple batches of bone broth. The amount and strength of the nutrients in each batch will diminish each time you reuse the bones, though. If you’re able, it’s really best to use fresh bones every time you make bone broth, to ensure you’re getting the most benefits you can. That’s another reason I like to make up a really large batch and freeze as much as possible for later! If prices go up dramatically, I’ve got enough to get by for a bit.
- You’ll notice a thick layer of healthy fat resting on top of the bone broth after it cools. That layer is totally safe to consume, but you’re welcome to scoop it off and discard it if you want. Just use a fork or spoon to scoop off only that thick layer, leaving the brown-ish gelled Instant Pot bone broth below.
🥘 More Better-For-You Recipes You’ll Love
- Moon Milk (3 Ways)
- Immunity Boosters
- Apple Cider Vinegar and Honey Shot
- Easy Golden Milk
- How to Make Cucumber Water
- Chlorophyll Water
Instant Pot Bone Broth (Beef and/or Chicken)
Equipment
- large sheet pan
- Tongs
- Instant Pot
- water enough to deglaze sheet pan
- whisk or spatula, to scrape up browned bits
- Mesh strainer
- Large bowl
- large airtight, freezer-safe glass jars or large food-safe, sealable freezer bags
- funnel optional, to help fill jars
Ingredients
- 2 ½ pounds beef marrow bones usually "beef bones" at the store
- 2 ½ pounds beef feet and/or beef necks and/or use chicken feet and/or chicken necks
- 1-2 tablespoons apple cider vinegar optional, see Notes
- 1 large carrot roughly sliced
- 1 stalk celery roughly sliced
- 2-4 cloves garlic smashed
- 5-10 whole black peppercorns to taste
- 1 tablespoon Himalayan pink sea salt recommended but any sea salt is fine; use more to taste
- 4-5 sprigs fresh rosemary and/or fresh thyme
- filtered water enough to almost fill Instant Pot
Instructions
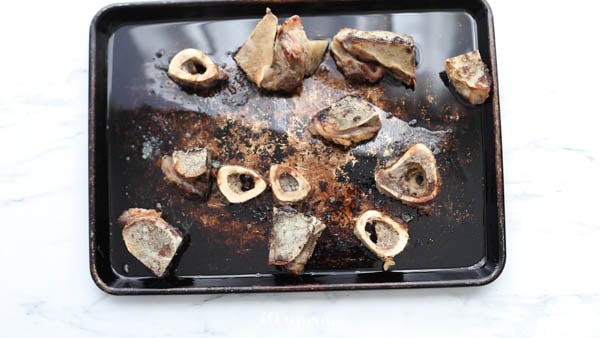
To Prepare the Marrow Bones
- Preheat oven to 350° Fahrenheit. Spread marrow bones out across sheet pan in one even layer, making sure bones don't touch or overlap.
- When oven is preheated, place sheet pan in oven and roast marrow bones 20 minutes. After 20 minutes, carefully remove sheet pan from oven. Use tongs to flip marrow bones over.
- Return sheet pan to oven. Bake 15 minutes more, then remove sheet pan and set aside. Let marrow bones cool slightly.

For the Instant Pot Bone Broth
- Once marrow bones have cooled slightly, carefully transfer bones from sheet pan to Instant Pot insert.
- Pour water on sheet pan, just enough to cover bottom of pan. Using whisk or spatula, carefully scrape up any browned bits stuck to sheet pan. Transfer contents of sheet pan (water, fat, and browned bits) to Instant Pot insert with marrow bones.
- Place necks and feet in Instant Pot.
If Using Apple Cider Vinegar
- Pour apple cider vinegar over all bones, then let bones sit in vinegar 30 minutes. After 30 minutes, proceed with all steps below.
If Not Using Apple Cider Vinegar (or After 30 Minutes)
- Add carrot slices, celery slices, smashed garlic cloves, peppercorns, sprigs of rosemary and/or thyme, and plenty of sea salt to Instant Pot.
- Pour in enough filtered water to fill pot ⅔ of the way. Secure lid on Instant Pot with valve in sealing position.
- Set Instant Pot to cook on Manual Low Pressure for 180 minutes (see Notes below). Instant Pot will pressurize, then cook time will begin.
- Once cook time is up, use Natural Release to let pressure out of Instant Pot. Process will take approximately 20 to 30 minutes. Once Instant Pot is cool enough to touch, remove lid and set aside.
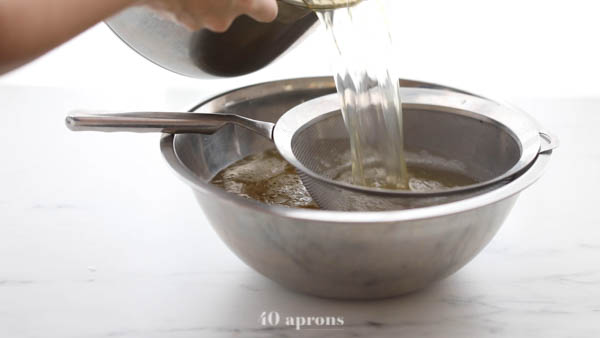
- Place a mesh strainer over a large bowl and gently pour broth over strainer. Discard bones and veggies. Pour broth into glass jars with tight fitting lids, or into plastic freezer bags.
- Fit mesh strainer in large bowl. Carefully pour contents of Instant Pot insert into strainer. Once Instant Pot has been emptied, discard bones, vegetables, and herbs. If needed, strain broth again to remove any remaining debris or aromatics. If broth is still warm, place bowl in refrigerator until broth has cooled.
- Fit glass jar with funnel if desired, or open freezer bag. Slowly pour strained broth into jar or freezer bag. Repeat with additional jars or bags as needed until all bone broth has been transferred to storage containers.
- Secure lids on jars, or remove air from freezer bags and seal bags completely shut. Place broth in fridge or freezer as needed (see Notes below) or serve immediately.
Video
- Instant Pot: I tested and perfected this recipe using a 6-quart Instant Pot. For smaller pressure cookers, make two batches, or cut the recipe in half.
- Chicken Feet: Boil the chicken feet at least 5 minutes before using them, to remove any surface impurities.
- Apple Cider Vinegar: Soaking the bones in apple cider vinegar helps extract all the nutrients from the bones and helps the broth gel, but you might prefer the flavor of the broth without the ACV. I do! If that’s the case, you can skip this step.
- Instant Pot Settings: If you prefer to cook your broth on Manual High Pressure, set your timer for 120 minutes instead of 180 minutes.
- Refrigerate: Store in airtight containers or sealed plastic bags for up to one week.
- Freeze: Store in airtight containers or sealed plastic bags (placed flat in freezer) up to one year.
- Reheating: To reheat refrigerated bone broth, scoop out a cup of the gelatin and warm it on the stove.
Approximate Information for One Serving
Nutrition Disclaimers
Number of total servings shown is approximate. Actual number of servings will depend on your preferred portion sizes.
Nutritional values shown are general guidelines and reflect information for 1 serving using the ingredients listed, not including any optional ingredients. Actual macros may vary slightly depending on specific brands and types of ingredients used.
To determine the weight of one serving, prepare the recipe as instructed. Weigh the finished recipe, then divide the weight of the finished recipe (not including the weight of the container the food is in) by the desired number of servings. Result will be the weight of one serving.
Did You Make This Recipe?
Tag @40aprons on Instagram and be sure to leave a review on the blog post!
Never Miss A Meal!
New Recipes Straight To Your Inbox
A curated selection of our most recent recipes, delivered straight to your inbox once a week.


Perfect recipie, so easy!
So happy to hear it! It really is the easiest thing, right? Once you’ve made it yourself you can’t go back to store-bought 😄