
This Post May Contain Affiliate Links. Please Read Our Disclosure Policy.
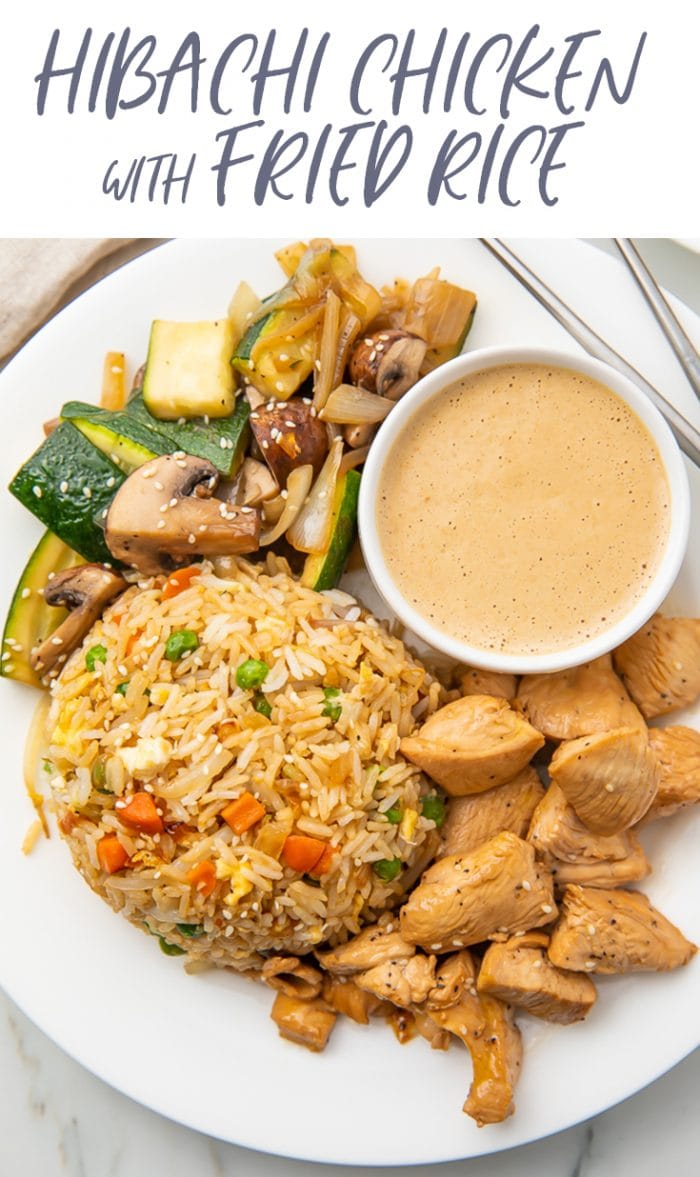
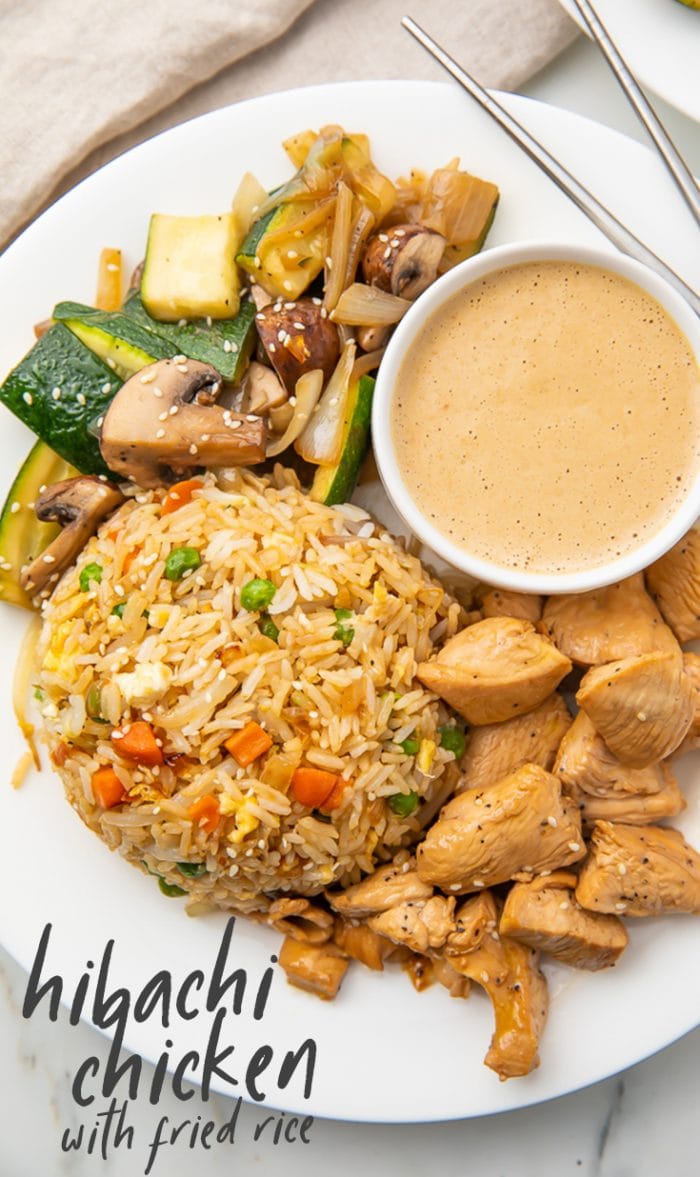
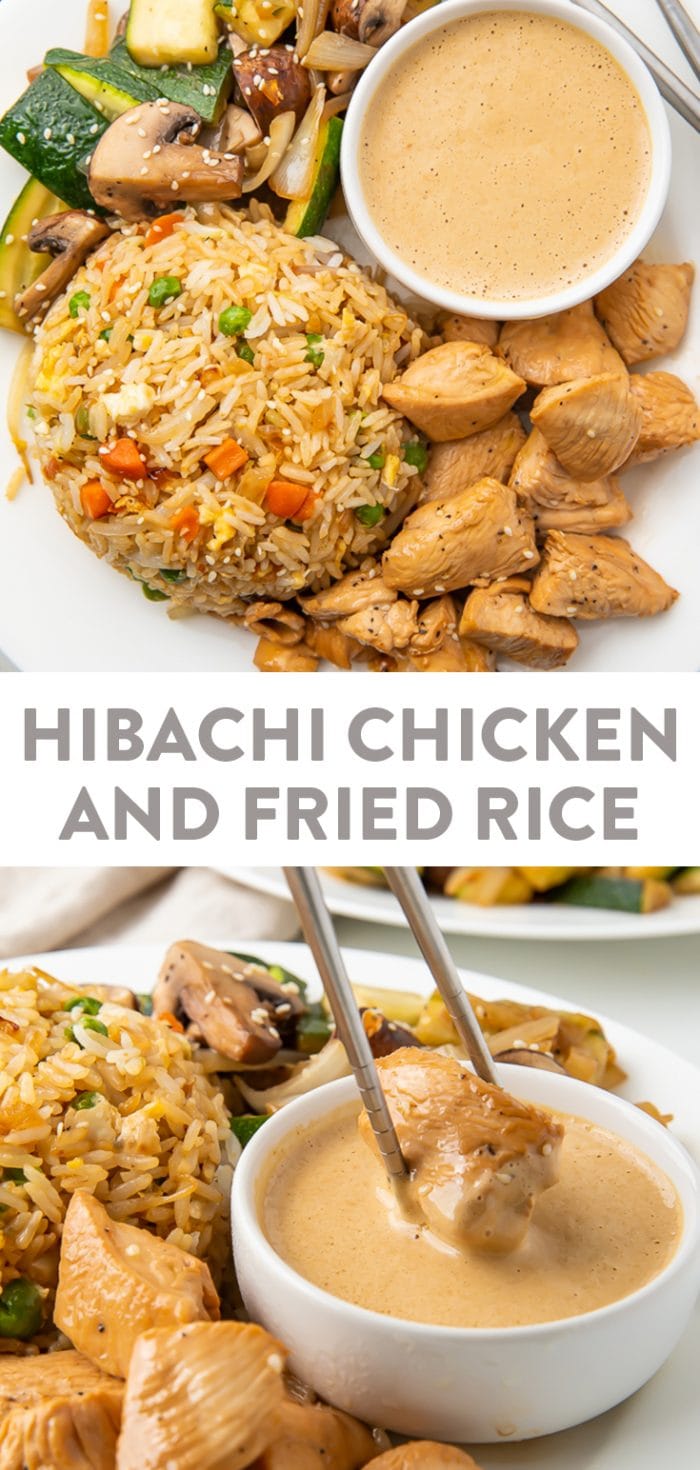
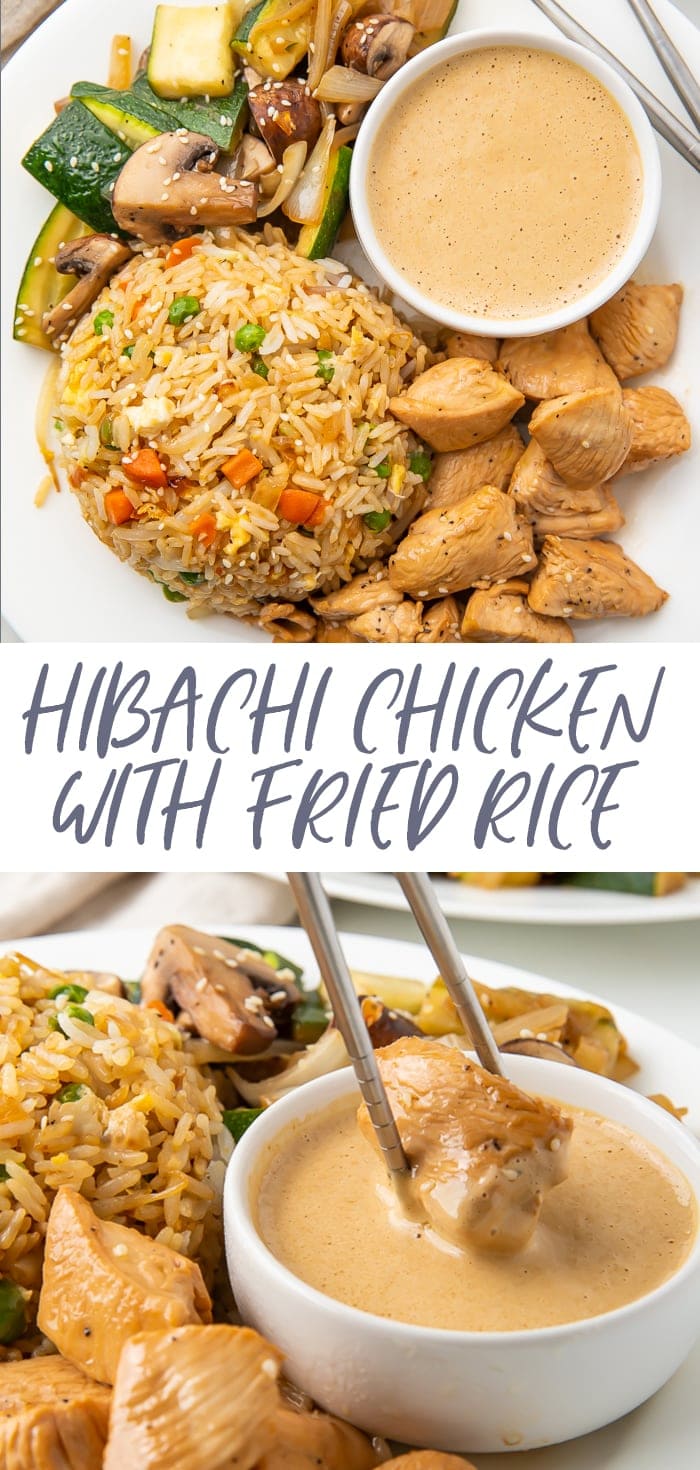
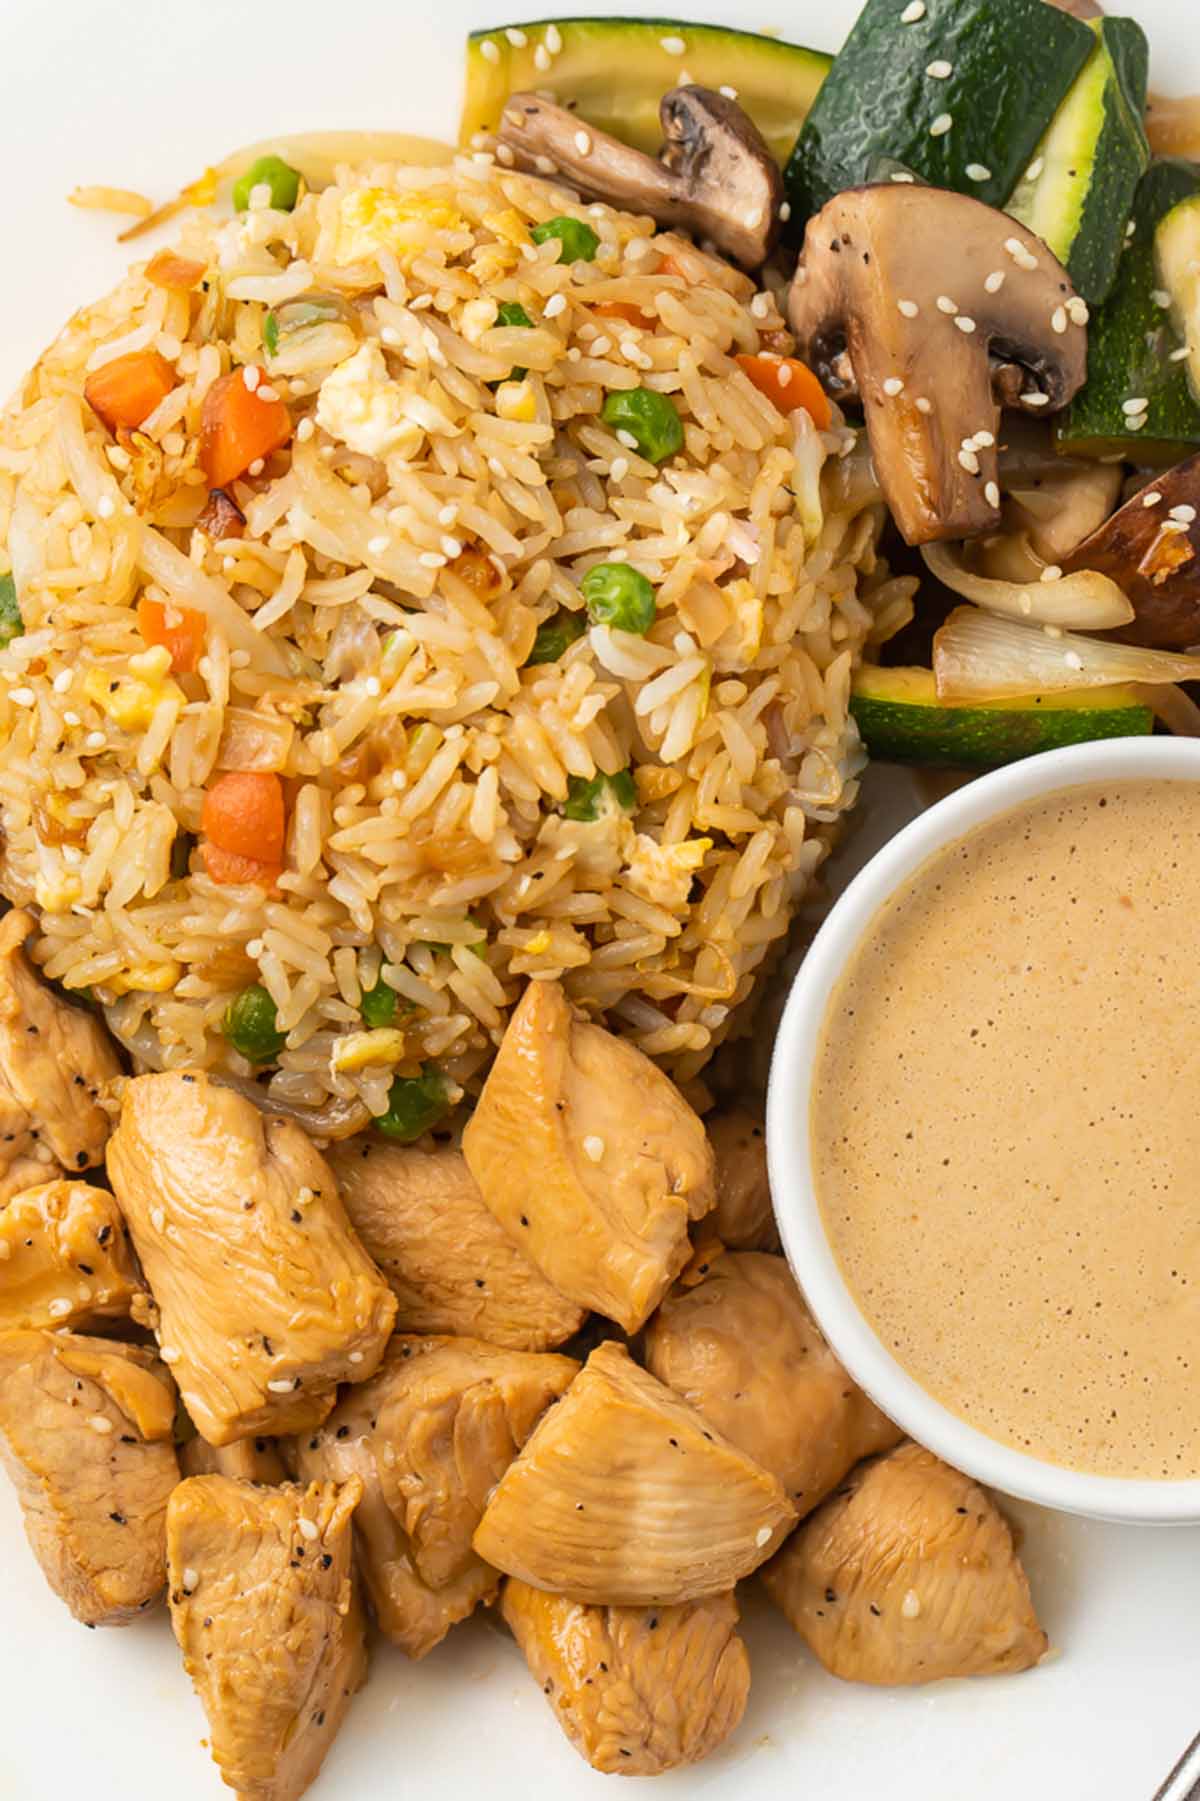
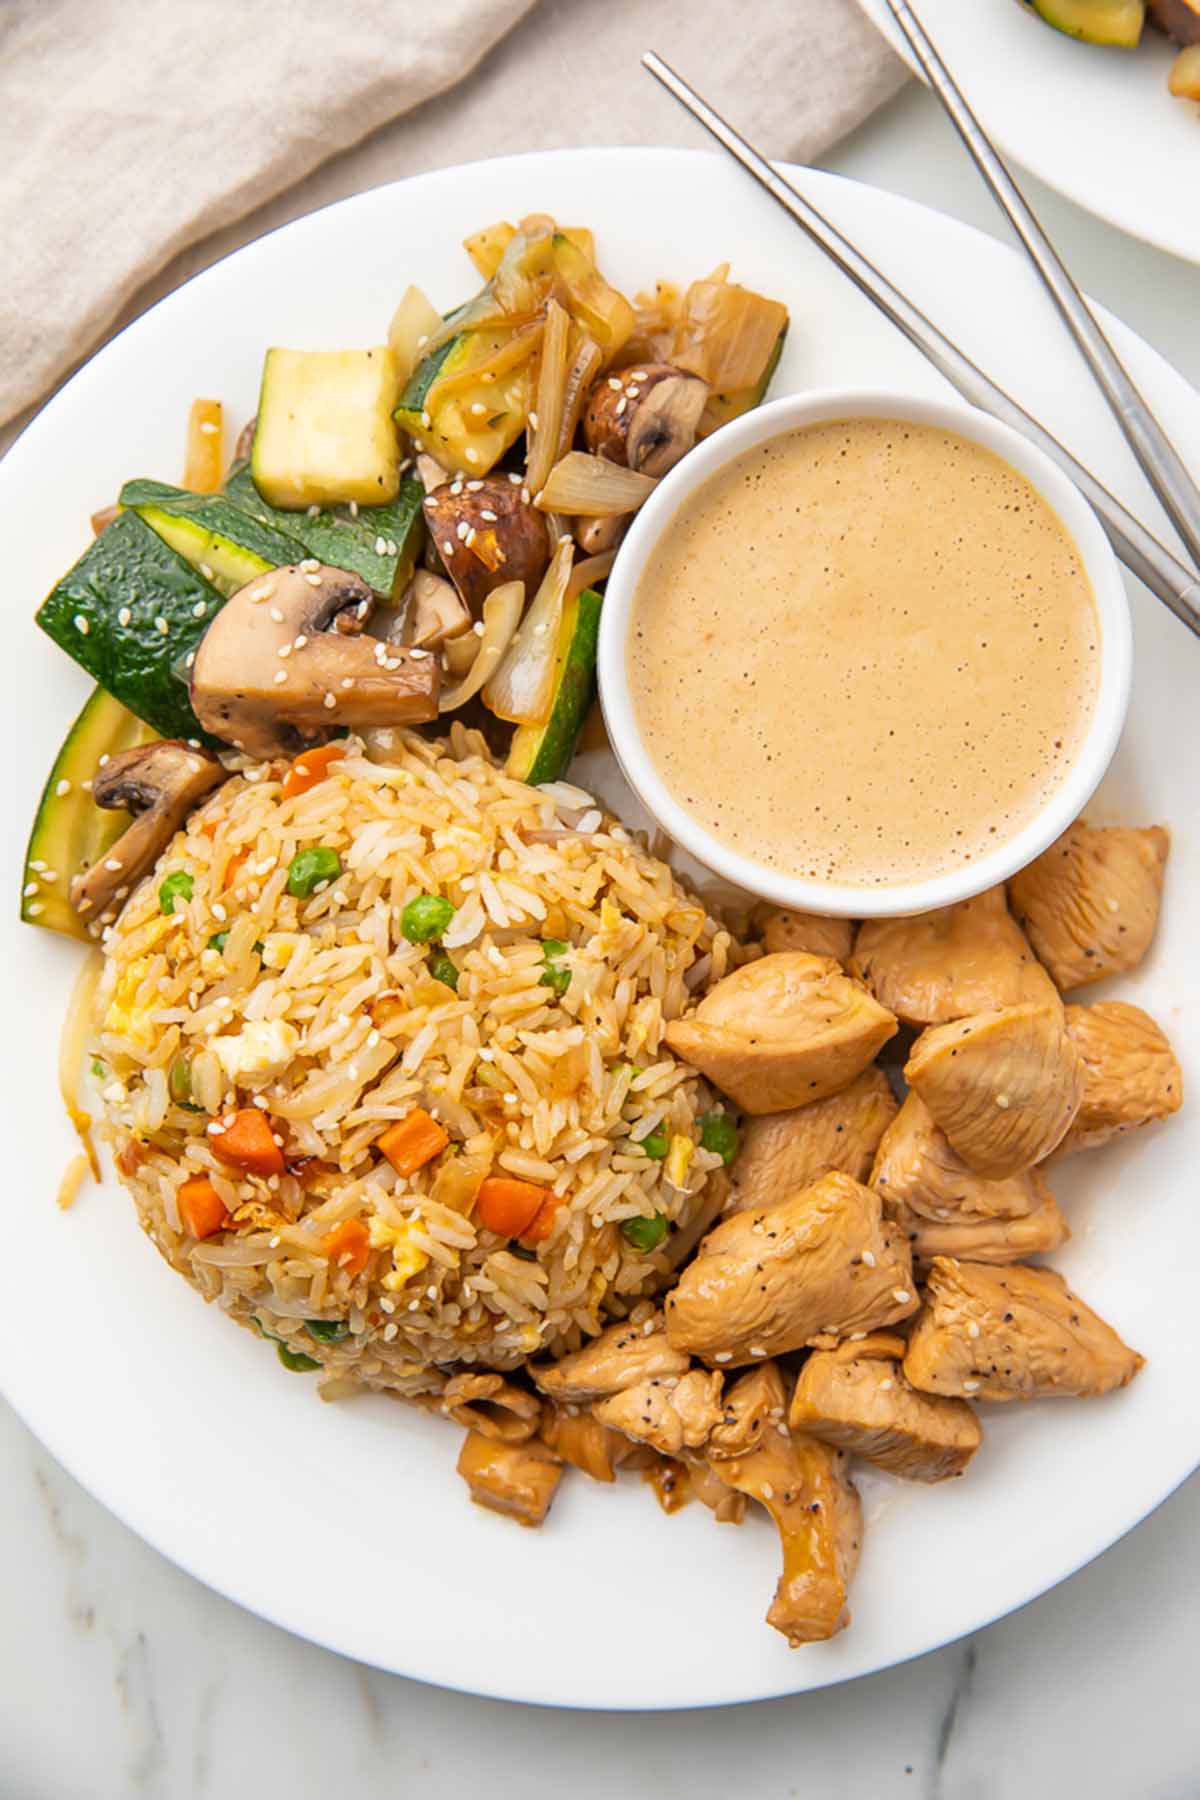
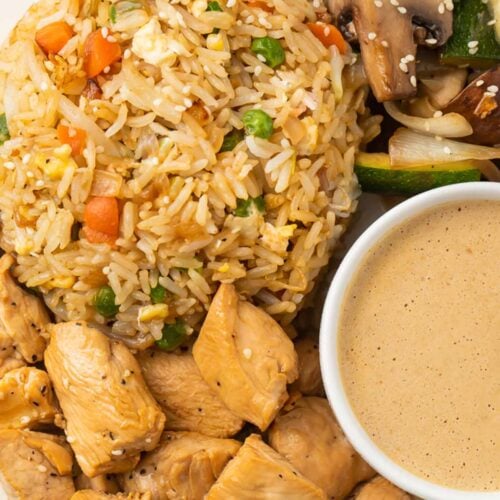
This recipe is a full hibachi chicken dinner at home, in next to no time! Restaurant-style sautéed veggies, fried rice, super tender chicken, and a creamy mustard dipping sauce turn your everyday dinner table into a homemade Japanese steakhouse experience (onion volcano not included).
Before You Get Started
- Did you know – fried rice was originally created as a way to use up leftover cooked rice? That means, to make a really great hibachi rice, you want to use rice you cooked ahead of time – NOT rice you cooked right before you started this dish! For a real restaurant-quality fried rice, don’t even bother doing the initial cook yourself. Just buy already-cooked rice from the grocery store!
How to Make This Recipe
See recipe card below for full list of measurements, ingredients, and instructions.
Start with the sauce.
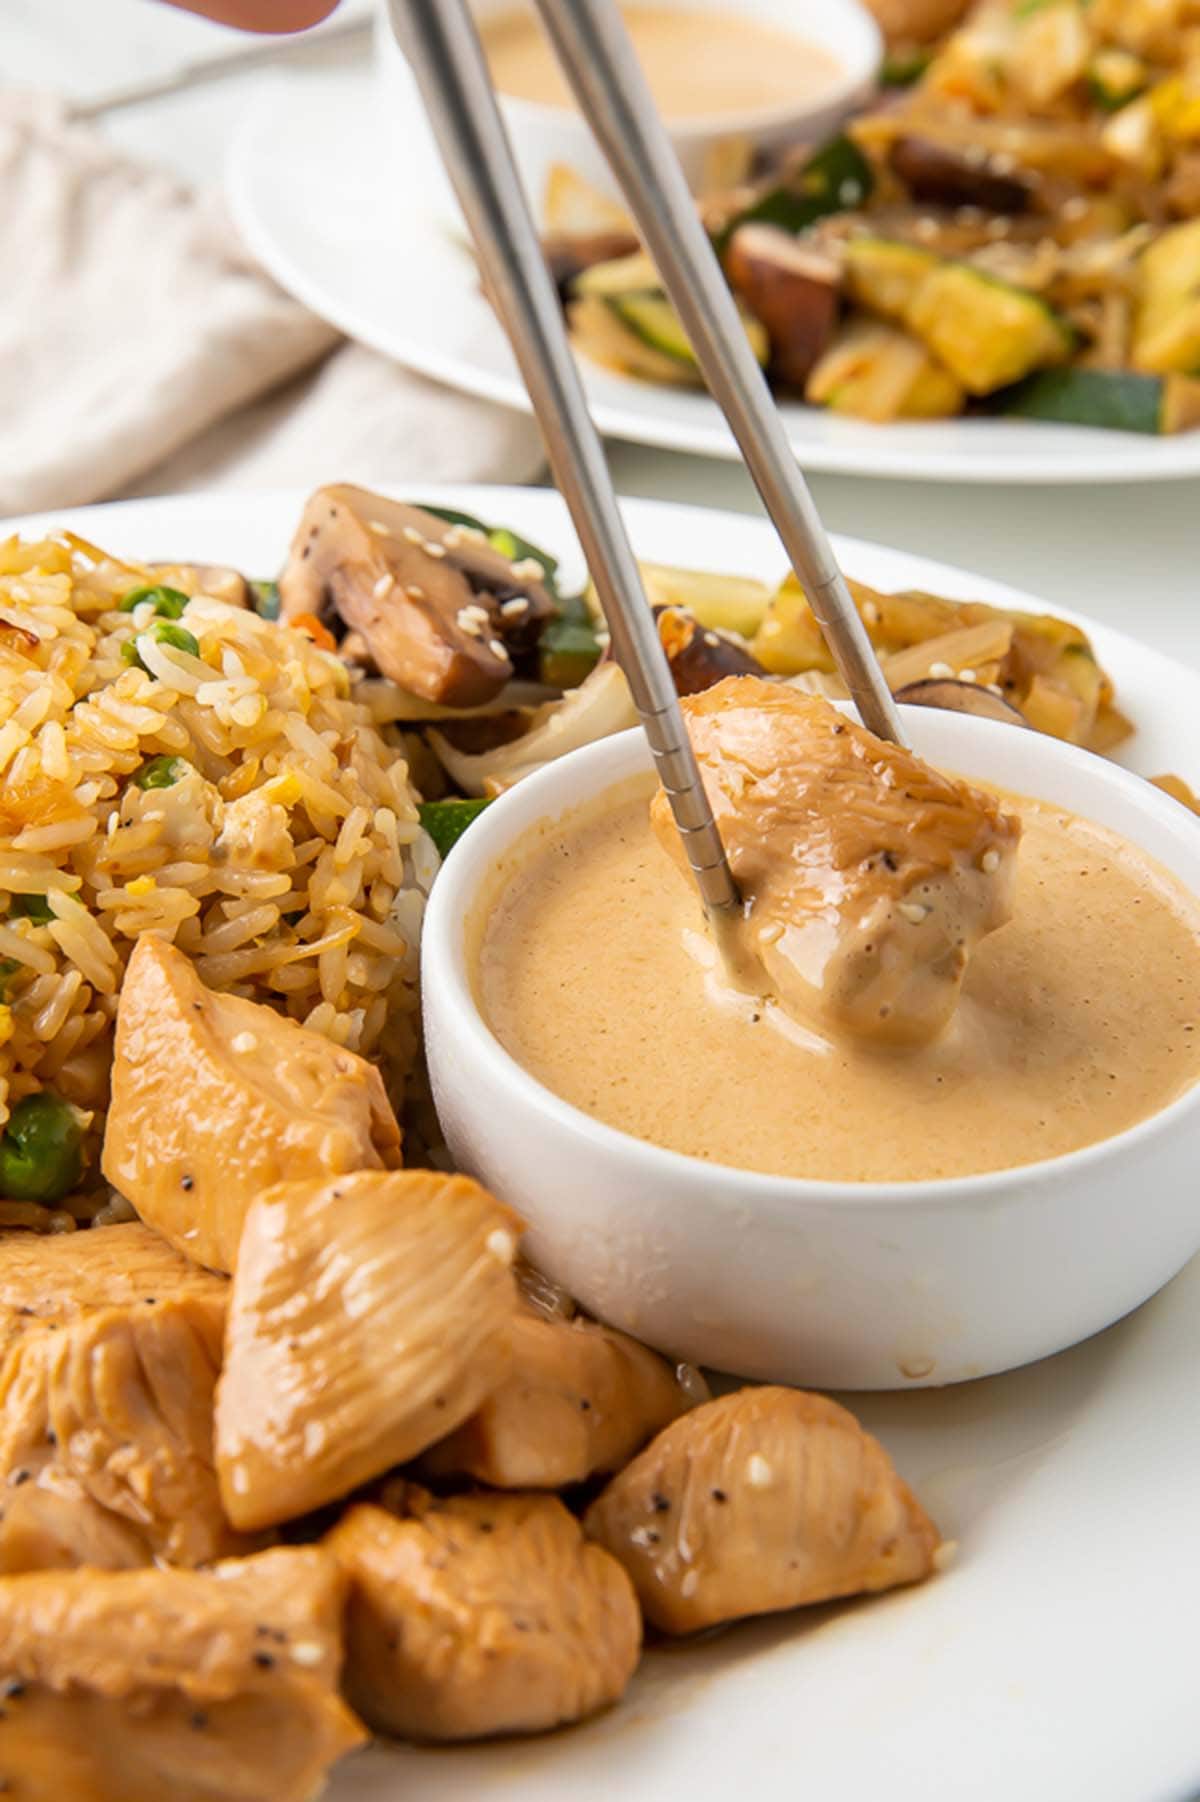
You don’t really have to start with the mustard sauce, but I like to knock it out first to give all the flavors more time to meld and deepen. Making it is super easy – just toss all your ingredients into a blender and blend until smooth!
on to the rice.
Heat oil in a large wok, then add the onions and mixed vegetables. Sauté those until the onions start to lose their opacity, then push the veggies to the side of the pan, making an empty spot you can crack the eggs into. Scramble the eggs in the pan until they’re fully cooked, then add the leftover rice and butter. This is where the “fried” part of fried rice comes in – cook the rice for about 5 minutes or so, just until it’s lightly fried.
Cheryl’s Tip: To keep the fried rice warm while you cook the chicken and veggies, pack it tightly into a bowl, then cover the bowl with a plate or a lid. The more firmly you pack the rice into the bowl, the better insulated it’ll be!
double time!
To keep everything moving and make sure it’s all ready to eat at the same time, you’ll want to cook the chicken and the veggies at the same time, in two separate pans. Don’t worry, it’s not as intimidating as it sounds!
Heat a blend of sesame oil and avocado oil in each skillet, then add the chicken and its sauce ingredients to one pan and the veggies and their sauce ingredients to the other. Cook the chicken until browned, with no pink remaining, and the veggies until they’re nice and tender. Each will only take 5-10 minutes, so you’ll be digging into a full hibachi dinner in no time!
What I Love About This Recipe
- This hibachi chicken and fried rice recipe is so rich and perfectly seasoned, it seriously tastes like it was just made at your favorite Japanese restaurant. This is hands-down the best, easiest way to make hibachi at home!
- The creamy mustard sauce is a little sweet and just a little spicy, and it’s the perfect little touch on top of the already-flavorful chicken, veggies, and fried rice. Plus, it’s SO easy to make, and it stores really well. Go ahead, double the recipe and keep some prepared mustard sauce in the fridge. I won’t judge!
Recipe Variations
- Go Grain Free: Talk about easy! Just swap out the rice for cooked cauliflower rice, like in our cauliflower fried rice recipe.
- Make it Whole30/Paleo: Oh, you’re in luck! Instead of rattling off a list of ingredients to swap out, you can just head over to my Whole30 Hibachi Chicken and Veggies post for an easy-to-follow, fully-compatible version of this hibachi chicken dish.
Making changes to a recipe can result in recipe failure. Any substitutions or variations listed are simple changes that I believe will work in this recipe, but results are not guaranteed.
Hibachi Chicken with Fried Rice and Vegetables
Equipment
- standard blender
- 2 large woks or large skillets
- Silicone spatula
- whisk optional
- Medium bowl with lid, or plate to cover
Ingredients
For the Mustard Sauce
- 1 tablespoon white sesame seeds lightly toasted preferred
- 2 tablespoons ground mustard
- 2 teaspoons honey
- 4 tablespoons low-sodium soy sauce
- ½ cup half-and-half
- 1 tablespoon hot water
- ½ tablespoon minced garlic approximately 1 large clove
For the Fried Rice
- 2 tablespoons neutral-flavored oil avocado oil, refined coconut oil, etc.
- ½ cup diced white onion approximately 1 small white onion
- 1 cup frozen mixed vegetables peas, carrots, corn
- 2 large eggs
- 4 cups cooked rice cooled completely, day-old rice preferred
- 4 tablespoons butter at room temperature, cut into small pieces
- 4 tablespoons low-sodium soy sauce
For the Hibachi Chicken
- 1 ½ teaspoons sesame oil
- 1 tablespoon avocado oil
- 1 pound boneless, skinless chicken breasts cut into bite-sized pieces, approximately 3 medium chicken breasts
- 3 tablespoons low-sodium soy sauce
- 1 tablespoon butter at room temperature
- 2 teaspoons fresh lemon juice
- salt to taste
- freshly cracked black pepper to taste
For the Hibachi Vegetables
- 1 ½ teaspoons sesame oil
- 1 tablespoon avocado oil
- 8-10 ounces zucchini pieces approximately 1 large zucchini; sliced into 2-inch-thick half moons
- 2 cups white onion slices approximately 1 large white onion; halved, cut into ½-inch-long slices
- 2 cups quartered baby bella mushrooms approximately 8 ounces
- 1 tablespoon butter
- 1 tablespoon low-sodium soy sauce
- salt to taste
- freshly cracked black pepper to taste
Instructions
For the Mustard Sauce
- Add 1 tablespoon white sesame seeds, 2 tablespoons ground mustard, 2 teaspoons honey, 4 tablespoons low-sodium soy sauce, ½ cup half-and-half, 1 tablespoon hot water, and ½ tablespoon minced garlic to blender.
- Blend all ingredients together until mixture is completely smooth, pausing blender to scrape down sides of bowl as needed.
- Once mixture is smooth, taste sauce and add ground mustard, honey, soy sauce, half-and-half, water, or garlic if desired. Blend mixture again until smooth to fully incorporate any added ingredients.
- When satisfied with flavor and consistency of sauce, transfer sauce to serving bowl or airtight container. Set prepared sauce aside, or refrigerate until ready to serve.
For the Fried Rice
- Place one large wok or skillet on stovetop over medium-high heat. Add 2 tablespoons neutral-flavored oil and heat wok until oil is hot and shimmery, swirling and tilting pan as needed to distribute oil across entire surface.
- When oil is hot, add ½ cup diced white onion and 1 cup frozen mixed vegetables to pan. Stir to incorporate. Sauté vegetables, stirring often, approximately 5 minutes or until onions are almost translucent.
- When onions are almost translucent, push vegetables to outer edges of pan, creating large open spot in center of pan.
- Crack 2 large eggs directly into center of pan. Scramble eggs with spatula or whisk until eggs are completely cooked.
- Once eggs are fully scrambled, add 4 cups cooked rice and 4 tablespoons butter to skillet. Stir all ingredients together to incorporate.
- Cook rice mixture, stirring frequently, approximately 5 minutes or until rice is lightly toasted.
- Pour 4 tablespoons low-sodium soy sauce over rice mixture and stir to incorporate. Continue cooking rice mixture, stirring frequently, approximately 1 to 3 minutes or until rice is browned and hot.
- Transfer fried rice to medium bowl. Pack rice tightly into bowl and cover with lid or plate to keep rice warm until ready to serve.
For the Hibachi Chicken and Vegetables (Made Simultaneously)
- Return wok or skillet to stovetop and reduce heat under pan to medium. Add 1 ½ teaspoons sesame oil and 1 tablespoon avocado oil to pan. Continue heating pan, tilting and swirling as needed, until oils are hot and shimmery.
- When oil is hot, add 1 pound boneless, skinless chicken breasts, 3 tablespoons low-sodium soy sauce, 1 tablespoon butter, 2 teaspoons fresh lemon juice, salt (to taste), and freshly cracked black pepper (to taste) to pan.
- Stir all ingredients together until well incorporated, then sauté chicken 5 to 7 minutes, stirring only 1 to 2 times, until chicken is browned and no longer pink.
- Place second large wok or skillet on stovetop over medium-high heat. Add 1 ½ teaspoons sesame oil and 1 tablespoon avocado oil to pan, then continue heating pan until oil is hot and shimmery.
- When oil is hot, add 8-10 ounces zucchini pieces, 2 cups white onion slices, 2 cups quartered baby bella mushrooms, 1 tablespoon butter, 1 tablespoon low-sodium soy sauce, salt (to taste), and freshly cracked black pepper (to taste). Stir until all ingredients are well-incorporated.
- Once incorporated, sauté vegetables, stirring occasionally, approximately 6 to 8 minutes or until all vegetables are tender.
To Serve
- When chicken and vegetables are fully cooked, divide each into preferred portion sizes and transfer to serving plates. Serve chicken and vegetables warm with fried rice and prepared mustard sauce.
- Rice: For the best fried use, cook your rice the day before, or use pre-cooked rice from the store. Don’t cook the rice immediately before making this recipe if possible!
- Sesame Seeds: Lightly toasting the sesame seeds will enhance their flavor, but toasting them isn’t required for this recipe.
- Leftovers: Let each component (chicken, rice, veggies, and sauce) cool completely, then refrigerate each component separately in airtight containers. Rice can be kept up to 3 days, chicken and vegetables can be kept up to 5 days, and mustard sauce can be kept up to 7 days.
Approximate Information for One Serving
Nutrition Disclaimers
Number of total servings shown is approximate. Actual number of servings will depend on your preferred portion sizes.
Nutritional values shown are general guidelines and reflect information for 1 serving using the ingredients listed, not including any optional ingredients. Actual macros may vary slightly depending on specific brands and types of ingredients used.
To determine the weight of one serving, prepare the recipe as instructed. Weigh the finished recipe, then divide the weight of the finished recipe (not including the weight of the container the food is in) by the desired number of servings. Result will be the weight of one serving.
Did You Make This Recipe?
Tag @40aprons on Instagram and be sure to leave a review on the blog post!
More Asian-Inspired Recipes You’ll LOVE
- Cauliflower Fried Rice with Chicken (Whole30 and Paleo Friendly)
- Instant Pot Black Rice (aka Forbidden Rice)
- Best Ever Tom Kha Gai Soup (Thai Coconut Chicken Soup)
- Instant Pot Chicken Teriyaki
- Egg Roll in a Bowl with Creamy Chili Sauce (Whole30, Low Carb, Keto, Paleo)
- Beef with Garlic Sauce
- Healthy Lettuce Wraps – PF Changs Recipe (Whole30, Paleo)
- Paleo Sesame Chicken Recipe (Whole30)
- Instant Pot Japanese Curry
- Whole30 Thai Chicken Zoodle Bowl (With “Peanut” Sauce, Paleo, Low Carb)
- Air Fryer Chicken Katsu
- Slow Cooker Tom Kha Soup (Thai Coconut Chicken Soup)
- Paleo Chinese Chicken Salad (Whole30)
- Kylie Jenner’s Ramen Noodles
- Chicken Egg Roll in a Bowl
Never Miss A Meal!
New Recipes Straight To Your Inbox
A curated selection of our most recent recipes, delivered straight to your inbox once a week.


Hello! Is it possible to make this mustard sauce dairy (but still gluten free)?
Sure! We would use coconut heavy cream in place of the half and half! Make sure you are using coco aminos in place of the soy sauce for a gluten free dish. 🙂
Delicious and easy to make! Will DEFINITELY make again! I subbed the avocado oil for the olive oil I had and used snow snap peas instead of zucchini because I don’t really like it. I also skipped the mustard sauce and just used Yum Yum sauce, otherwise, made as written. The recipe makes a lot of fried rice, definitely enough for 6 servings, although I’m not sure there’s quite enough chicken and vegetables for 6 servings. One question, how does it contain so many calories & fat per serving??? I realize some oil & butter is used to cook, but other wise, it’s vegetables and chicken.
One note: While it is easy to make and totally doable for a weeknight dinner, it is not really a meal that you can prep and then walk away from while it cooks. Rather consistent stirring needed and a few short (less than 10 mins) periods of cooking. To maximize time, I washed and cut up the veggies and chicken while I made and cooked the fried rice.
Thanks for the awesome review! So glad you liked it. 🙂
I loosely use this recipe using whatever veggies I have on hand and it’s great! I also don’t have avocado oil so I just sub in olive with the sesame oil. I make some yum yum sauce and my kids and husband enjoy it. Thanks for the great recipe!
Thanks for the kind review!
Delicious! I had to use olive oil instead of avocado, since that’s what I had and only used about a 1/2 tsp of sesame oil because I usually find it really overpowering. No zucchini, so I subbed broccoli and I didn’t have the ingredients for the mustard, so I didn’t make it. This tasted as good as the restaurant, better than some. I’ll definitely be making again. Thanks!
Yay, let us know how it goes!
Planning on making this recipe tomorrow so I will make the rice tonight, Should I use Basmati or Jasmine?
Either works!
My daughter and I made this last night for dinner and it was delicious. The mustard sauce is awesome, but a little bit goes a long ways. We will be making this again.
It’s definitely got a punch to it.
The ads on this page are extremely annoying. Couldn’t close out a of a cooking video that plays while on the page .. usually that would make me leave but I made the recipe anyways and it was very good! I used a little less soy sauce to keep the salt down. Will definitely be making this again.
Thanks for powering through Lindsey!
Is the 4 cups of rice, 4 cups precooked or 4 cups after cooked?
Four cups after cooking!
We love this recipe! I have been using it when we get a little “homesick” for restaurant food during the coronavirus pandemic and it does the trick – so much cheaper too! I cook the rice in my instant pot in the afternoon and chill til dinner and it works pretty well. With regard to others comments about the soy, I believe the author mentions using a reduced sodium soy sauce, so that may help. I usually will just add and taste until it’s what we’re looking for. Thank you for sharing this recipe with us!
Glad this one is a family fav Emily!!
I just made this and it is so good! Definitely will make again! Thank you!!
You’re welcome Monica!