This Post May Contain Affiliate Links. Please Read Our Disclosure Policy.
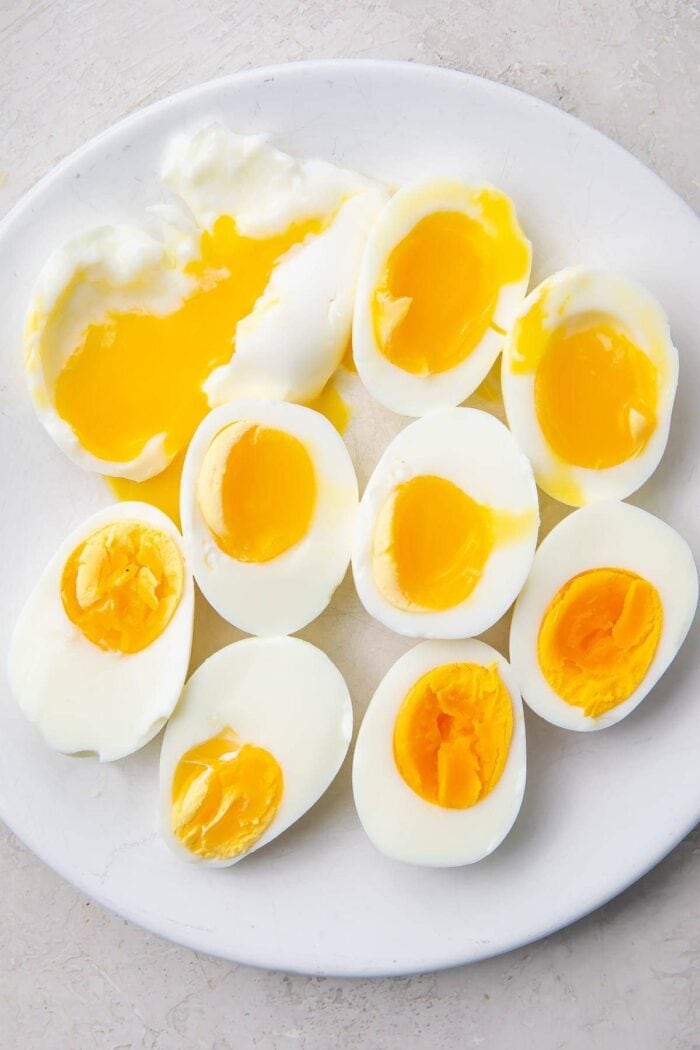
Making eggs in the Instant Pot is the absolute best way to make soft boiled or hard boiled eggs! From a runny yolk to jammy eggs to tender hard boiled, this guide to making Instant Pot eggs is all you need for your perfect easy-to-peel eggs.
What Makes This Method So Good
- The method is super reliable! Once you nail down your perfect cooking time, you’ll get consistently boiled eggs every single time.
- Boiled eggs are perfect for snacks-on-hand, meal prep, or even if you’re doing an egg fast. Refrigerate hard boiled eggs up to 7 days unpeeled or 5 days peeled. Unpeeled soft boiled eggs will keep in the refrigerator up to 2 days.
- The general rule-of-thumb for boiling eggs on the stovetop is that older eggs just work better. That may be true for the stove, but in my experience, the Instant Pot will give you the same results whether your eggs are fresh or older.
How To Make Them
That depends on how you like your eggs boiled! All appliances are different, so your Instant Pot eggs may need a couple of minutes more or less than mine, but in general I stick to…
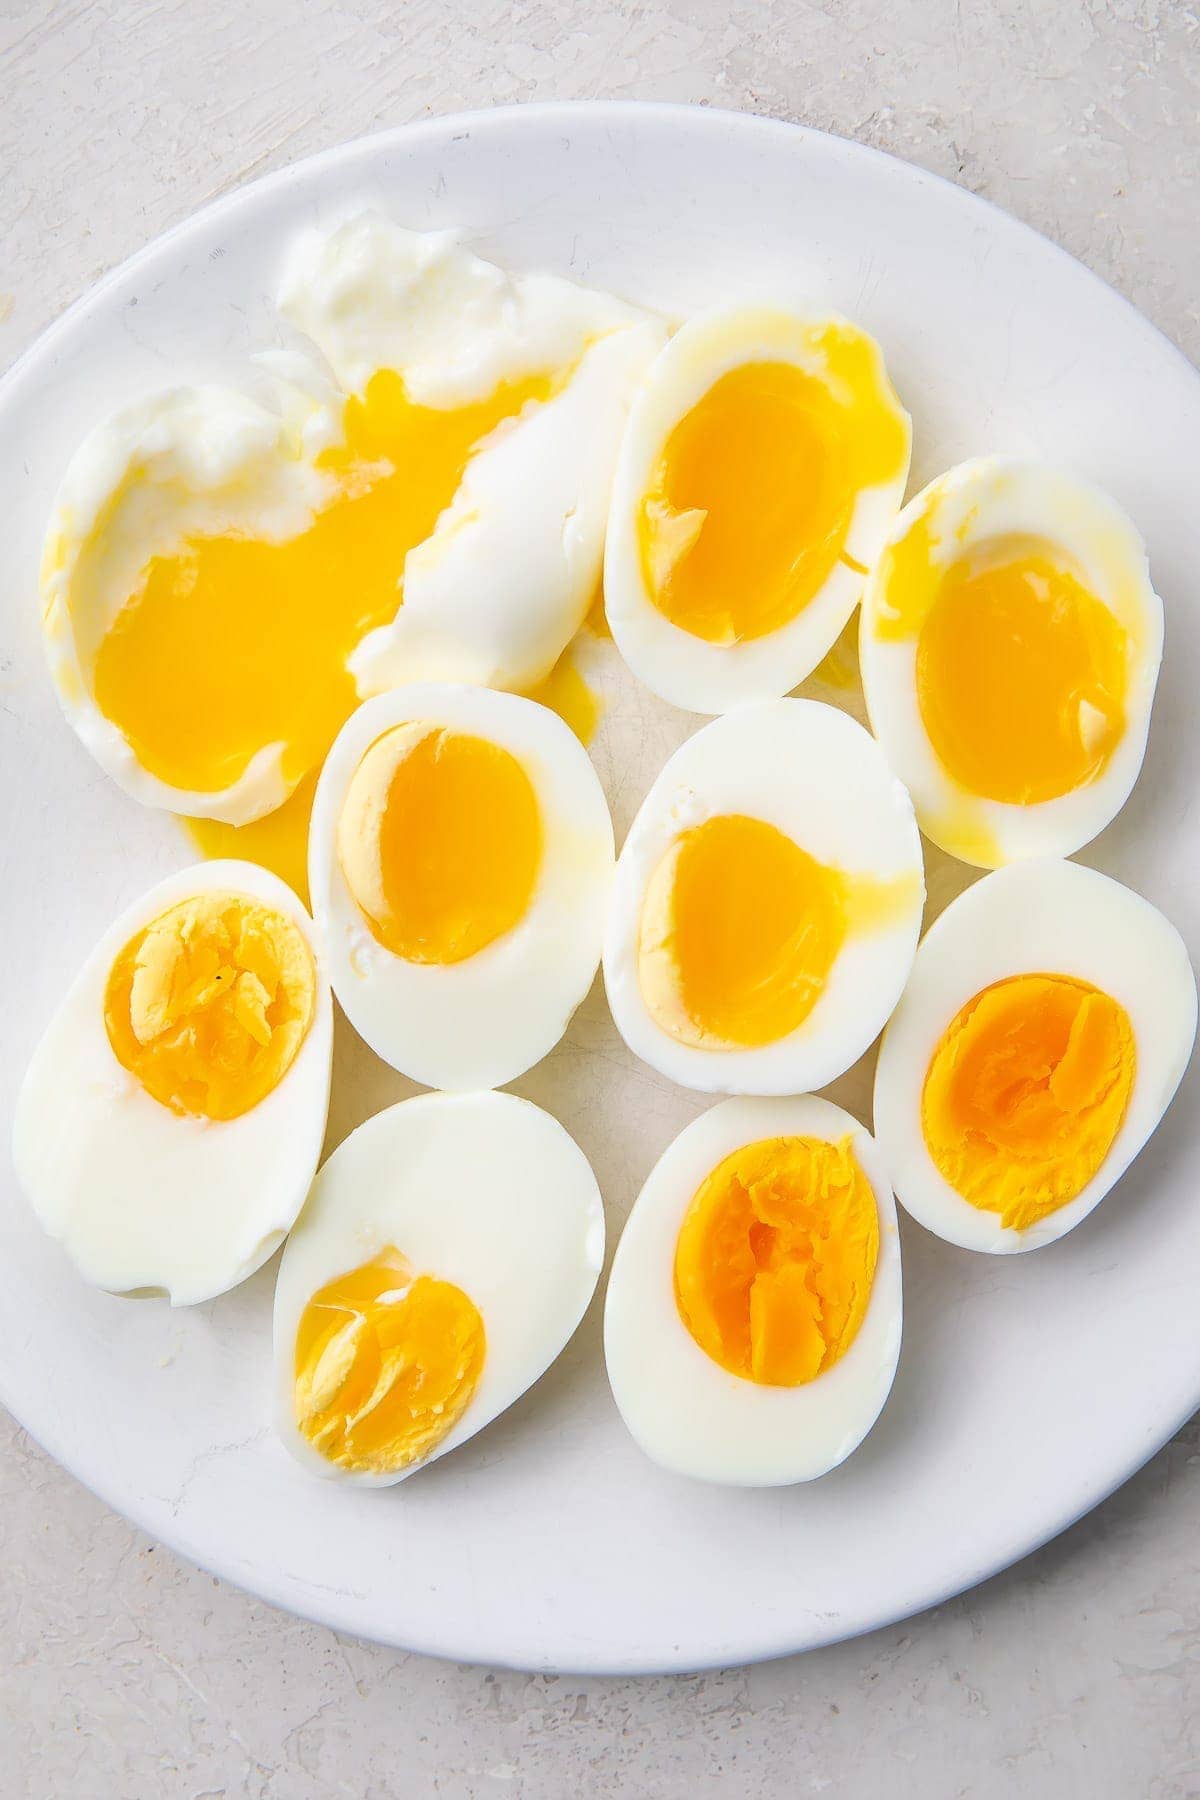
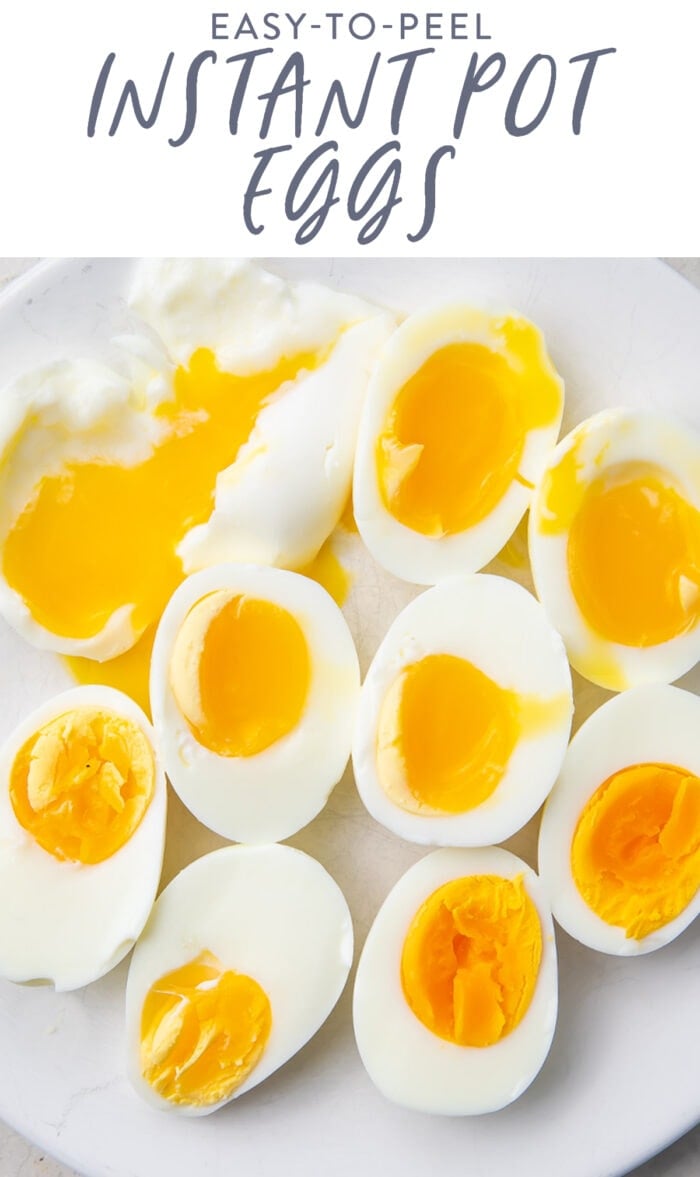
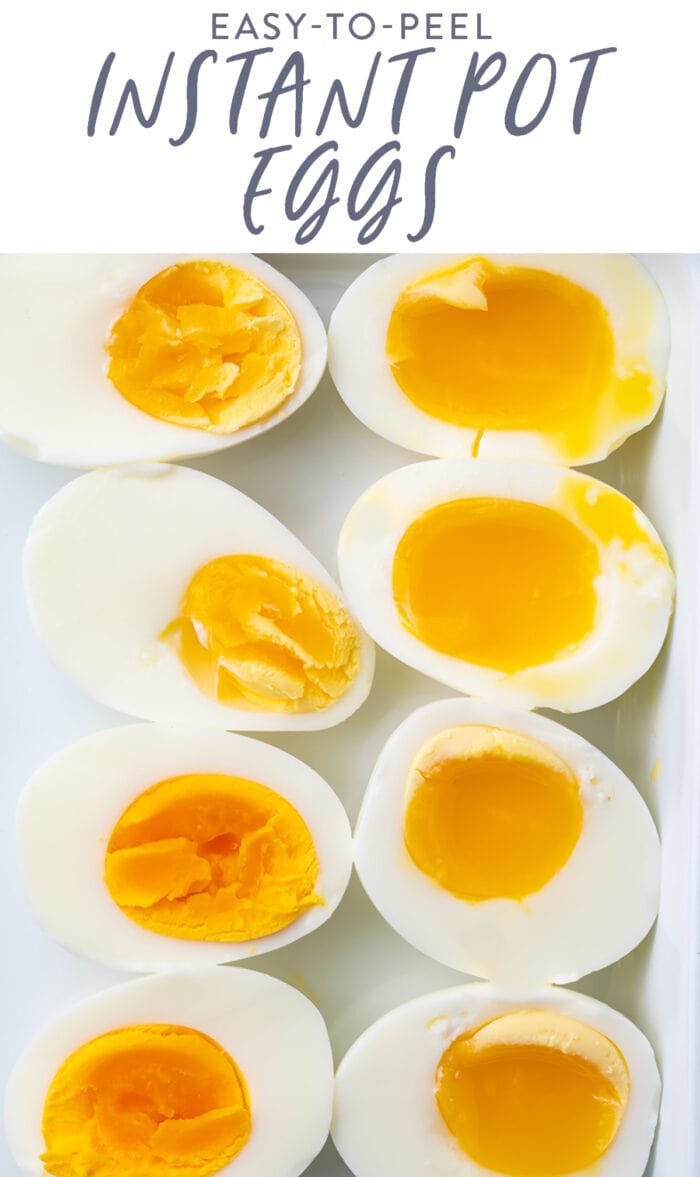
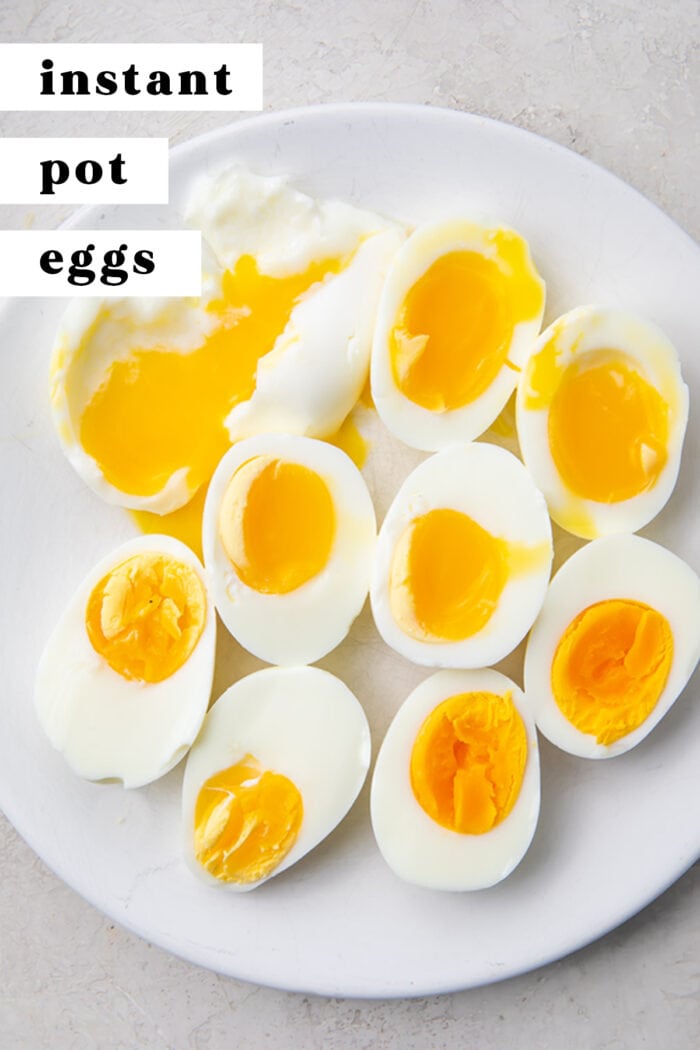
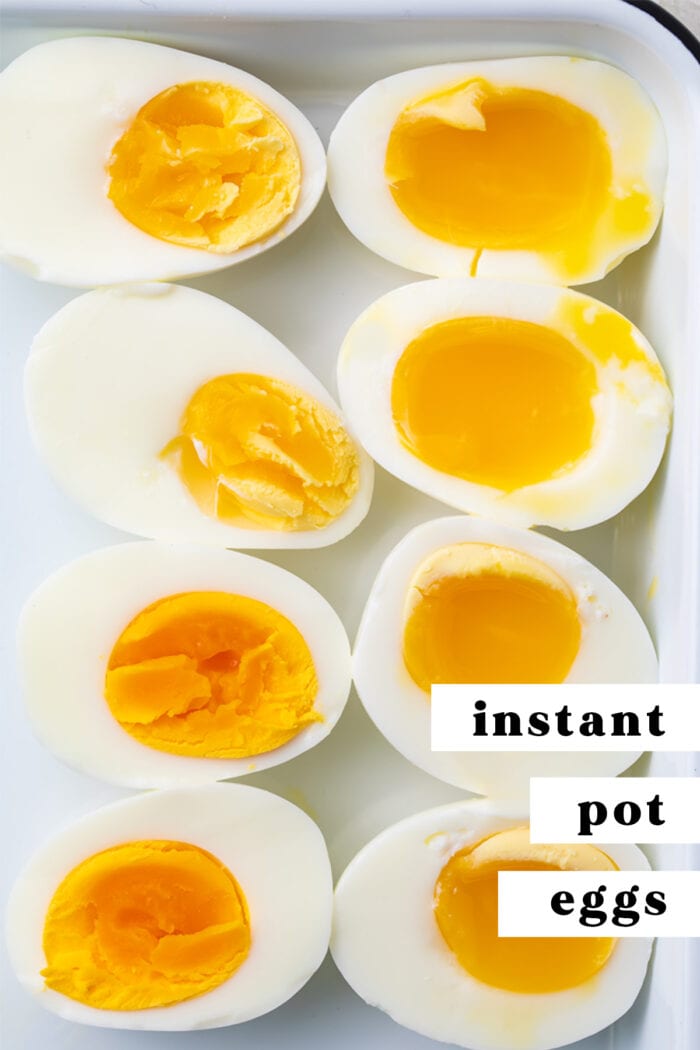
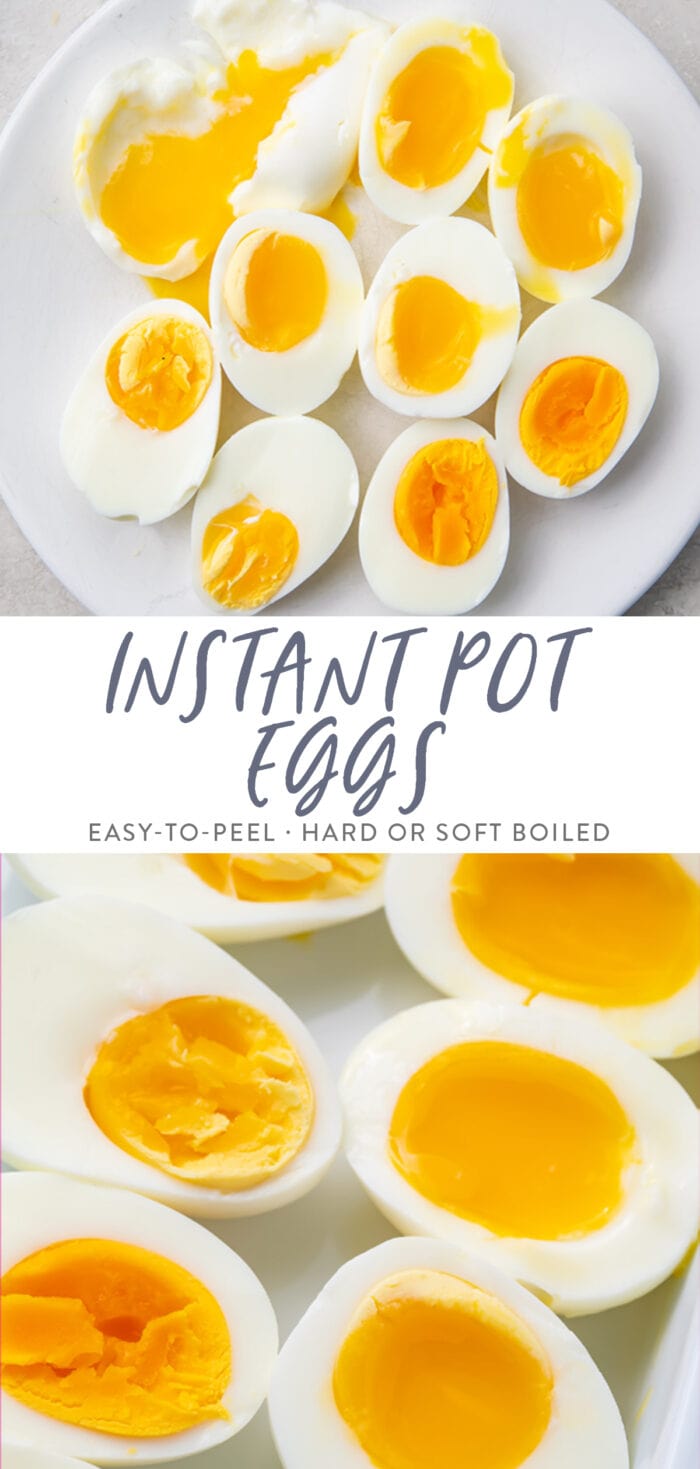
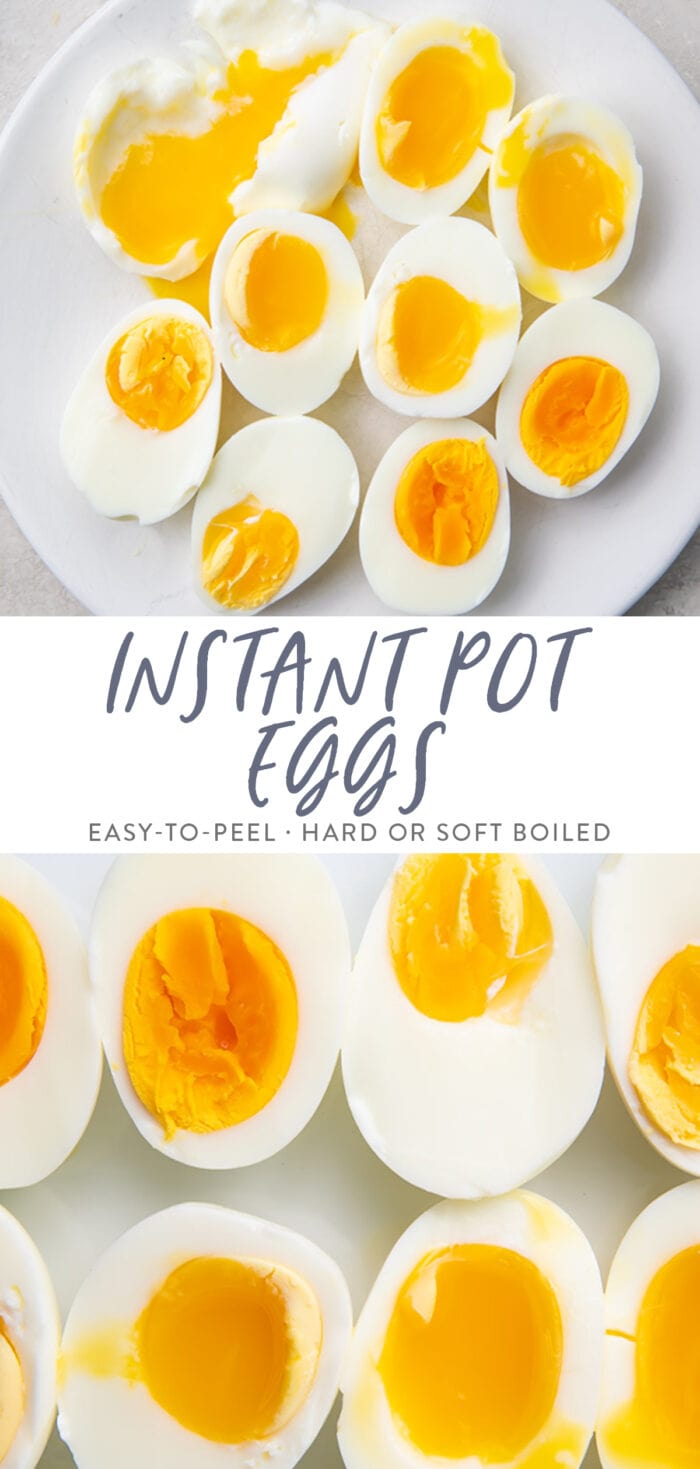
- 2 minutes for a mostly set white and very runny yolk
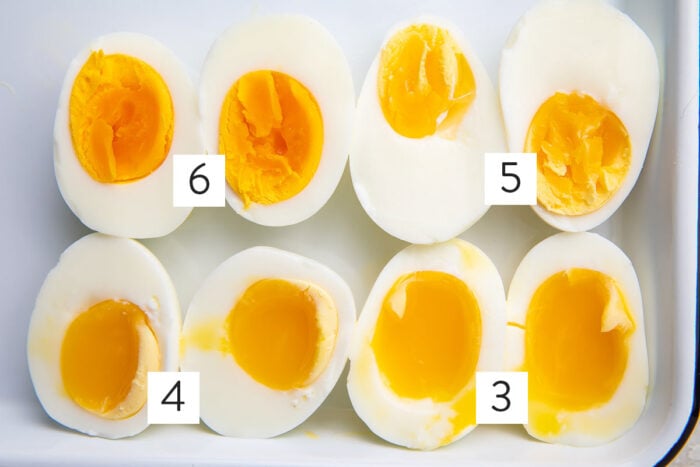
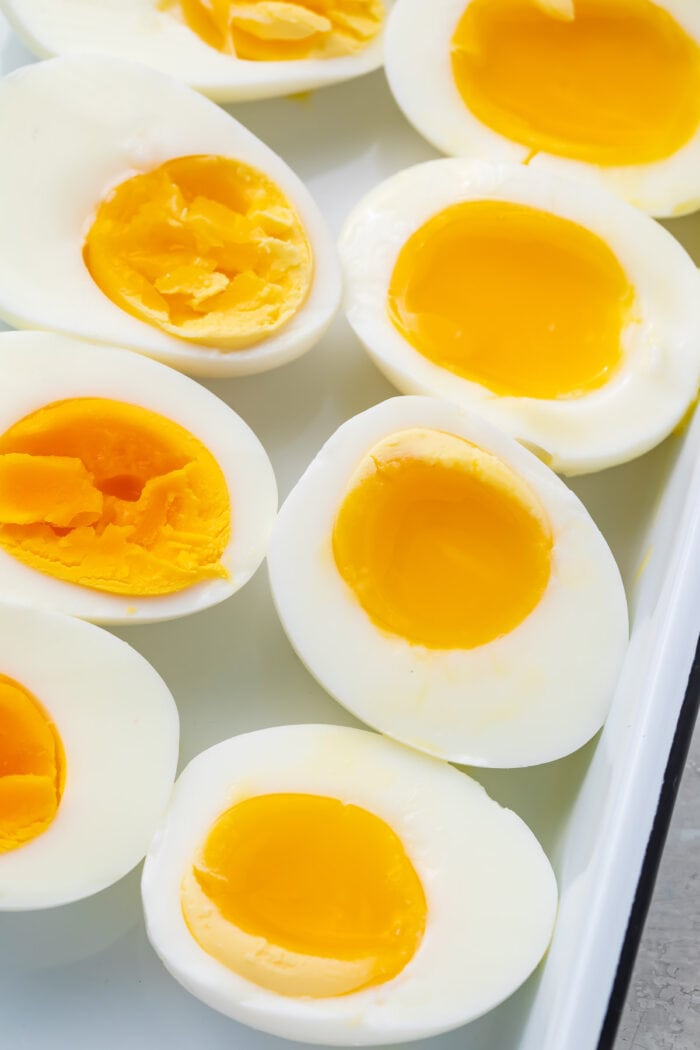
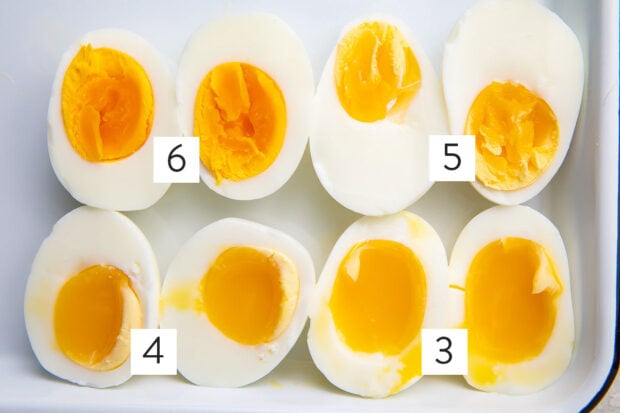
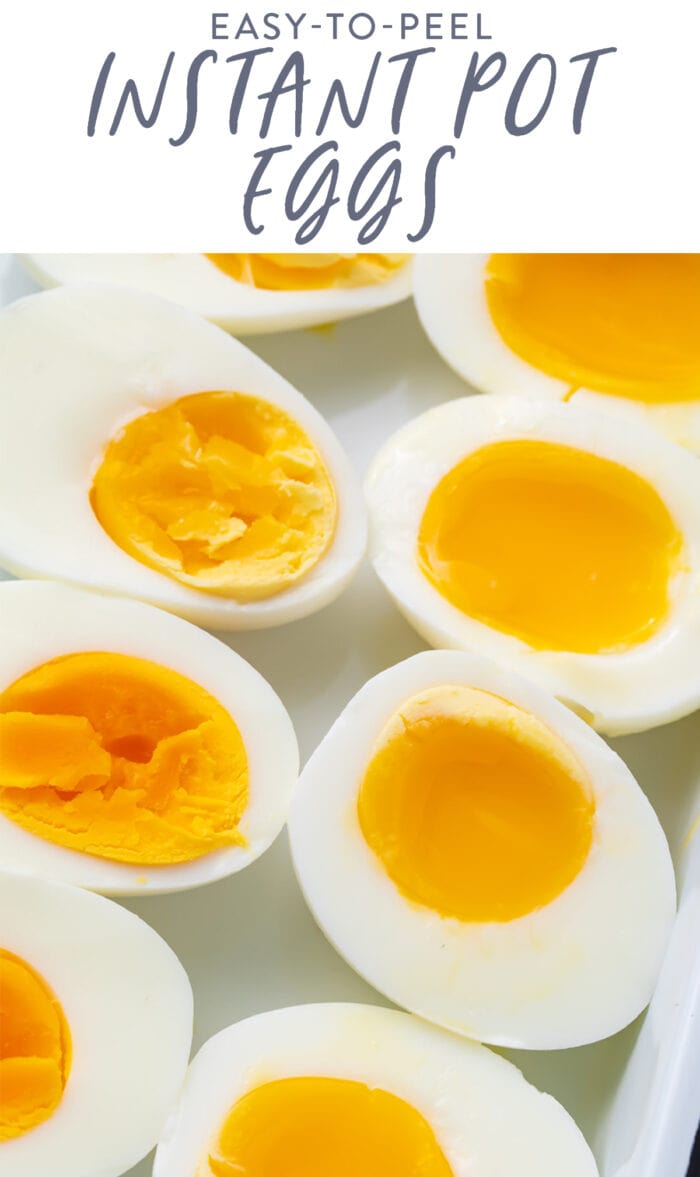
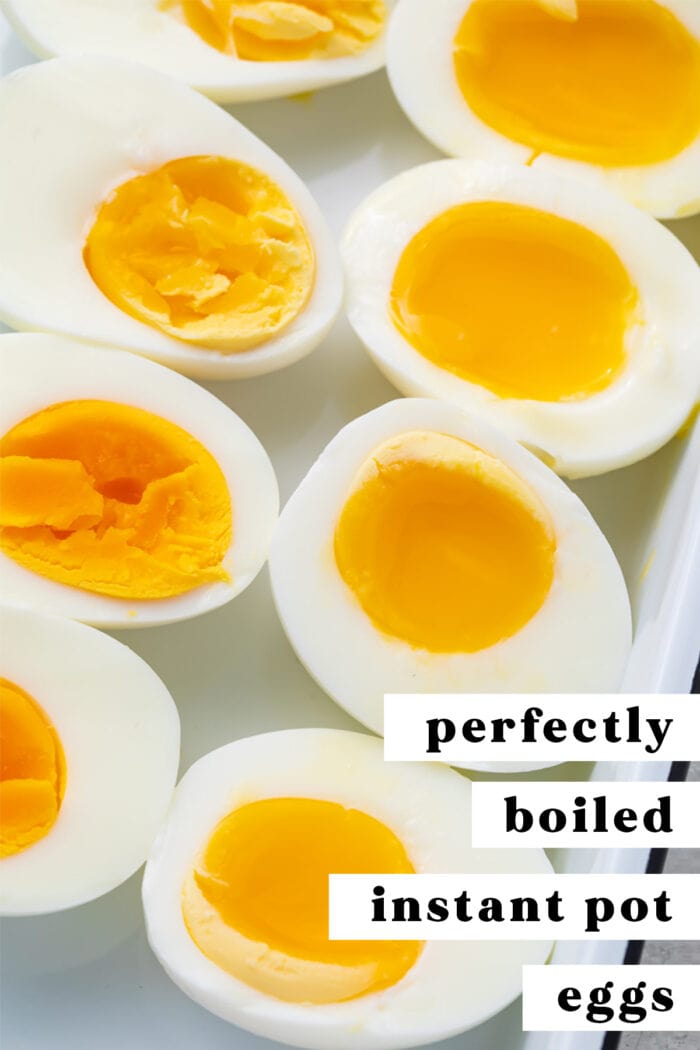
- 3 minutes for a set white and runny yolk (see image below)
- 4 minutes for a set white and jammy yolk (see image below)
- 5 minutes for a mostly set yolk with a tender quality (see image below)
- 6 minutes for a hard boiled white without a chalky yolk, yolk still nice and orange (see image below)
- 7 minutes for a hard boiled white with pale yellow yolk
Chef’s Tips
- Don’t overcrowd the eggs. If they touch, or if you’re working with so many that you can have two layers, then they’ll cook unevenly. Work in smaller batches, or try an Instant Pot egg rack to cook a large number of eggs in one go.
- Green/grey ring around the yolk of your eggs? That means you’ve either overcooked your eggs or you didn’t cool them quickly enough. It’s safe to eat, though. The ring is just a result of a chemical reaction inside the egg.
- It’s so, so, SO important that you Quick Release the pressure in the Instant Pot as soon as the cook time is up – especially if your goal is soft boiled eggs. Just a fraction too long will overcook them.
- If you notice your eggs cracking during cooking, try letting them come to room temperature before you put them in the Instant Pot.
More Easy Instant Pot Recipes
- Instant Pot Orange Chicken
- 50 Low Carb Instant Pot Recipes
- The Best EVER Instant Pot Black Eyed Peas
- Instant Pot Sushi Rice
- Instant Pot Shredded Chicken
- Dreamy Instant Pot Chicken and Rice
- Instant Pot Quinoa
- Instant Pot Chicken Wings
Instant Pot Eggs
Equipment
- Instant Pot
- Instant Pot trivet or metal steam basket
Ingredients
- 1 cup cold water see Notes
- eggs
- ice bath
Instructions
- Pour 1 cup of water into Instant Pot. Set trivet or metal steam basket inside Instant Pot, then place eggs inside.
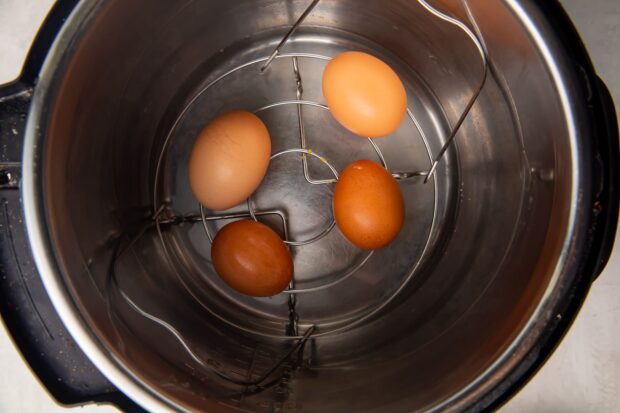
- Place lid on Instant Pot and seal. Set to Manual High Pressure and cook for…· 2 minutes for mostly set white and very runny yolk· 3 minutes for set white and runny yolk· 4 minutes for set white and jammy yolk· 5 minutes for mostly set yolk with a tender quality· 6 minutes for hard boiled without a chalky yolk, yolk still nice and orange· 7 minutes for hard boiled with pale yellow yolk
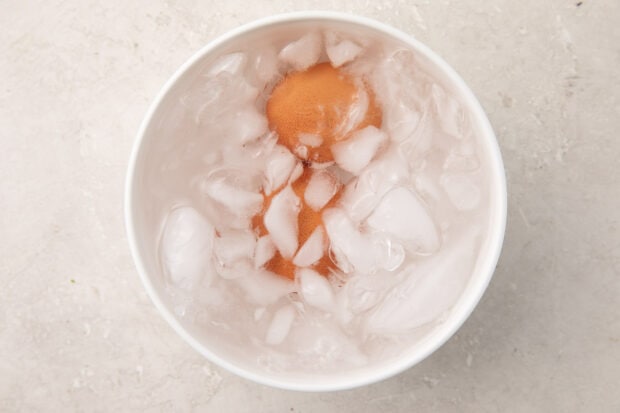
- Quick Release pressure as soon as cook time is up. Immediately remove eggs and carefully set into ice bath for 5 minutes.
- When eggs have cooled completely, gently crack them by tapping or rolling entire surface of shell on countertop. Remove shells. If you prefer, you can store the eggs in their shells and peel them when you're ready to eat them.
- A 3-quart or 6-quart Instant Pot will need 1 cup of water. An 8-quart Instant Pot will need 1.5 cups of water. Be sure to use cold water – warm or hot water will change the cook time.
- Eggs will be very hot after cooking, so you may want to use a potholder to remove them from the Instant Pot.
- This method will work for any type or number of eggs. Jumbo eggs may need an additional minute per recommended time to achieve the desired result.
Approximate Information for One Serving
Nutrition Disclaimers
Number of total servings shown is approximate. Actual number of servings will depend on your preferred portion sizes.
Nutritional values shown are general guidelines and reflect information for 1 serving using the ingredients listed, not including any optional ingredients. Actual macros may vary slightly depending on specific brands and types of ingredients used.
To determine the weight of one serving, prepare the recipe as instructed. Weigh the finished recipe, then divide the weight of the finished recipe (not including the weight of the container the food is in) by the desired number of servings. Result will be the weight of one serving.
Did You Make This Recipe?
Tag @40aprons on Instagram and be sure to leave a review on the blog post!




Never Miss A Meal!
New Recipes Straight To Your Inbox
A curated selection of our most recent recipes, delivered straight to your inbox once a week.
Thank you!
You have successfully joined our subscriber list.