
This Post May Contain Affiliate Links. Please Read Our Disclosure Policy.
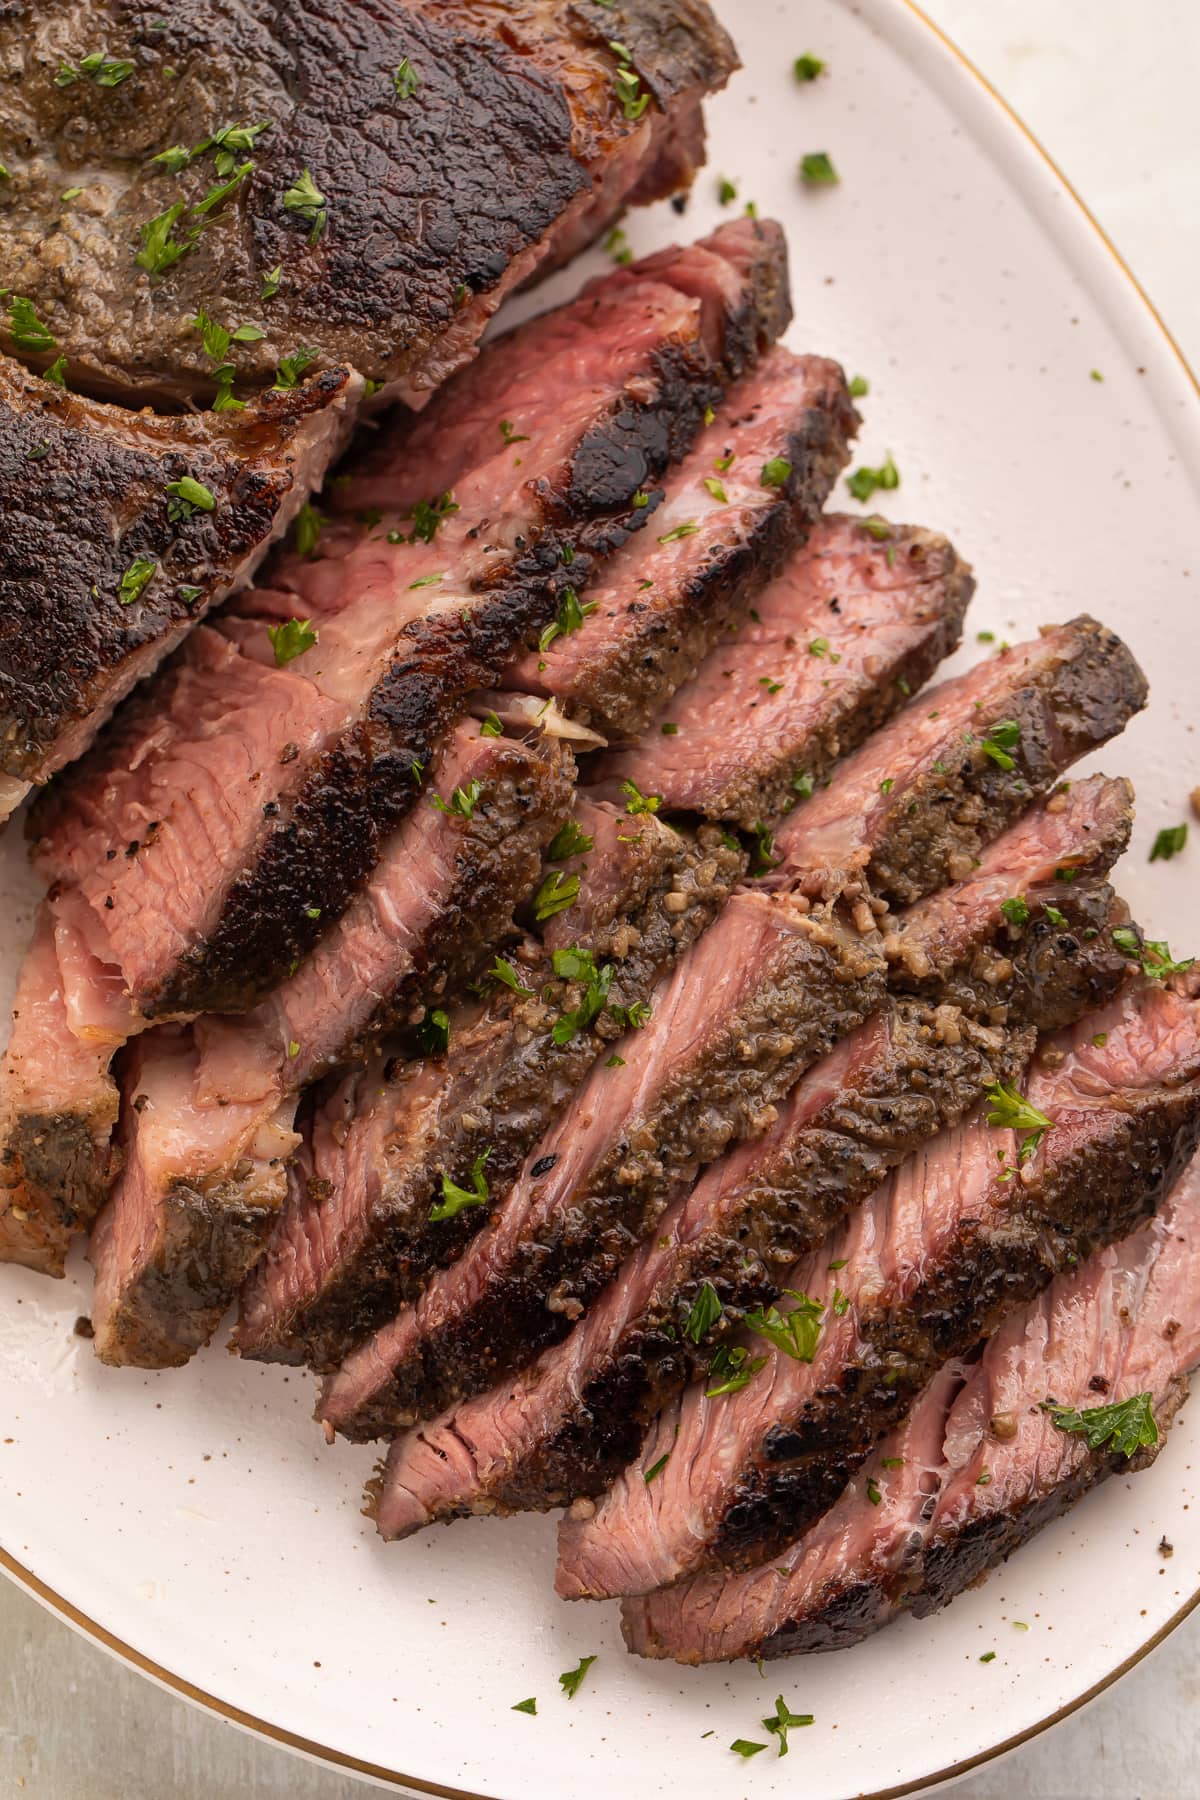
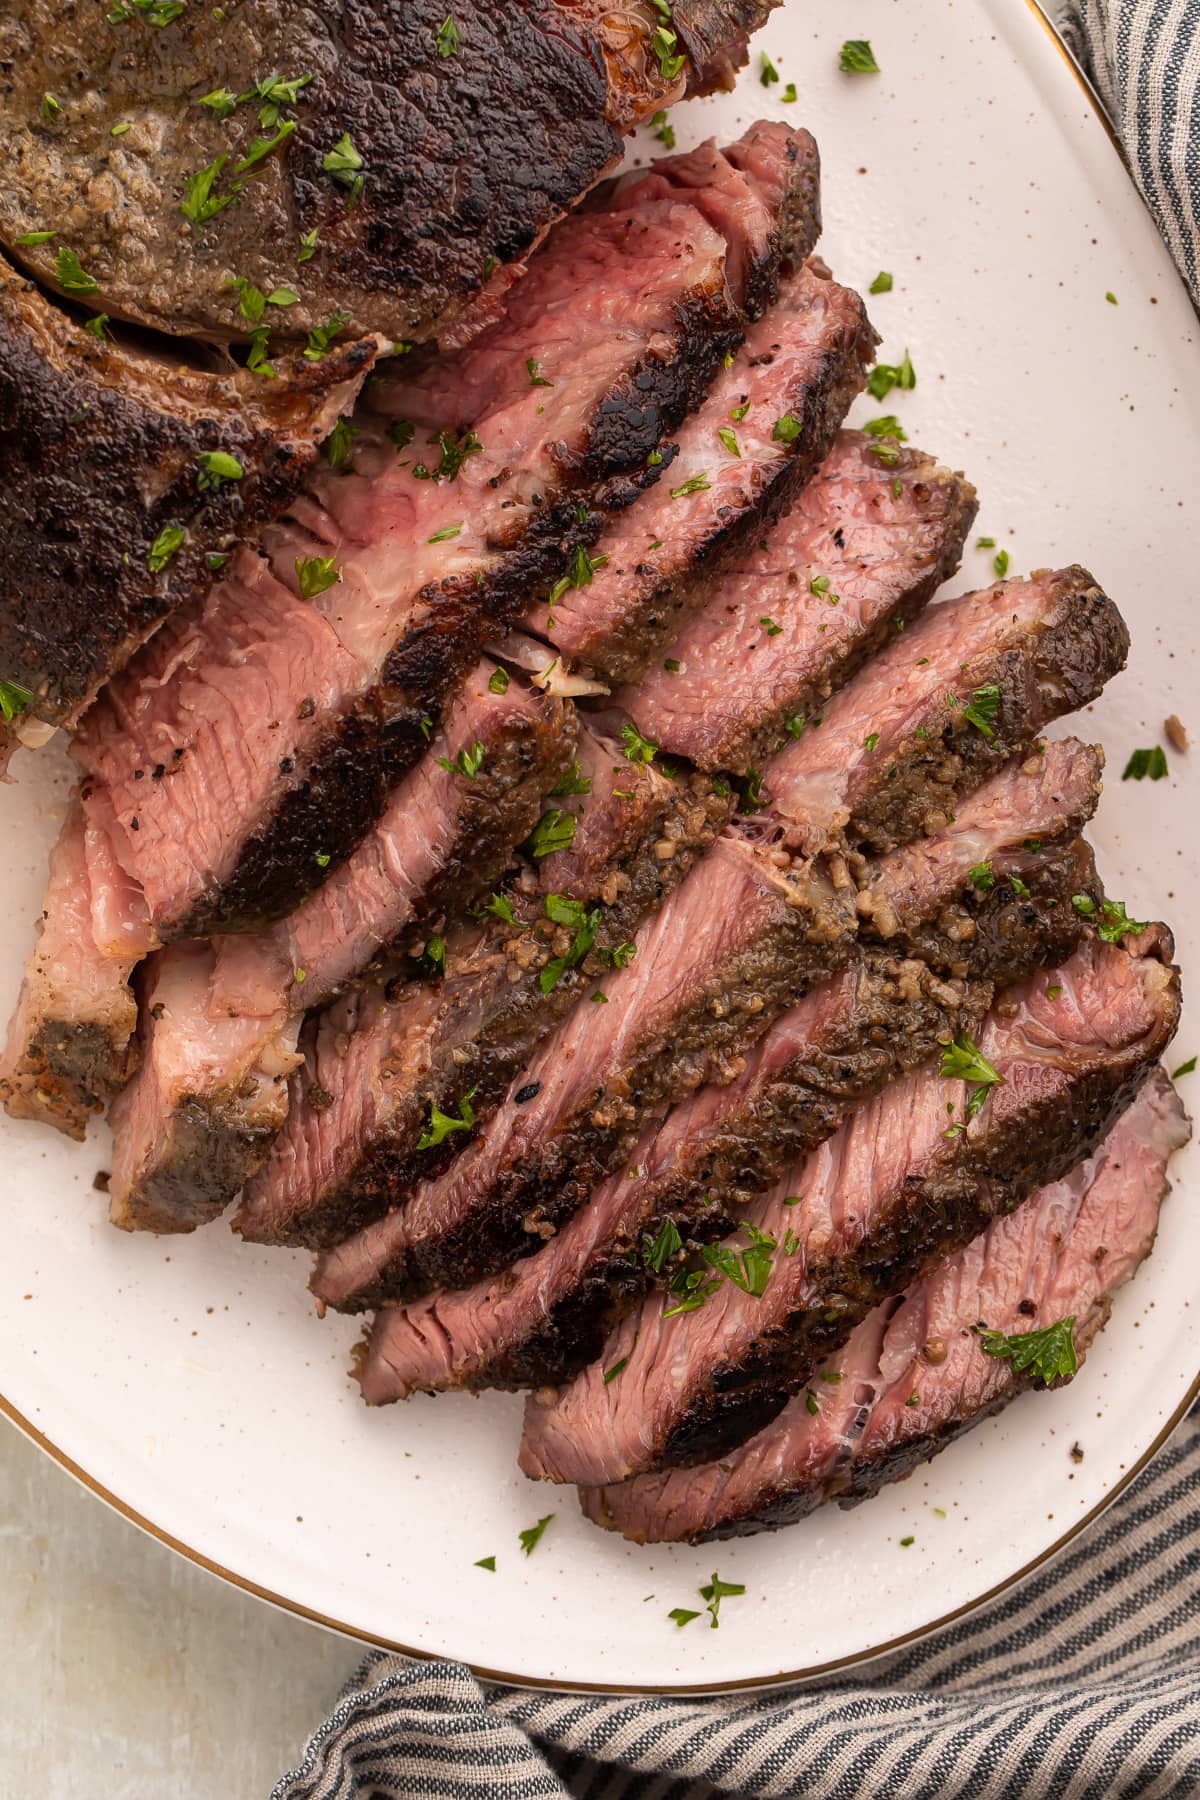
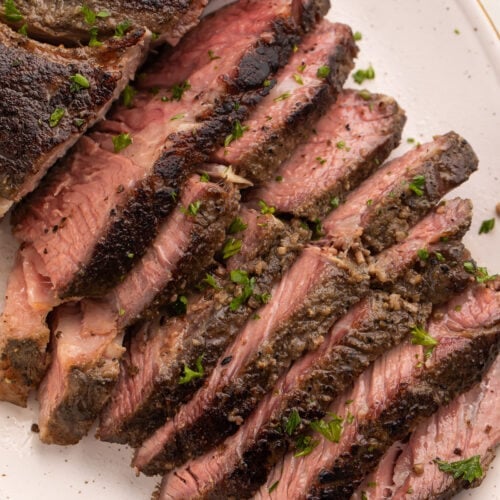
The sous vide transforms the humble chuck roast into an ultra tender, rich cut of meat! Cooked slowly for deliciously flavorful slices of beef that are perfectly medium rare (or whatever temperature you prefer!), this is serious kitchen magic!
🥩 What Makes This Recipe So Good
- If you’ve struggled with cooking chuck roast in the past, this foolproof recipe is everything you need. The sous vide method gives you tender, juicy chuck roast, and the reverse-sear method finishes it off beautifully, creating a crisp, flavorful crust layer over its entire surface. If you’ve ever tried my reverse-sear filet mignon (AKA the BEST filet mignon ever!) then you already know exactly what I’m talking about!
- Sous vide chuck roast might seem intimidating, but it’s really SO easy. The majority of the cooking is completely hands-off since the sous vide does most of the work. All you really have to “worry” about is the reverse sear at the end, but if you can heat a skillet, you’ll be just fine.
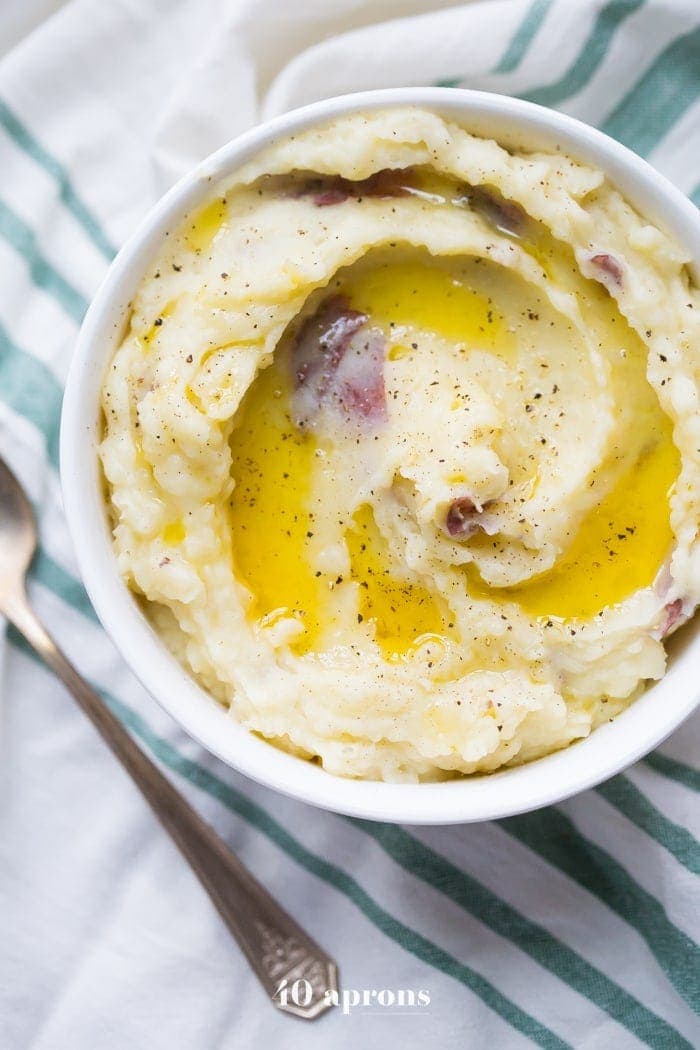
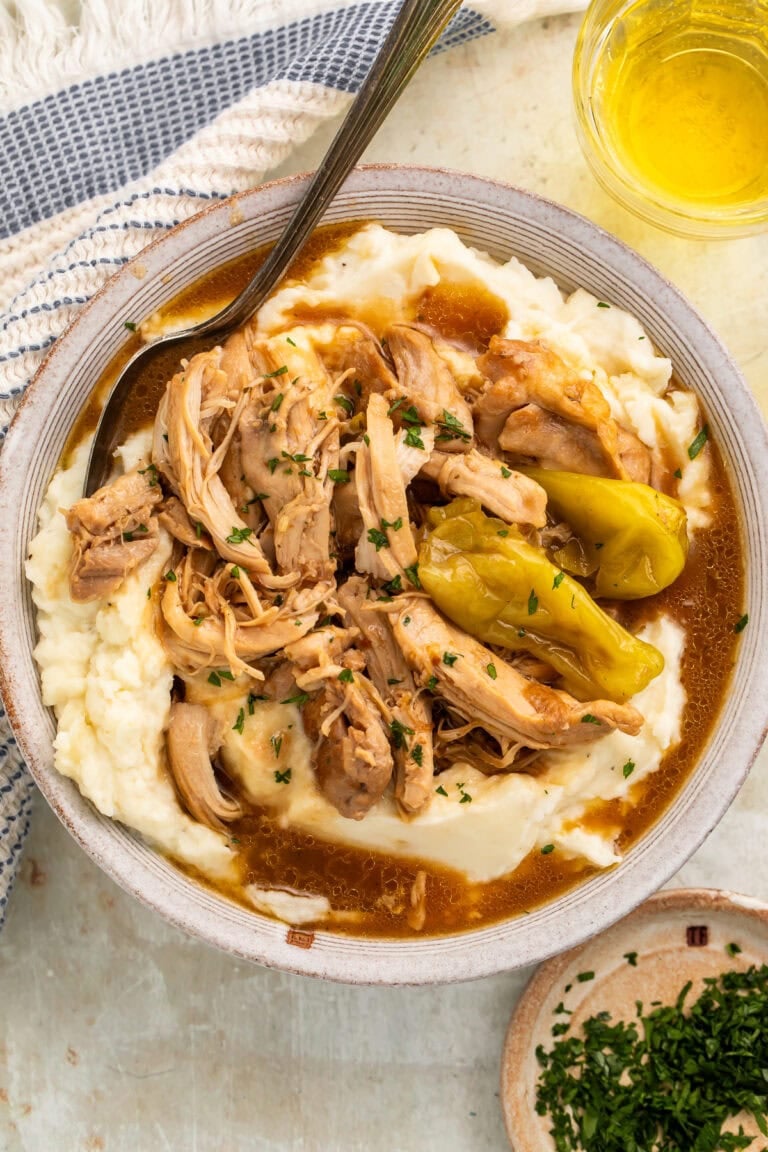
- The exact seasoning is up to you, which means you can pair a sous vide chuck roast with basically any side. If you want to dress things up a little for a holiday dinner or a special occasion, try our best ever risotto, impressive fondant potatoes, or asparagus with garlic aioli. For a cozier, more casual weeknight meal, try roasted carrots and potatoes or mashed potatoes and sautéed broccoli.
👩🏼🍳 Chef’s Tips
- To get a really beautiful, crisp crust on the outside of the chuck roast, you’ll want to dry it really well with paper towels. Don’t worry, the inside will still be nice and juicy. Removing the moisture just from the outer layer lets you get a perfect sear, locking in the internal moisture.
- Any time you cook something sous vide, whether it’s chuck roast or potatoes, it’s imperative that the food is 100% completely submerged in the water the entire time. If it’s not, it won’t cook evenly. You can buy sous vide sinker weights and clips, which you might want if you sous vide a lot. If you don’t, though, or just don’t want the extra tools and expense, you can use basically anything handy, as long as it’s waterproof and heat-resistant. The easiest option? Grab some silverware and attach it to the bag (literally you can just tape it to the outside) after you’ve sealed it up.
- When it’s time to reverse sear your sous vide chuck roast, I highly, highly recommend using a cast-iron skillet. They’re simply fantastic for high heat and really give you rich, even results. If you don’t have a cast-iron skillet, you can still get a great sear. You just need a large, heavy stainless steel skillet. Non-stick skillets don’t conduct the heat as well so you won’t get the same results.
🥩 More Beef Recipes We Love
- Gluten Free Meatloaf
- Instant Pot Mississippi Pot Roast
- Beef Tips And Gravy
- Beef Pot Pie
- Ground Beef and Gravy Over Mashed Potatoes
- Crispy Beef Schnitzel
- Beef Vindaloo
- Beef with Oyster Sauce
- Ground Beef Alfredo with Broccoli
- Creamy Rotel Pasta with Ground Beef
Sous Vide Chuck Roast
Tender, juicy beef chuck roast slow-cooked in a temperature-controlled water bath, then reverse-seared for a beautiful crust.
servings
Equipment
- 2 cutting boards or 1 sheet pan and 1 cutting board
- Paper towels
- Large pot or other large heat-resistant container
- Sous vide immersion circulator
- large food-safe vacuum sealing bag or large sealable food-safe plastic bag
- vacuum sealer optional, see Notes for alternate sealing method
- Large cast-iron skillet or large heavy stainless skillet
- Large plate
- Tongs
- large chef's knife
Ingredients
- 1 large boneless chuck roast 3–4 pounds, unseasoned
- seasoning salt store-bought or homemade; see Notes
- 1-2 tablespoons avocado oil or vegetable oil, or other oil with high smoke-point
Instructions
To Dry Brine the Chuck Roast (Optional)
- Place 1 large boneless chuck roast on cutting board or sheet pan. Pat chuck roast completely dry on all sides with paper towels.
- Liberally season chuck roast on all sides with seasoning salt, then place roast uncovered in refrigerator. Refrigerate seasoned roast overnight.
To Sous Vide the Chuck Roast
- Fill large pot or other large, heat-resistant container with water. Note: pot must be deep enough that water level falls between minimum and maximum indicators on circulator.
- Insert sous vide immersion circulator in pot of water and set to 135° Fahrenheit, or other temperature as preferred. See Notes for temperature recommendations by desired doneness.
- If Chuck Roast Was NOT Dry-Brined: Place 1 large boneless chuck roast on cutting board or sheet pan. Pat roast completely dry on all sides with paper towels, then liberally season roast with seasoning salt, making sure to cover all sides of roast.
- Place seasoned chuck roast in large, sealable food-safe bag. Remove as much air as possible from bag using vacuum sealer or water displacement method (see Notes below), then seal bag completely.
- Once water bath is preheated to desired temperature, place bag in water, making sure chuck roast is fully submerged. If needed, use sous vide sinker weights or silverware to weigh down bag and keep chuck roast completely submerged.
- Sous vide chuck roast 36 hours, or at least 24 hours, but no more than 48 hours. See Notes.
To Reverse-Sear the Chuck Roast
- Once chuck roast has cooked for desired length of time, add 1-2 tablespoons avocado oil to large cast-iron skillet. Use more oil as needed to cover bottom of skillet completely.
- Place cast-iron skillet on stovetop over medium-high heat. Heat skillet 3 to 5 minutes or until skillet is scorching hot and smoking slightly.
- While skillet preheats, carefully remove bag from water bath. Unseal bag and transfer chuck roast to large plate. Pat chuck roast completely dry on all sides with paper towels.
- Once skillet is preheated, place chuck roast in skillet. Sear chuck roast on each side 45 seconds or until dark brown crust develops.
To Serve the Chuck Roast
- When all sides of chuck roast have been seared, transfer chuck roast to cutting board. Immediately slice chuck roast, cutting against grain of meat, then serve roast with desired sides.
- Seasoning Salt: You can buy prepared seasoned salt at most grocery stores, or you can make your own seasoning blend at home. Most seasoning salts are a mixture of salt, finely ground pepper, herbs, and spices like paprika, turmeric, onion powder, and garlic powder. Some blends will also include sugar, cayenne, chili powder, or celery powder.
- Seasoning Alternative: Instead of seasoning salt, you can season your chuck roast with sea salt (or kosher salt) and finely ground fresh black pepper.
- Water Displacement Method: If you don’t have a vacuum sealer, place the chuck roast in an appropriately-sized sealable food-safe bag. Seal the bag halfway, then slowly lower the bag into the preheated water bath. You should see the bag cling to the meat as the hot water forces the air out of the bag. When the chuck roast is fully submerged and all the air has been expelled from the bag, finish sealing the bag and continue with the recipe.
- Cook Time: The chuck roast needs to sous vide a minimum of 24 hours, but no more than 48 hours max. I personally prefer to sous vide mine 36 hours.
Recommended Temperatures by Desired Doneness
- For rare chuck roast, set sous vide to 125°-134° Fahrenheit.
- For medium-rare chuck roast, set sous vide to 135°-144° Fahrenheit.
- For medium chuck roast, set sous vide to 145°-149° Fahrenheit.
- For medium-well chuck roast, set sous vide to 150°-159° Fahrenheit.
- For well-done chuck roast, set sous vide to 160°-165° Fahrenheit.
Approximate Information for One Serving
Serving Size: 1servingCalories: 424calProtein: 44gFat: 28gSaturated Fat: 12gTrans Fat: 2gCholesterol: 156mgSodium: 3672mgPotassium: 754mgTotal Carbs: 0gFiber: 0gNet Carbs: 0gVitamin A: 29IUCalcium: 41mgIron: 5mg
Nutrition Disclaimers
Number of total servings shown is approximate. Actual number of servings will depend on your preferred portion sizes.
Nutritional values shown are general guidelines and reflect information for 1 serving using the ingredients listed, not including any optional ingredients. Actual macros may vary slightly depending on specific brands and types of ingredients used.
To determine the weight of one serving, prepare the recipe as instructed. Weigh the finished recipe, then divide the weight of the finished recipe (not including the weight of the container the food is in) by the desired number of servings. Result will be the weight of one serving.
Did You Make This Recipe?
Tag @40aprons on Instagram and be sure to leave a review on the blog post!
Never Miss A Meal!
New Recipes Straight To Your Inbox
A curated selection of our most recent recipes, delivered straight to your inbox once a week.


I used a ziploc bag which failed at 24 hours. A lot of juice escaped. I stopped the cooking at 25 hours and decided to pan sear anyway as I need the practice. It was the best medium steak I have ever cooked. The meat was uniformly cooked and (OMG) tender. I ate three times the protein I paid for buying a ribeye with steak almost as tasty and certainly as tender from a chuck roast. Next time I will double-bag and ensure the seal.
Oh no, we’re so sorry the bag failed! But, we’re glad it turned out well! Thanks for sharing, Tracy!
I tried a small chuck roast for my first try. It turned out great. I bought a couple more today that are a lot bigger. I mostly have used my sous vide for making cheese but cooking a tough cut like chuck roast and having it turn out like prime rib is worth the long cooking time. I will continue doing it this way from now on.
So glad you enjoyed it!
So I made this and cooked it sous vide for 26 hours and it was still terribly chewy. What did I do wrong? 😢
Oh no!! If it was chewy, it might have needed more cook time. We usually go with the 36 hour option. Be sure to let us know if you try it again, or have any questions as you cook!
Would the timing change for a much larger chuck roast? Like an 8 pounder? Or do you think it would be better to do two 4lb roasts in the same water bath?
It will definitely be closer to the 36-48 hour cook time, but we suggest keeping an eye on the internal temperature as it cooks! We have a chart at the bottom of the recipe card with target internal temperatures for different levels of doneness. Be sure to let us know how it turns out! 😊