This Post May Contain Affiliate Links. Please Read Our Disclosure Policy.
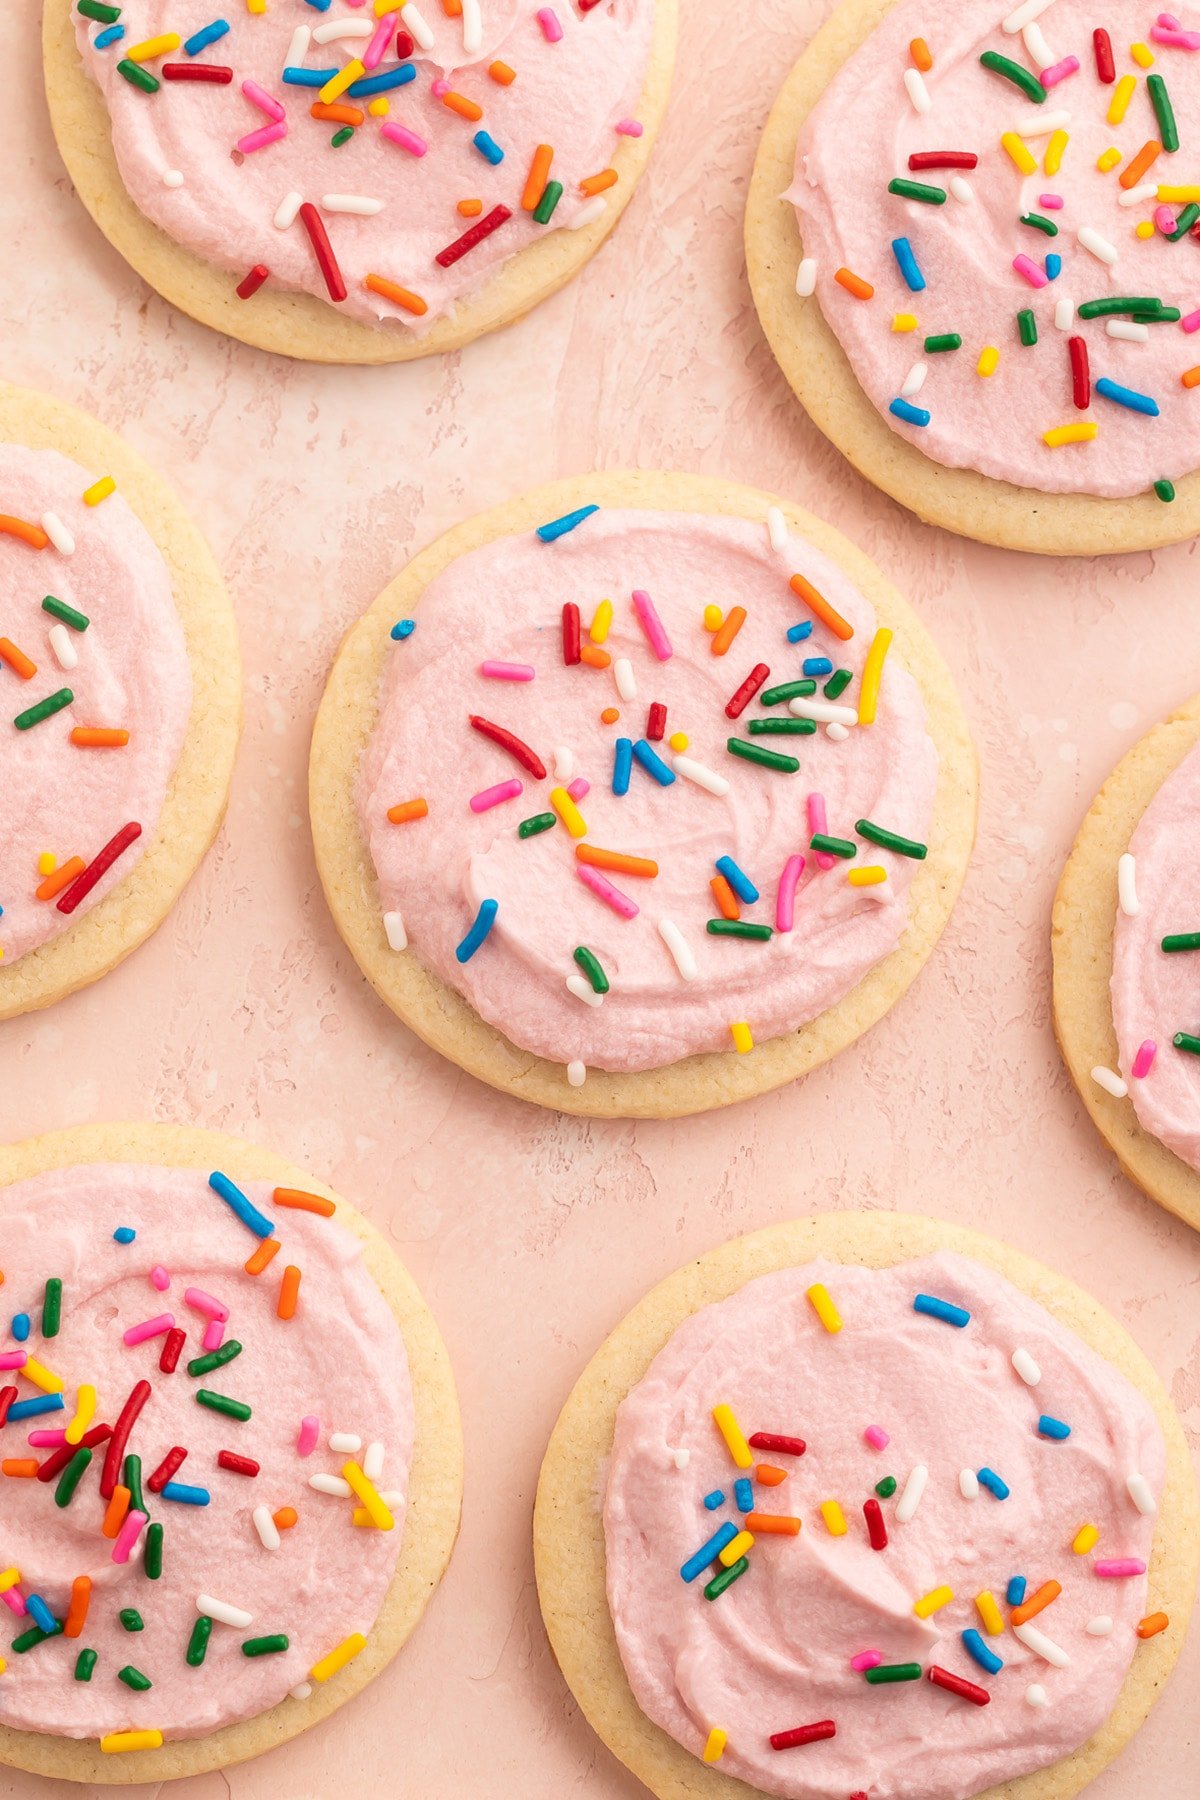
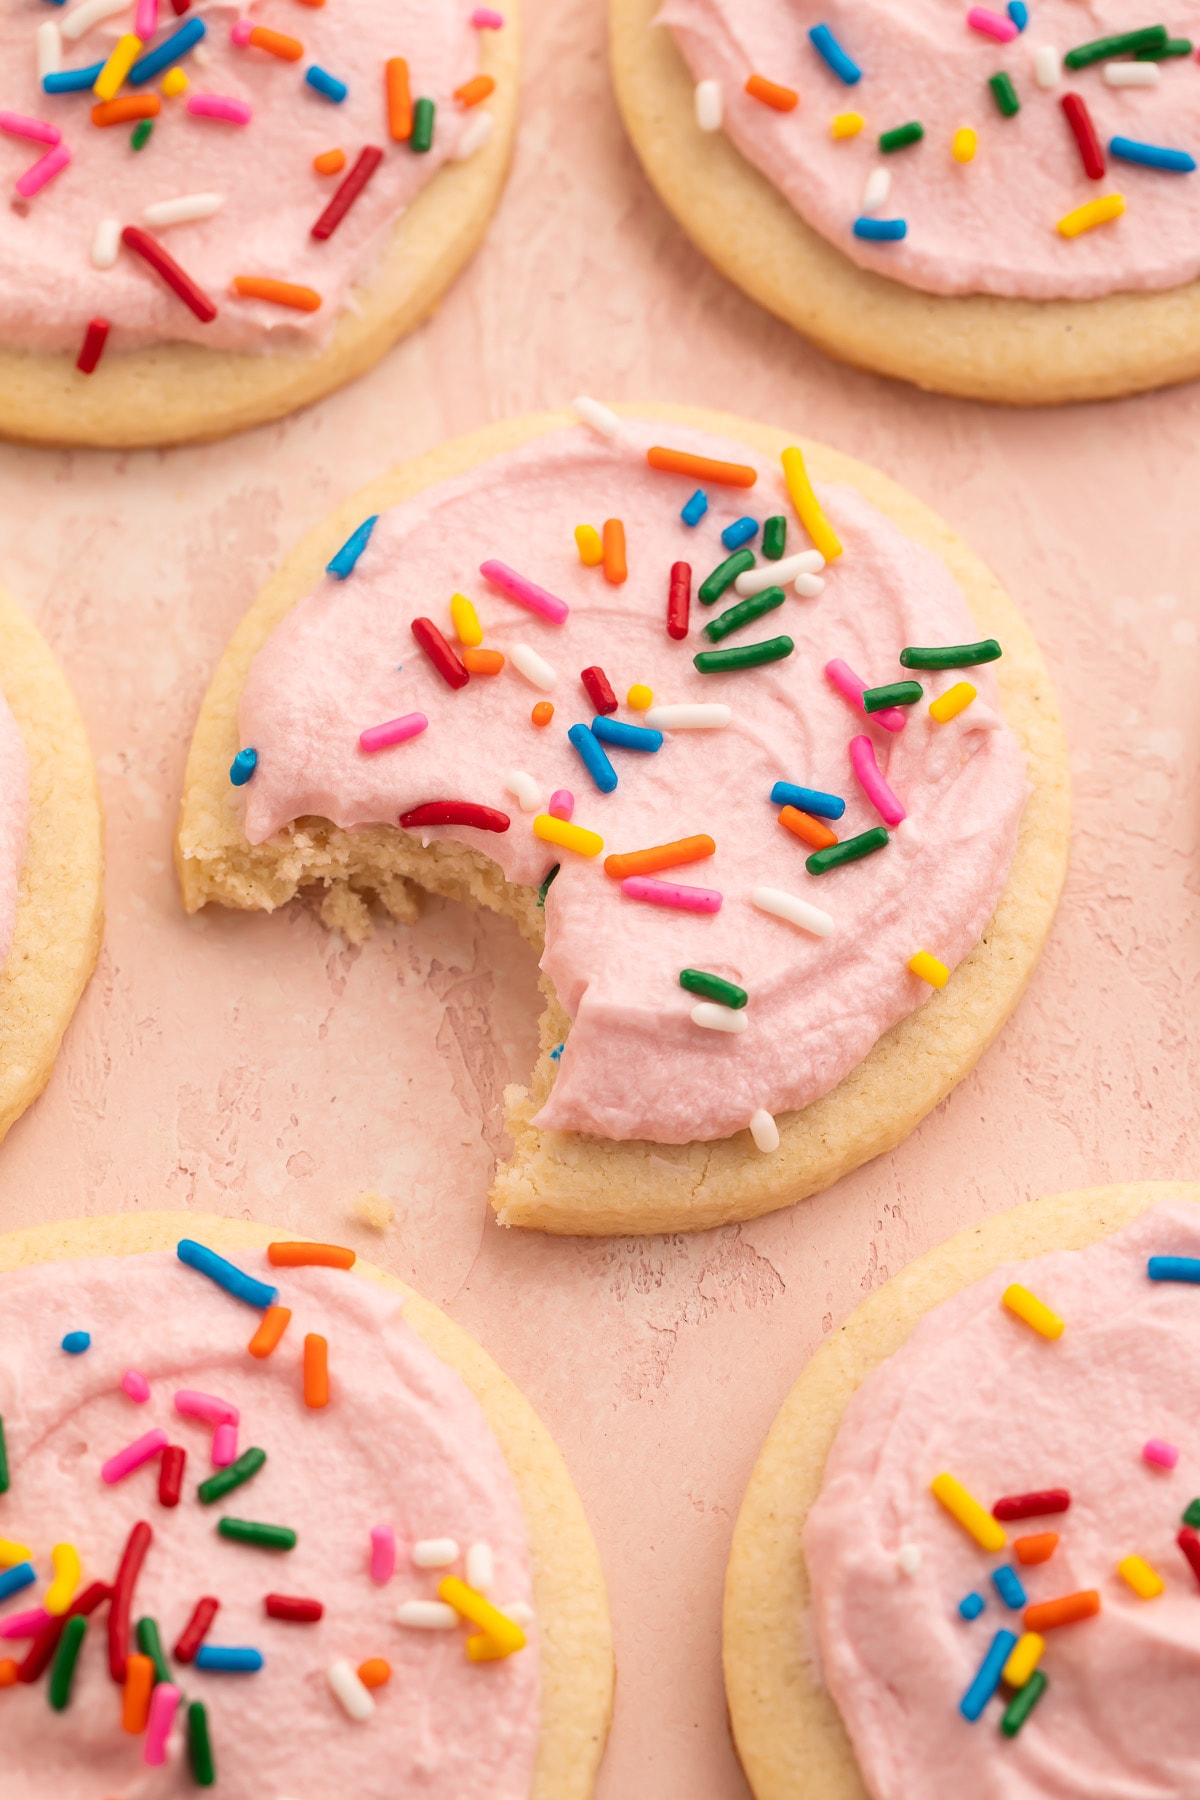
No one would ever guess these gluten-free sugar cookies are… well, gluten free! Soft and buttery and perfectly sweet, and decorated any way you like. Cut them into festive shapes or stick to traditional round cookies – either way, they’re perfect for holidays, special occasions, or any time at all. Optional buttercream frosting recipe included!
🌾 What Makes This Recipe So Good
- These gluten-free sugar cookies have the absolute dreamiest texture and flavor of just about any homemade gluten free cookie I’ve ever tried. Soft and tender, buttery, vanilla-y, and just sweet enough. They’re a huge hit at my house, and no one ever even suspects they’re gluten free.
- This recipe works perfectly for roll-out, cut-out sugar cookies, so break out your favorite cookie cutters! If you’re not feeling any festive shapes, though, this recipe works for basic round sugar cookies, too. All you’ll need to adjust is the bake time!
- Obviously you can change the shapes, frosting colors, and decorations to make your gluten-free sugar cookies work for any holiday or event. To really take them to the next level, try changing up the flavor of the buttercream frosting, too! Replace the vanilla extract with almond extract, peppermint extract, lemon extract, orange extract, or any other flavor you like. With one simple change you’ve got gluten-free sugar cookies ready for Christmas, Easter, baby showers, Mother’s Day, cookouts, you name it!
👩🏼🍳 Chef’s Tips
- Xanthan gum is super important with gluten-free baking, and these sugar cookies are no exception. Make sure to use a gluten-free flour that includes it – I typically use King Arthur Measure-for-Measure. If yours doesn’t include xanthan gum already, add ¼ teaspoon for every 1 cup of flour.
- The spoon-and-level method is the best way to make sure you don’t use too much flour without even noticing. It’s super easy. Just add spoonfuls of flour to your measuring cup, then use the back of a knife to level the top of the flour once the measuring cup is full. Whatever you do, don’t pack the flour into the cup! Don’t stick the measuring cup into the flour like a scoop, either. You’ll almost definitely use too much that way.
- Rolling cookie dough, especially gluten free sugar cookie dough, is always a little finicky. Before you get frustrated or call it quits, try these tips! 1) Check under the cookie dough frequently to make sure it’s not sticking to your work surface. Add more powdered sugar to your surface as you need to! 2) Work with chilled dough. If it becomes warm, sticky, or hard to roll, return it to the refrigerator for 10 minutes. Alternately, chill a cookie sheet and place it directly on top of the cookie dough to cool it down. 3) If the dough sticks to the rolling pin, dust the pin with more powdered sugar. Try not to go overboard, though – you don’t want the cookies to be too sweet. 4) Check the temperature of your kitchen! The ambient temp will make the dough warm and sticky, especially if you’re working near your preheated oven. You may need to kick up the A/C to compensate.
🧁 More Gluten-Free Treats We Love
- Cream Cheese Fruit Dip (No Marshmallow Fluff!)
- The Best EVER Gluten-Free Iced Lemon Cake
- Gluten-Free Gingerbread Cookies
- Paleo Lemon Bars
- Soft Keto Peanut Butter Cookies
- Gluten-Free Pecan Pie
- Chocolate Gluten-Free Mug Cake
- Almond Flour Banana Bread
- Gluten-Free Lemon Drizzle Cake
- Paleo Lime Bars (Gluten Free, Dairy Free)
- Oatmeal Cranberry Cookies
- 2-Ingredient Keto Magic Shell (Sugar-Free Chocolate Shell)
- Gluten-Free Christmas Cookies with Homemade Icing

Gluten-Free Sugar Cookies (Cut-Out or Drop Cookies)
Equipment
- Medium bowl
- Flour sifter
- large mixing bowl or stand mixer bowl
- hand mixer with beater attachments or stand mixer with beater attachment
- Silicone spatula
- Wax paper
- Oven
- 1-2 Cookie sheets
- unsalted butter or neutral cooking spray
- flat work surface
- rolling pin
- powdered sugar to dust surface and rolling pin
- Cookie cutters
- Spatula
- 2-3 wire cooling racks
- medium mixing bowl or stand mixer bowl
- Piping bag or offset spatula
Ingredients
For the Sugar Cookie Dough
- 3 cups gluten-free all-purpose flour with xanthan gum, see Notes
- ¾ teaspoon fresh baking powder
- ¼ teaspoon salt
- 8 ounces unsalted butter at room temperature
- 1 cup granulated sugar
- 1 large egg at room temperature, lightly beaten
- 1 tablespoon whole milk
- 1 teaspoon pure vanilla extract
For the Buttercream Frosting (Optional)
- 8 ounces unsalted butter at room temperature
- 2 teaspoons pure vanilla extract
- 16 ounces powdered sugar plus more as desired
- ¼ teaspoon salt
- 4 tablespoons whole milk or heavy cream
- food coloring optional
Decoration Suggestions (All Optional)
- sanding sugar
- shaped sprinkles
- nonpareils
- jimmies
- edible glitter
Instructions
To Prepare the Gluten-Free Sugar Cookie Dough
- Add 3 cups gluten-free all-purpose flour, ¾ teaspoon fresh baking powder, and ¼ teaspoon salt to sifter, then sift ingredients into medium bowl. If needed, return ingredients to sifter and repeat. Set bowl aside.
- Add 8 ounces unsalted butter (at room temperature) and 1 cup granulated sugar to large mixing bowl. Use hand mixer or stand mixer fitted with beater attachment to cream butter and sugar together until fully combined, approximately 1 to 2 minutes. Mixture should be pale in color and fluffy. Use silicone spatula to scrape down sides of bowl as needed.
- Add 1 large egg (lightly beaten), 1 tablespoon whole milk, and 1 teaspoon pure vanilla extract to bowl. Mix until all ingredients are just combined.
- Reduce mixer speed to low. Gradually add small amounts of flour mixture to butter mixture, incorporating dry ingredients completely before adding more. Once all flour mixture has been added to butter mixture, mix until dough pulls away from sides of bowl.
- Turn off mixer and set aside. Lay two large sheets of wax paper on flat work surface. Divide dough into two equal halves and transfer one half of dough onto each sheet of wax paper.
- Wrap each half of dough completely in wax paper. Place fully-wrapped dough halves in refrigerator and chill 2 hours.
To Bake the Gluten-Free Sugar Cookies
- Preheat oven to 375° Fahrenheit and position racks so that cookie sheet(s) can sit in center of oven. Lightly grease cookie sheet(s) with unsalted butter or neutral cooking spray, then set cookie sheet(s) aside. Sprinkle powdered sugar over flat work surface and rolling pin.
- Remove one wrapped dough half from refrigerator. Unwrap and discard wax paper, and place dough on dusted work surface. Roll cookie dough out until entire sheet of dough is uniformly ¼-inch thick. See Notes below for rolling tips.
- Use cookie cutters to cut dough into desired shapes. Place shaped dough on prepared cookie sheet and repeat, leaving 1-inch minimum between dough shapes on cookie sheet(s). Combine dough scraps and roll flat when possible to form additional cookies.
- When no additional cookies can be cut from dough, place cookie sheet(s) in refrigerator and chill shaped cookies while repeating process with other half of cookie dough. Incorporate scraps from first half of cookie dough into second half of dough before rolling.
- Once all dough has been cut into shaped cookies, place cookie sheet(s) in preheated oven. Bake cookies 5 minutes, then begin checking doneness. Check cookies every 60 seconds and remove cookie sheet(s) from oven as soon as bottom edges just begin to brown. Exact bake times will vary – be very careful not to over-bake.
- Once bottom edges of cookies begin to brown, remove cookie sheet(s) from oven and set aside. Let cookies cool on cookie sheet(s) 2 minutes, then use spatula to carefully transfer cookies to wire cooling racks. Let cookies rest on cooling racks until completely cooled.
To Decorate & Serve the Gluten-Free Sugar Cookies
- Add 8 ounces unsalted butter (softened) and 2 teaspoons pure vanilla extract to medium mixing bowl. Using hand mixer with beater attachments or stand mixer with paddle attachment, beat butter and vanilla extract together on medium-low speed until fully combined, approximately 1 to 2 minutes. Scrape down sides of bowl with silicone spatula as needed.
- Sift 16 ounces powdered sugar into bowl in increments, mixing on low speed after each addition until sugar is incorporated into butter. Once all sugar has been added, add ¼ teaspoon salt and mix until incorporated.
- Scrape down sides of bowl with silicone spatula as needed. Set mixer to medium speed and add 4 tablespoons whole milk in 1-tablespoon increments, fully incorporating each tablespoon before adding more, until desired consistency is achieved. If needed, mix in additional powdered sugar to thicken frosting.
- Optional: If using food coloring, add desired amount of coloring and mix until fully incorporated, adding more coloring as needed to achieve desired results.
- Transfer prepared frosting into piping bag and pipe onto completely-cooled cookies. Alternately, use offset spatula to dollop small amounts of frosting onto each cookie and spread frosting over cookie to cover.
- If desired, top frosted cookies with sanding sugar, shaped sprinkles, nonpareils, jimmies, edible glitter, or other decorations of choice. Let frosted cookies stand 3 to 5 minutes or until buttercream frosting is slightly set, then serve cookies as desired.
- Exact number of cookies will depend entirely on the size and shapes you make from the dough.
- Xanthan Gum: Xanthan gum is super important with gluten-free baking, so make sure to use a gluten-free flour that includes it. If yours doesn’t include it, add ¼ teaspoon of xanthan gum for every 1 cup of flour.
- Measuring Flour: Use the spoon-and-level method to ensure you don’t use too much flour! Add spoonfuls of flour to your measuring cup, then use the back of a knife to level the top of the flour once the measuring cup is full. Don’t pack the flour into the cup!
- Rolling Cookie Dough: Check under the cookie dough frequently to make sure it’s not sticking to your work surface. You’ll want to work with the dough while it’s chilled – if it becomes warm, sticky, or hard to roll, return it to the refrigerator for 10 minutes. Alternately, chill a cookie sheet and place it directly on top of the cookie dough to cool it down.
- Cutting Cookie Dough: If the cookie cutters stick to the dough, lightly grease them with butter or cooking spray, or lightly dust the edges of the cookie cutters with powdered sugar.
- Buttercream Flavors: To change the flavor of the frosting, feel free to replace the vanilla extract with almond extract, peppermint extract, lemon extract, orange extract, or any other flavor you like.
- Decorations: Make sure any sprinkles or other decorations you use are actually gluten free!
- Storage: Store frosted cookies in an airtight container at room temperature up to 3 days. Frosted cookies can be refrigerated in an airtight container up to 7 days. Baked sugar cookies without frosting can be kept at room temperature in an airtight container up to 7 days.
- Freezer Cookies: After decorating the cookies, lay them out on a baking sheet, plate, or platter in a single layer, making sure they don’t overlap. Place them in the freezer for 1 hour. After 1 hour, transfer them to an airtight container or food-safe sealable freezer bag. Use wax or parchment paper between each layer to keep the cookies from sticking together. Cookies can be frozen up to 3 months. Defrost desired number of cookies at room temperature before consuming.
For Drop Cookies (Round Cookies Without Cookie Cutters)
- Follow the cookie dough recipe as written. Once the dough is ready, cover the mixing bowl with plastic wrap and chill the dough in the mixing bowl for 2 hours. Don’t divide the dough in half or wrap it in wax paper.
- After 2 hours, remove the bowl from the fridge and discard the plastic wrap. Use a cookie scoop to scoop equal portions of dough out of the bowl. Roll each scoop between the palms of your hands (work quickly – don’t let the dough get warm) and then place the dough ball on the greased cookie sheet.
- Once all the dough has been rolled into balls, gently flatten each dough ball with your fingers. Make sure each individual flattened dough ball is the same thickness all the way across, but also make sure all your flattened cookies are the same size and the same thickness or they won’t bake evenly!
- Once all the dough balls have been flattened into uniform round cookies, bake the cookies at 375° Fahrenheit for 5 minutes, then begin checking how “done” they are. Check them every 60 seconds and remove them from the oven once the bottom edges just as they barely start to brown.
- Let the cookies cool on the cookie sheets 2 minutes, then transfer them to wire cooling racks and set them aside until they’re completely cool.
- Decorate as desired and serve!
Approximate Information for One Serving
Nutrition Disclaimers
Number of total servings shown is approximate. Actual number of servings will depend on your preferred portion sizes.
Nutritional values shown are general guidelines and reflect information for 1 serving using the ingredients listed, not including any optional ingredients. Actual macros may vary slightly depending on specific brands and types of ingredients used.
To determine the weight of one serving, prepare the recipe as instructed. Weigh the finished recipe, then divide the weight of the finished recipe (not including the weight of the container the food is in) by the desired number of servings. Result will be the weight of one serving.
Did You Make This Recipe?
Tag @40aprons on Instagram and be sure to leave a review on the blog post!
Never Miss A Meal!
New Recipes Straight To Your Inbox
A curated selection of our most recent recipes, delivered straight to your inbox once a week.




Turned out great and they were delicious 😋
We’re so happy to hear! Thanks for sharing, Martina!
Love these cookies but can the dough be frozen before rolling out?
Sure!
Hi! I loved these cookies. They are excellent. I just had a question, is it possible to refrigerate the cookies longer than 2 hours? Say 12-24? Thanks so much!
That should work! They just may not spread as much.