
This Post May Contain Affiliate Links. Please Read Our Disclosure Policy.

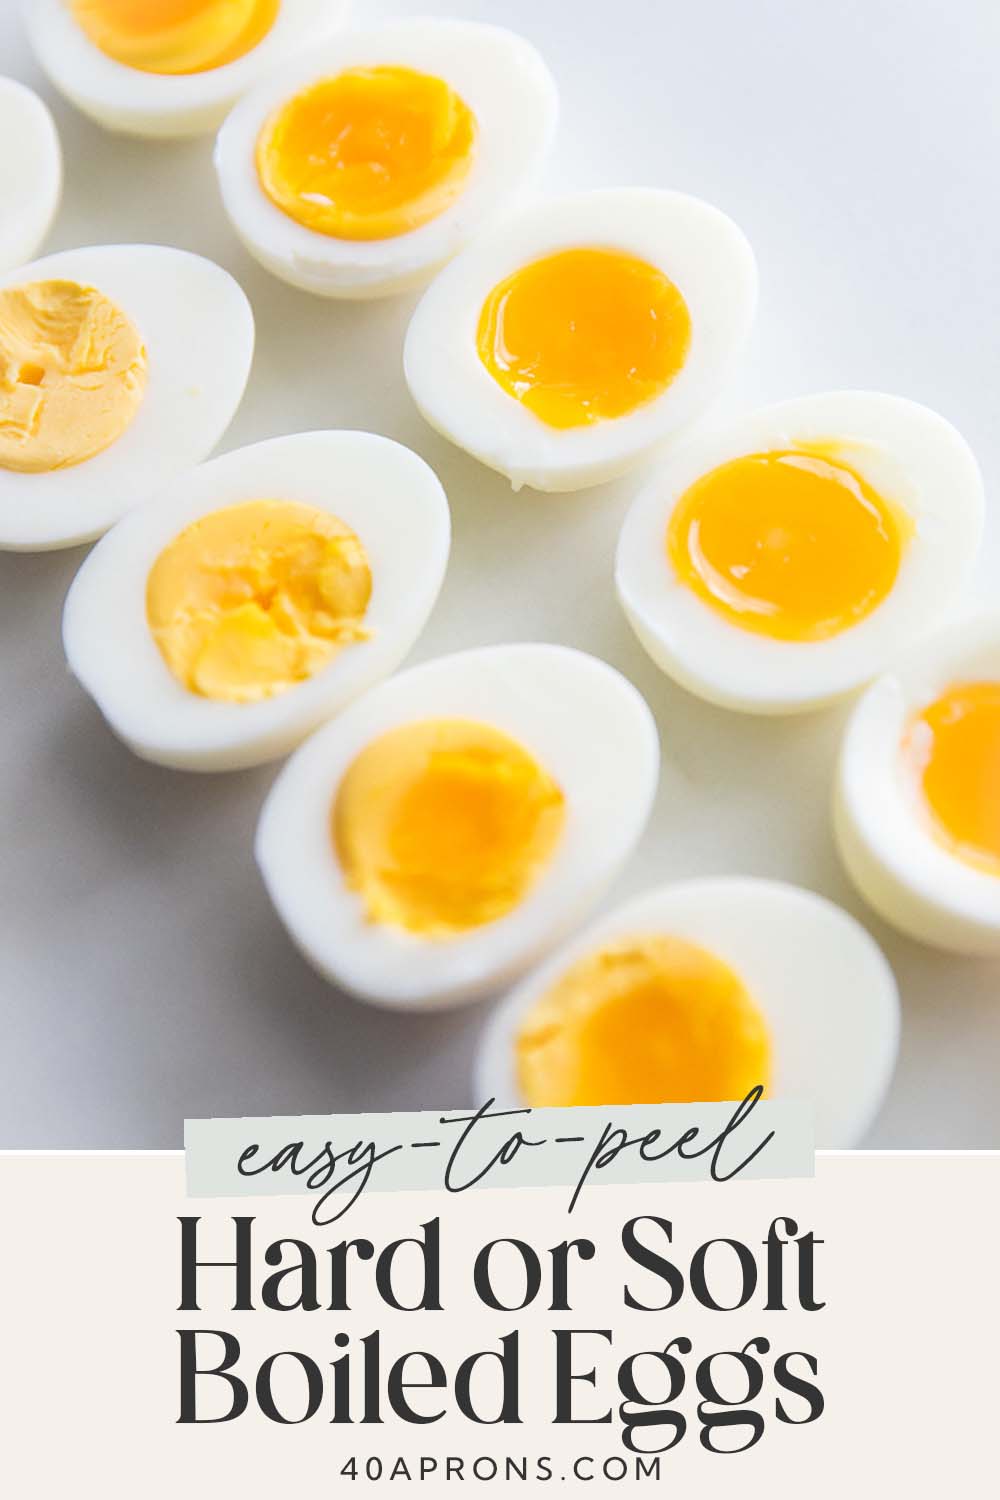
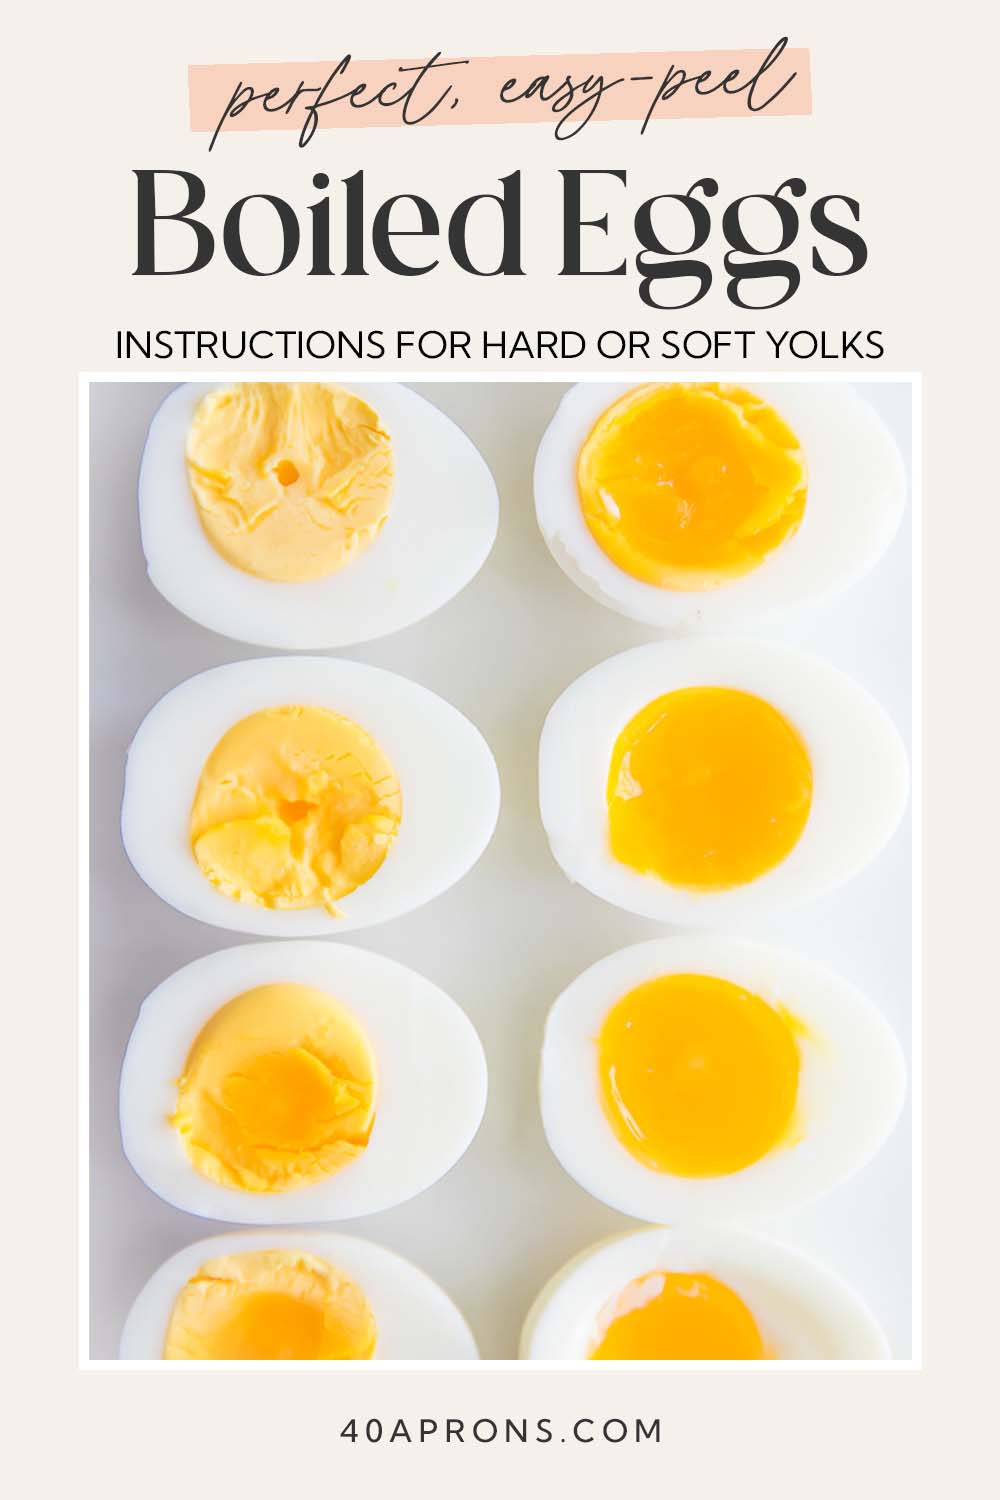

This super simple method creates the most perfect boiled eggs that are SO easy to peel. From soft-boiled to creamy hard-boiled and everything in between, this article is all you need for perfect boiled eggs every time. Ideal for deviled eggs and Easter eggs.
What I Love About This Method
Look. I’m not ashamed to admit it. For years, I was boiling eggs ALL wrong. Don’t hate me, but you probably are, too.
I used to start the eggs in cold water and bring them to a boil. I also tried adding the eggs to boiling water, then removing them from the head and letting them just steep for however many minutes.
Nothing ever worked just right. Peeling them was an absolute pain, and the creaminess and doneness of the yolks always, always varied.
Sound familiar?
- It’s quick and easy and totally foolproof. You can peel a dozen boiled eggs perfectly in roughly 2 minutes.
- It produces the richest, creamiest yolks, whether you want them runny, jammy, or fully solid.
- You end up with the easiest-to-peel boiled eggs you’ll ever attempt to peel.
- The yolks never turn blue-green or sulphuric.
How Long Does it Take to Boil an Egg?
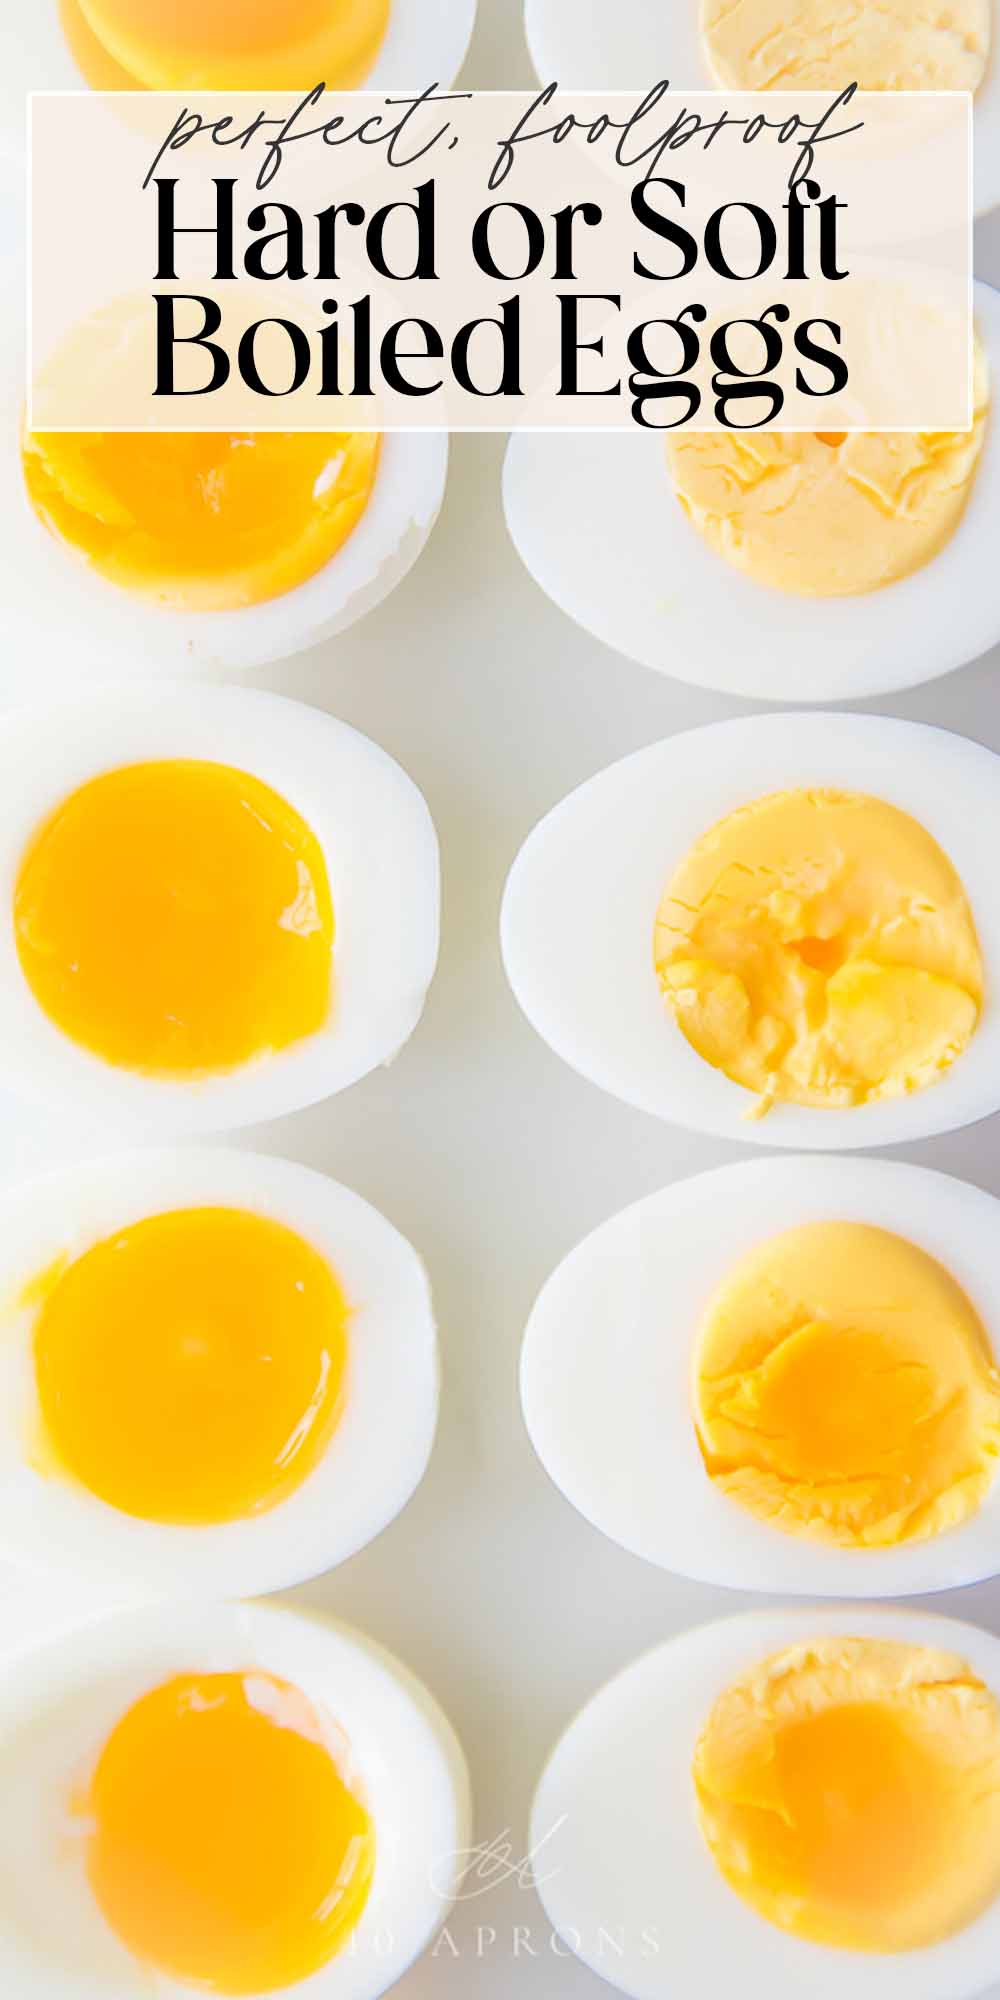
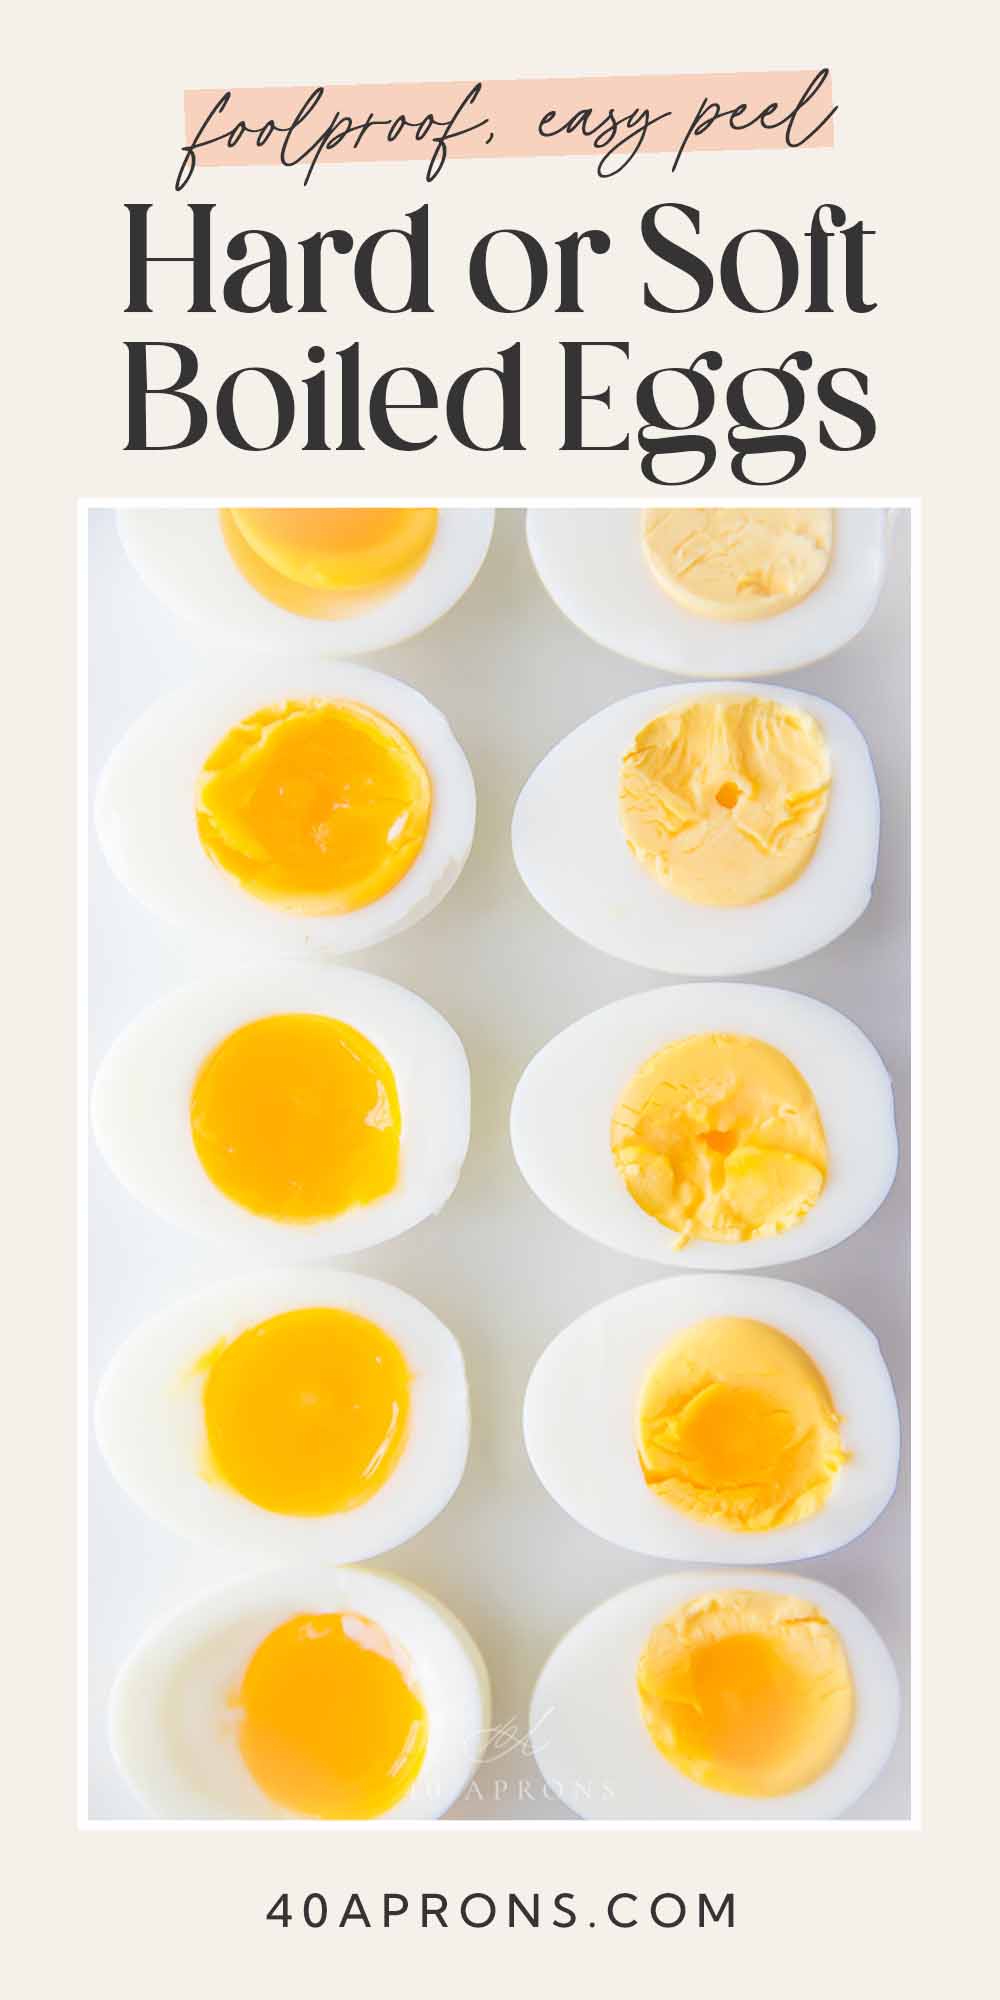
Well… that depends entirely on how you prefer your boiled eggs! Did you know there’s a whole range of results between “hard boiled” and “soft boiled”?
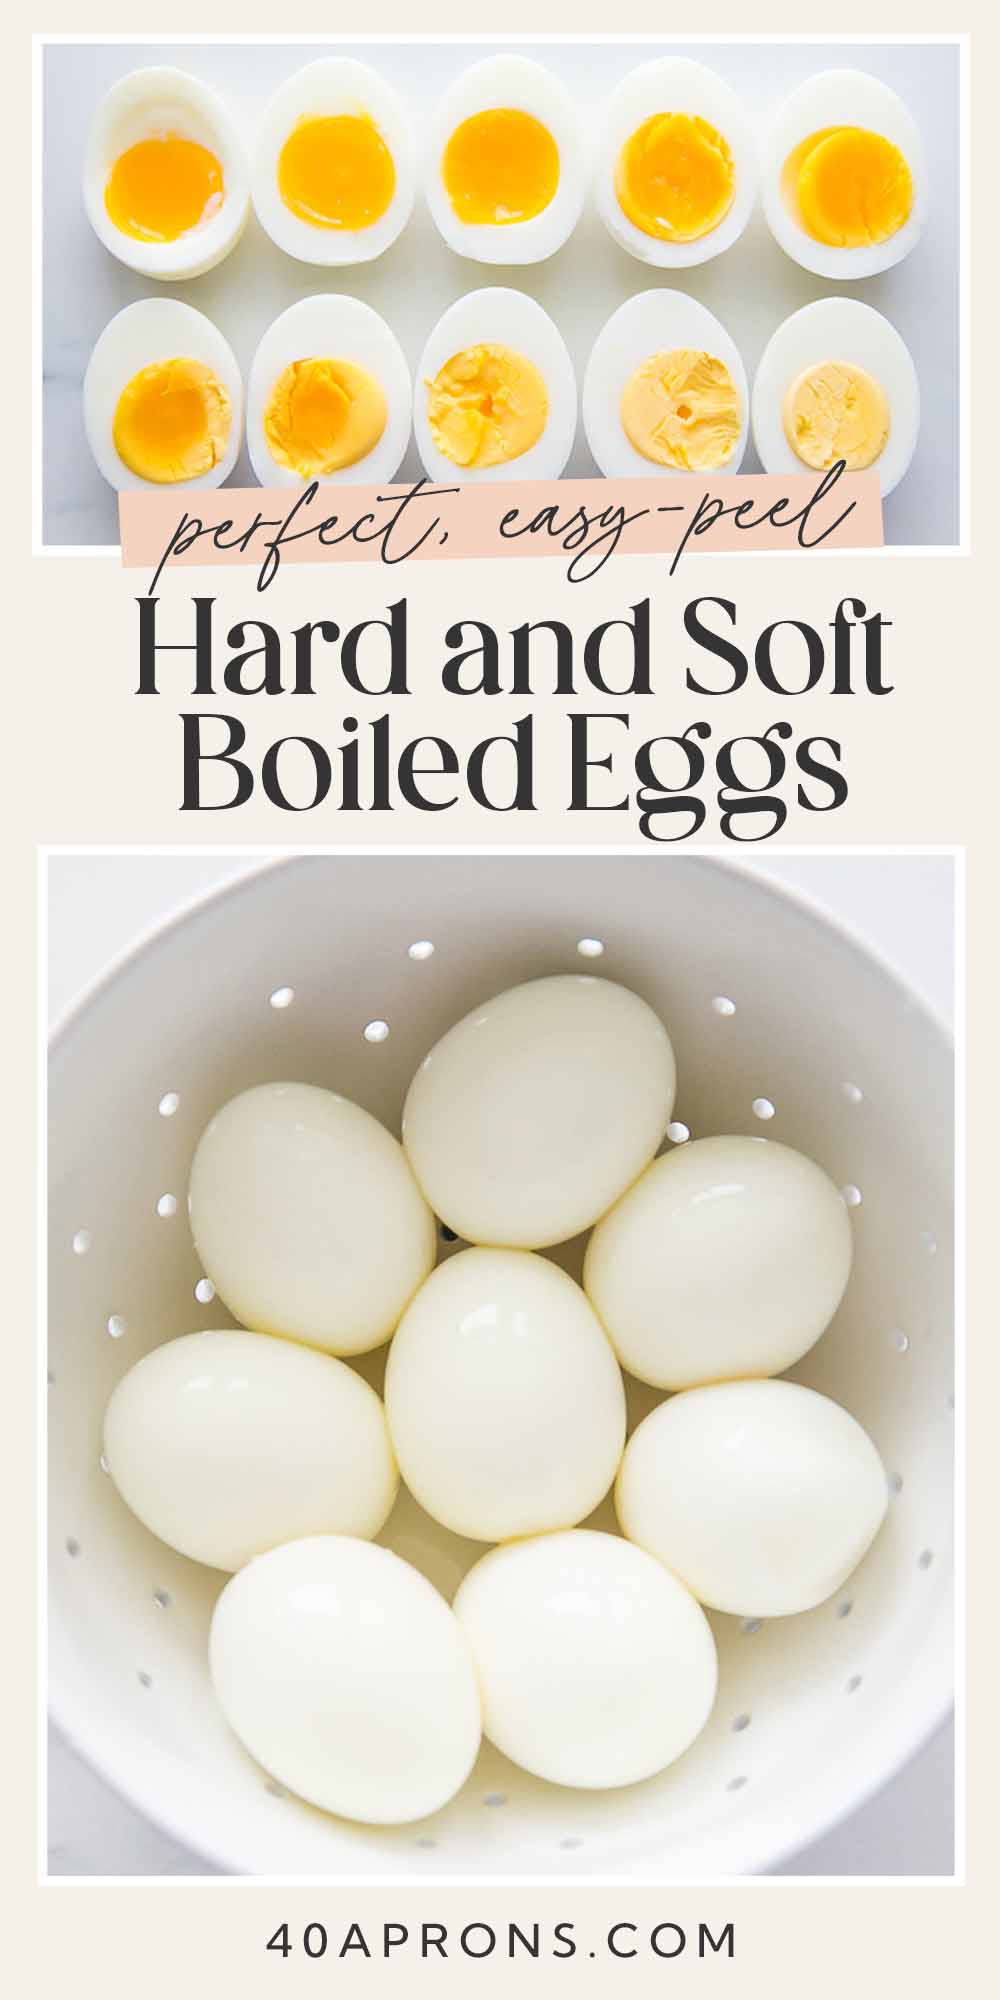
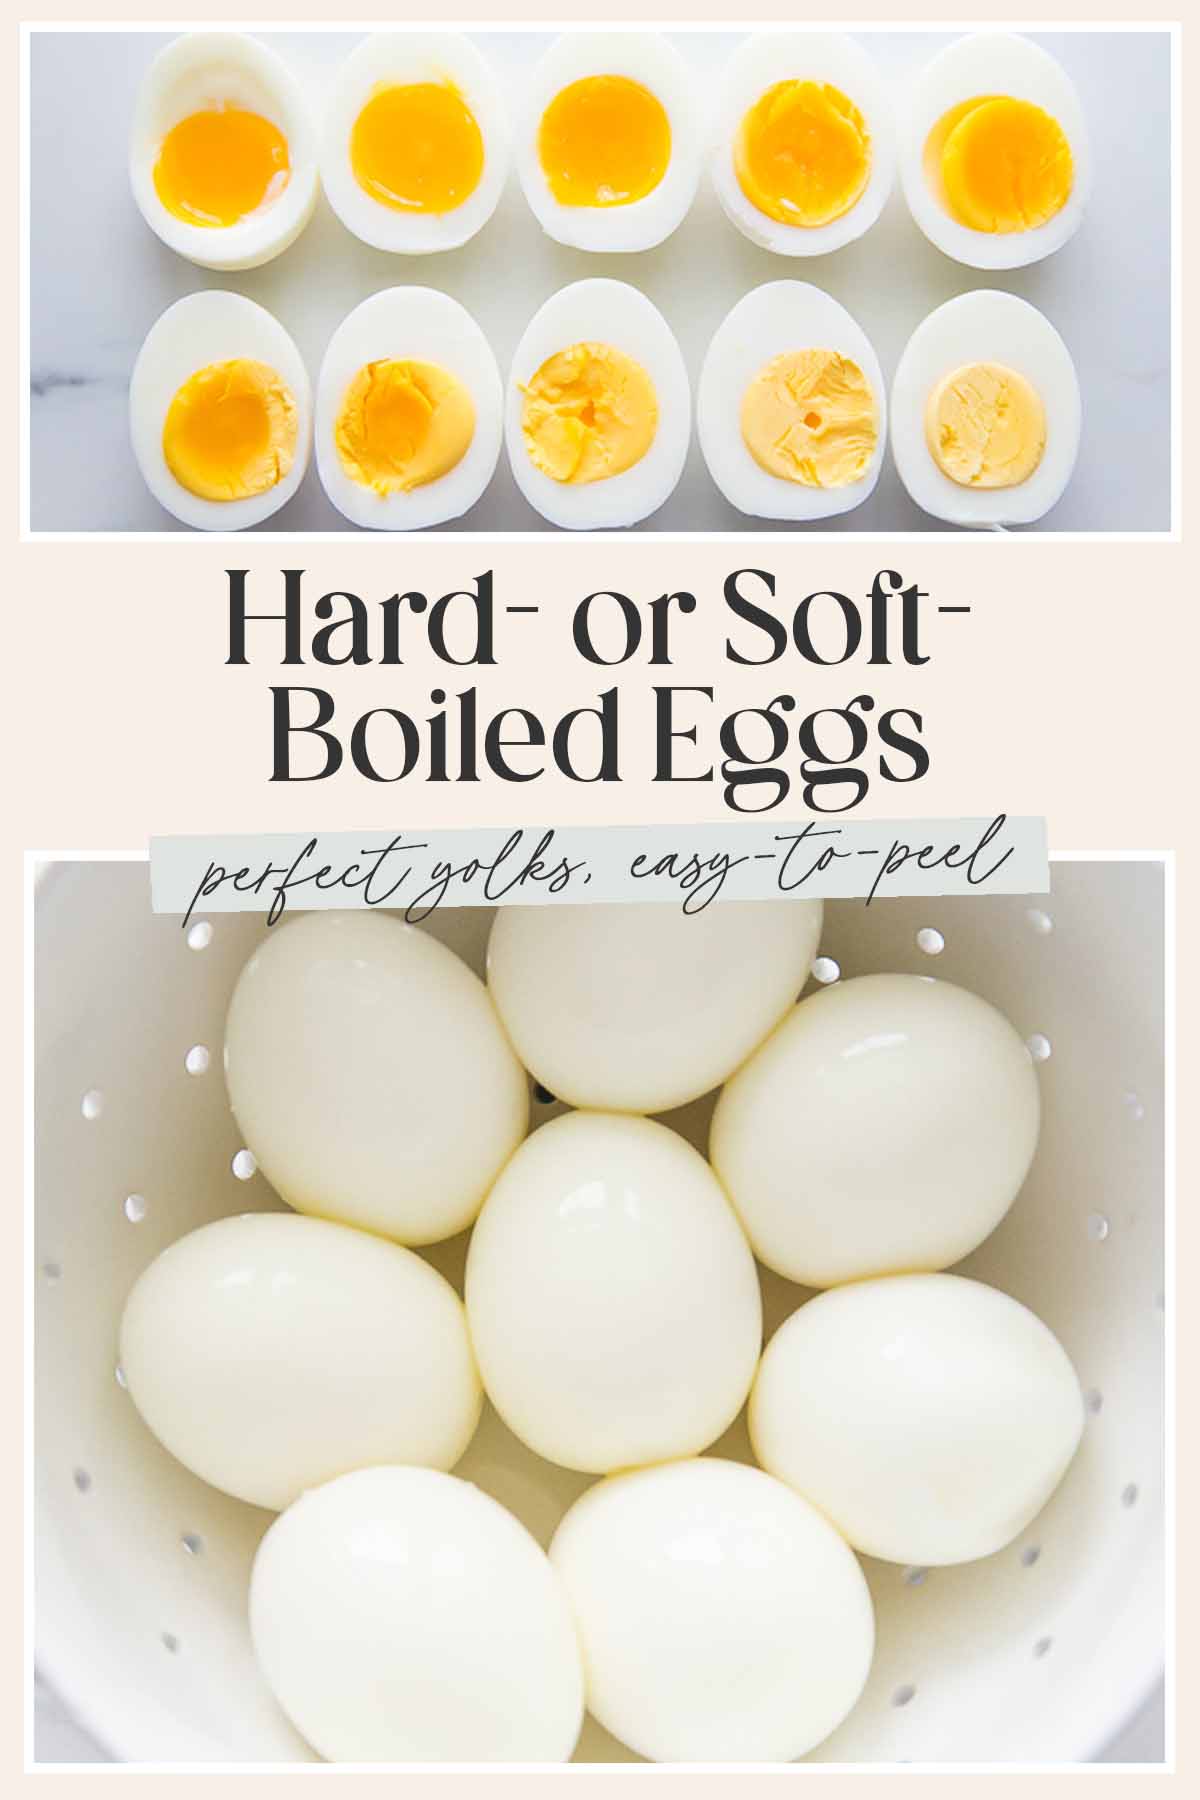
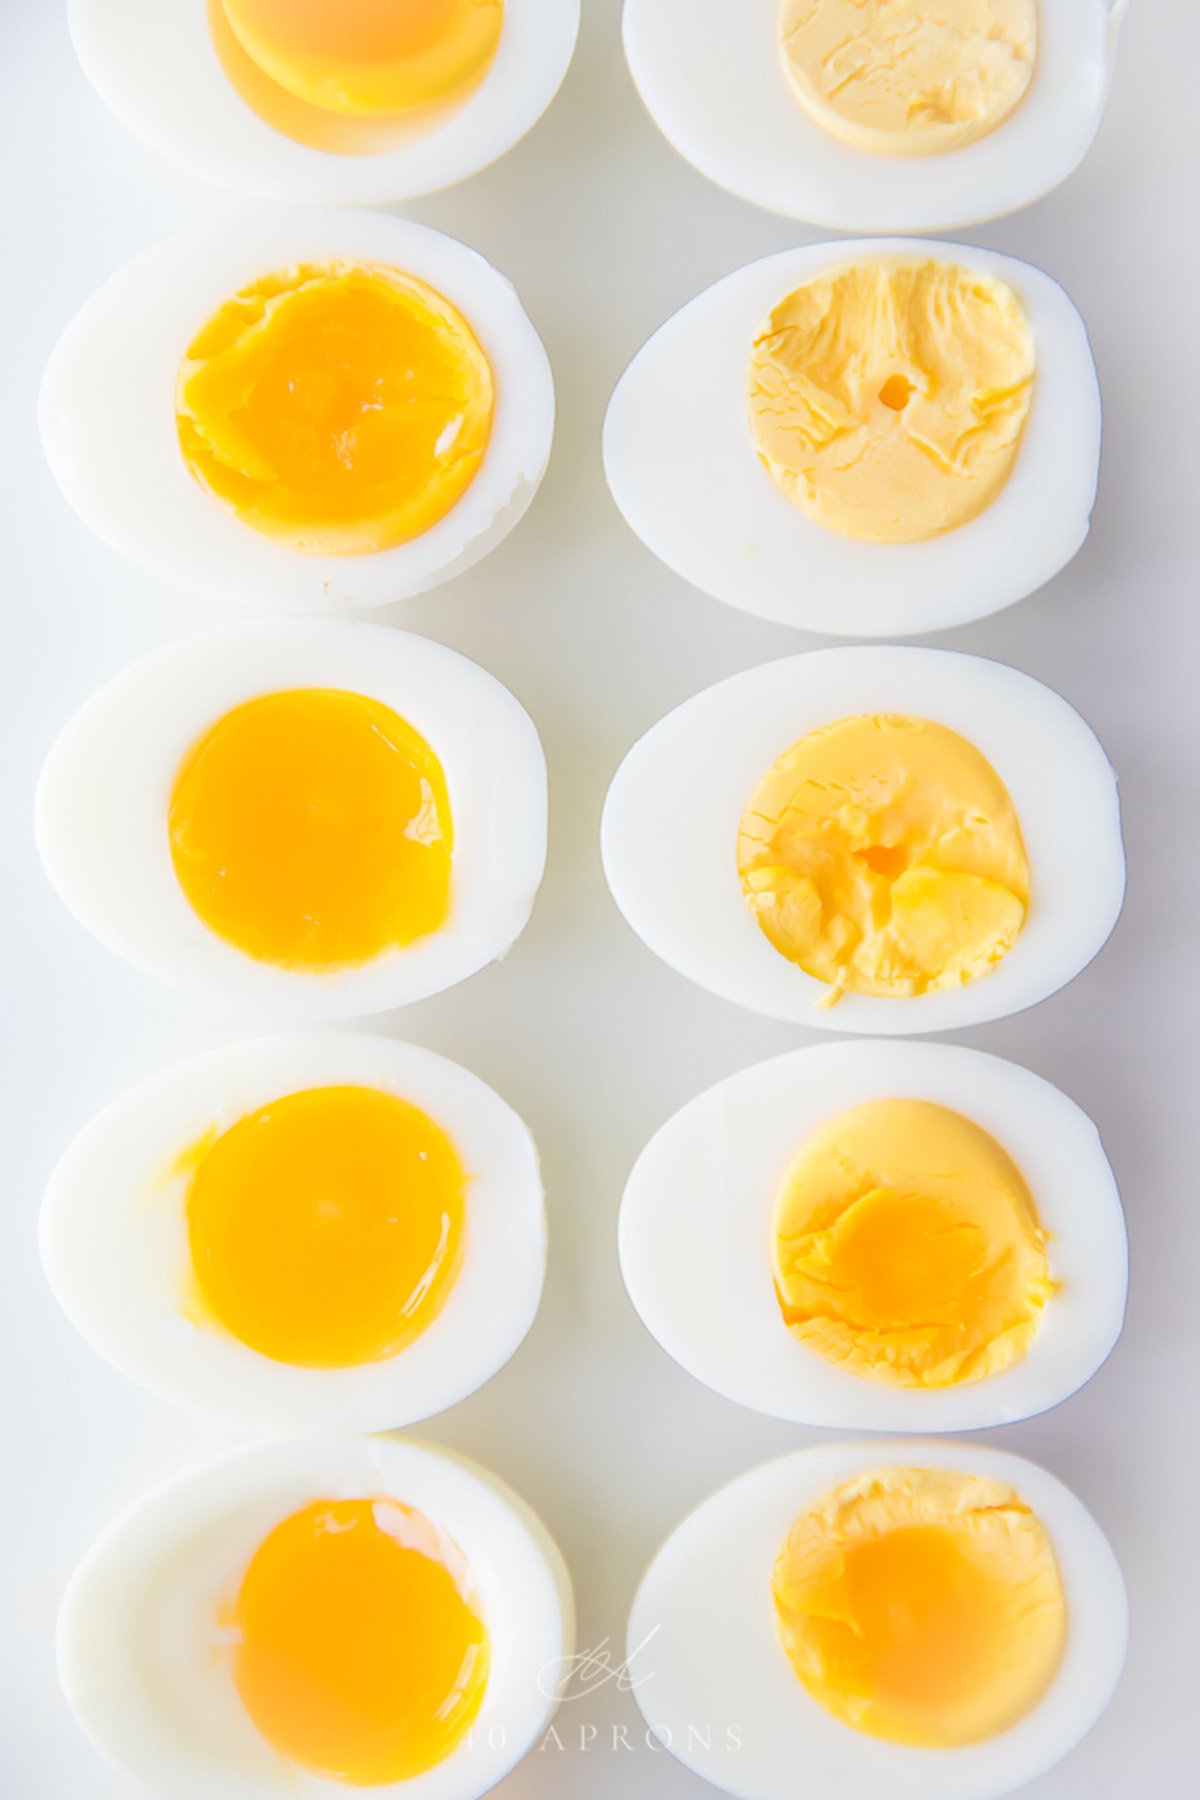
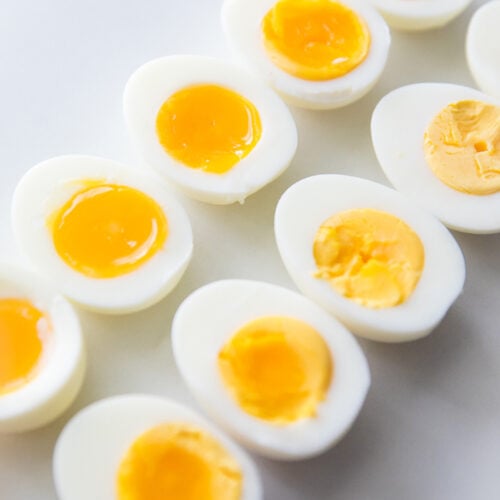
I boiled each egg with exactly the same method. The only difference was the length of time I let them boil.
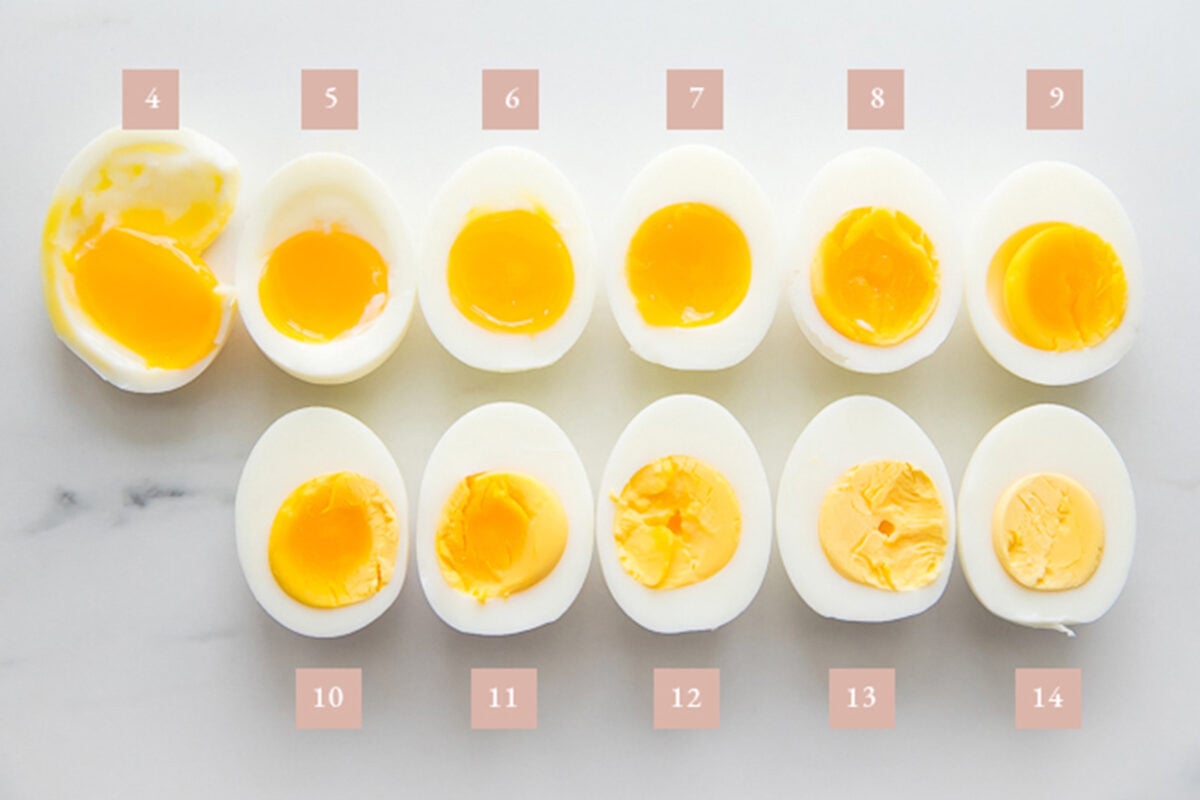
If we break down each boiled egg result, starting from the top left, we’ve got:
- 4 minutes: Mostly set white that doesn’t stay together. Super liquid yolk.
- 5 minutes: Almost entirely set white with a runny, nearly liquid yolk.
- 6 minutes: Set white and creamy, gooey yolk. Great for ramen and similar dishes.
- 7 minutes: Firm white and jammy yolks. Great for eating alone, topped with your preferred seasoning and a nice pinch of salt. My favorite!
After 7 minutes, all boiled eggs moving forward will have firm egg whites.
- 8 minutes: Half-set yolk. The edge is solid and creamy but the center is soft and almost a little jammy.
- 9 minutes: Mostly set yolk, but the center is quite moist.
- 10 minutes: The yolk is half fully set (light yellow) but the center half is still darker yellow and moist.
- 11 minutes: The yolk is mostly fully set (light yellow), but not quite. The very center is still a little moister than the rest.
- 12 minutes: The yolk is fully set and light yellow but still super creamy.
- 13 minutes: Fully set but less creamy.
- 14 minutes: Fully set but starting to get dry.
How to Use Hard- and Soft-Boiled Eggs
There are SO many uses for boiled eggs! I mean sure, you could go with the classic dash of salt, pinch of pepper. Beyond that, try…
- …dying the eggs for Easter egg hunts or holiday decorations.
- …turning them into classic deviled eggs for cookouts or potlucks.
- …halving them, then adding a sprinkle of togarashi, hot sauce, Old Bay, cajun seasoning, or smoked paprika.
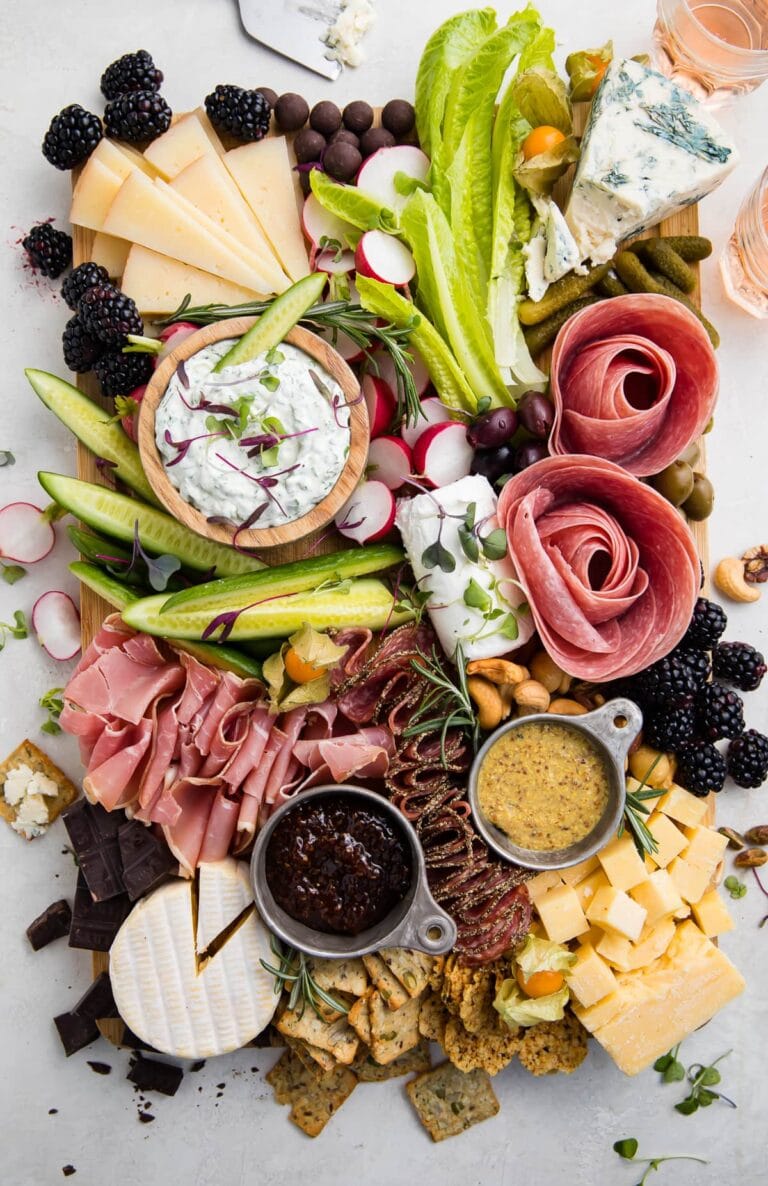
- …serving them as part of a breakfast charcuterie with bits of nice cheeses, meats, fruits, or even bagels.
- …mashing them into egg salad.
- …giving the finishing touch to a bowl of homemade ramen.
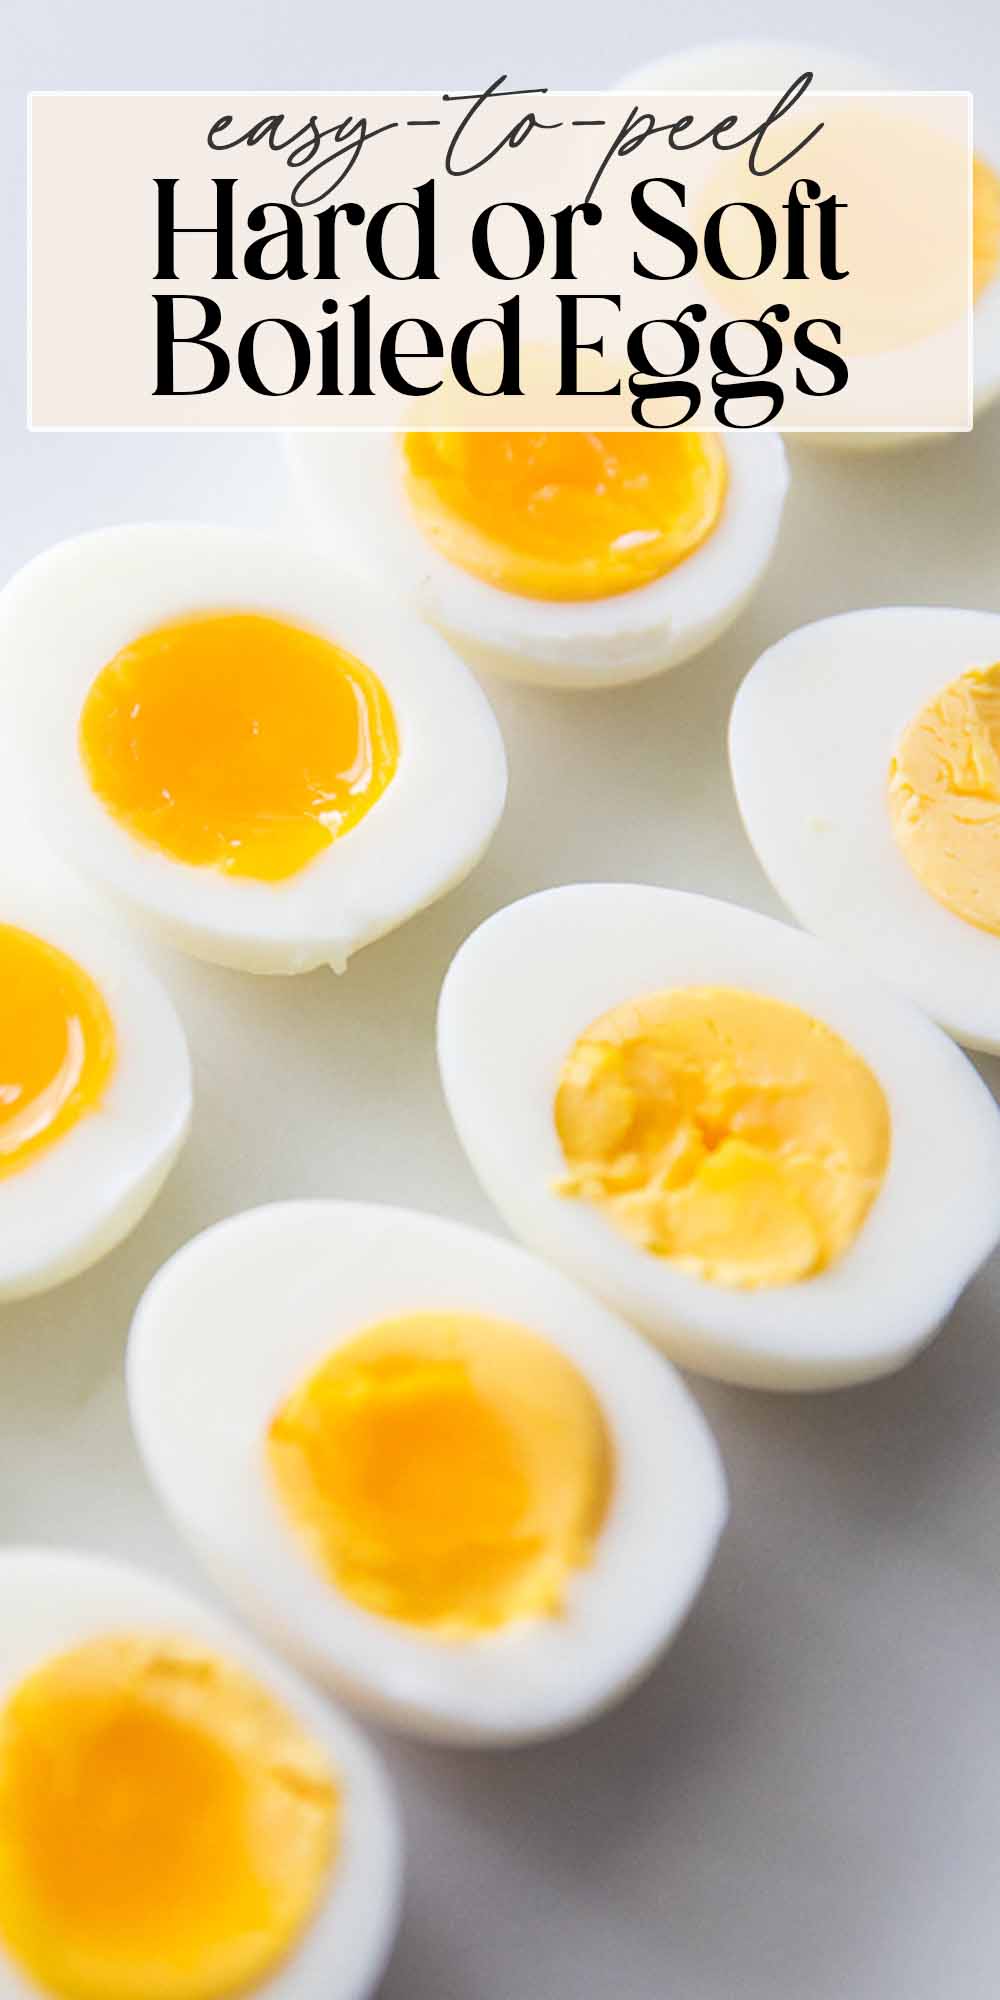
Boiling Old Eggs vs. New Eggs
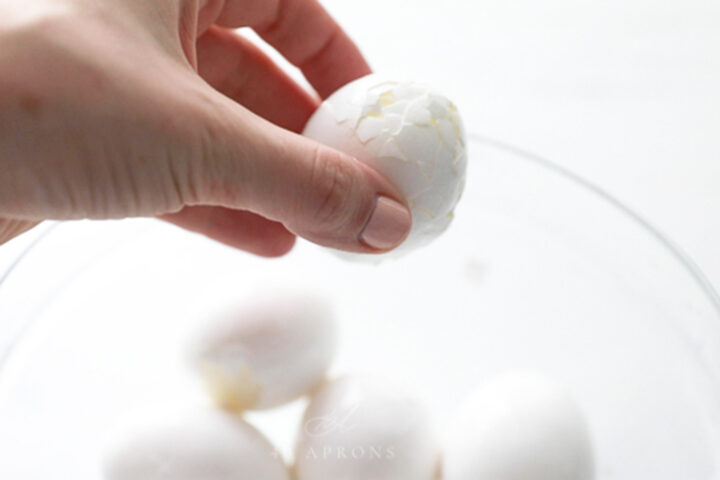
I found only a very slight difference between peeling old and new boiled eggs. I compared “brand new, purchased yesterday” eggs with eggs that were purchased at least a week before. Compare the two left eggs in the photo below.
I wouldn’t worry too much about which eggs you use, though. The remaining eggs used I used were new, conventional eggs. I had zero problems with them whatsoever.

Vinegar and Salt in the Water?
I’ll keep it simple: Yes. You should add vinegar and salt to your boiling water. Here’s why:
- Adding vinegar makes the eggs easier to peel.
- Adding salt makes the eggs coagulate if the shells crack during boiling. That means little-to-no egg white leakage!
It doesn’t really matter what kind of vinegar you use, but add about 1-2 tablespoons to your water as it warms up. Include a big few pinches of salt at the same time.
Making changes to a recipe can result in recipe failure. Any substitutions or variations listed are simple changes that I believe will work in this recipe, but results are not guaranteed.
Easy Peel Hard- and Soft-Boiled Eggs
Equipment
- Large saucepan or large pot, see Notes
- water
- Slotted spoon or handheld strainer
- timer
- Large bowl filled with cold water and ice
- running water optional
Ingredients
- 1-2 tablespoons vinegar any type
- ½ teaspoon salt
- 12 large eggs
Instructions
- Fill saucepan with enough water that waterline sits approximately 1-inch above top of eggs.
- Place saucepan on stovetop over high heat and bring water to boil. Once water begins to boil, stir in vinegar and salt. Bring water back to rolling boil.
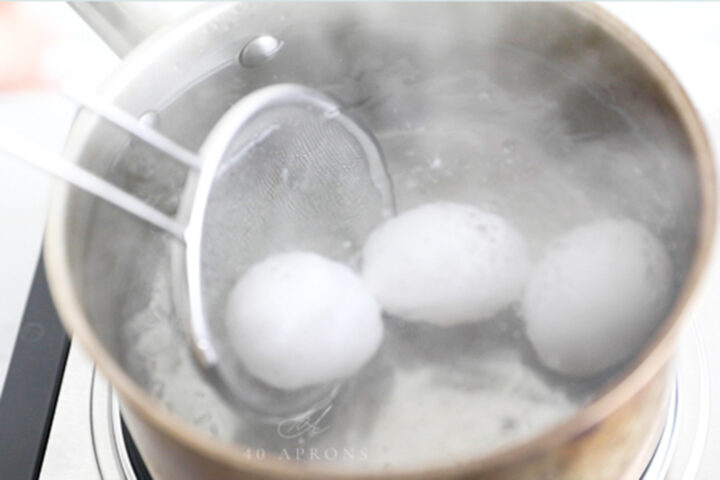
- Working quickly but carefully, use slotted spoon to gently lower 2 to 3 eggs into water, being careful not to crack eggs on bottom of saucepan. Continue until all eggs have been submerged, then start timer. See Notes below for time recommendations.
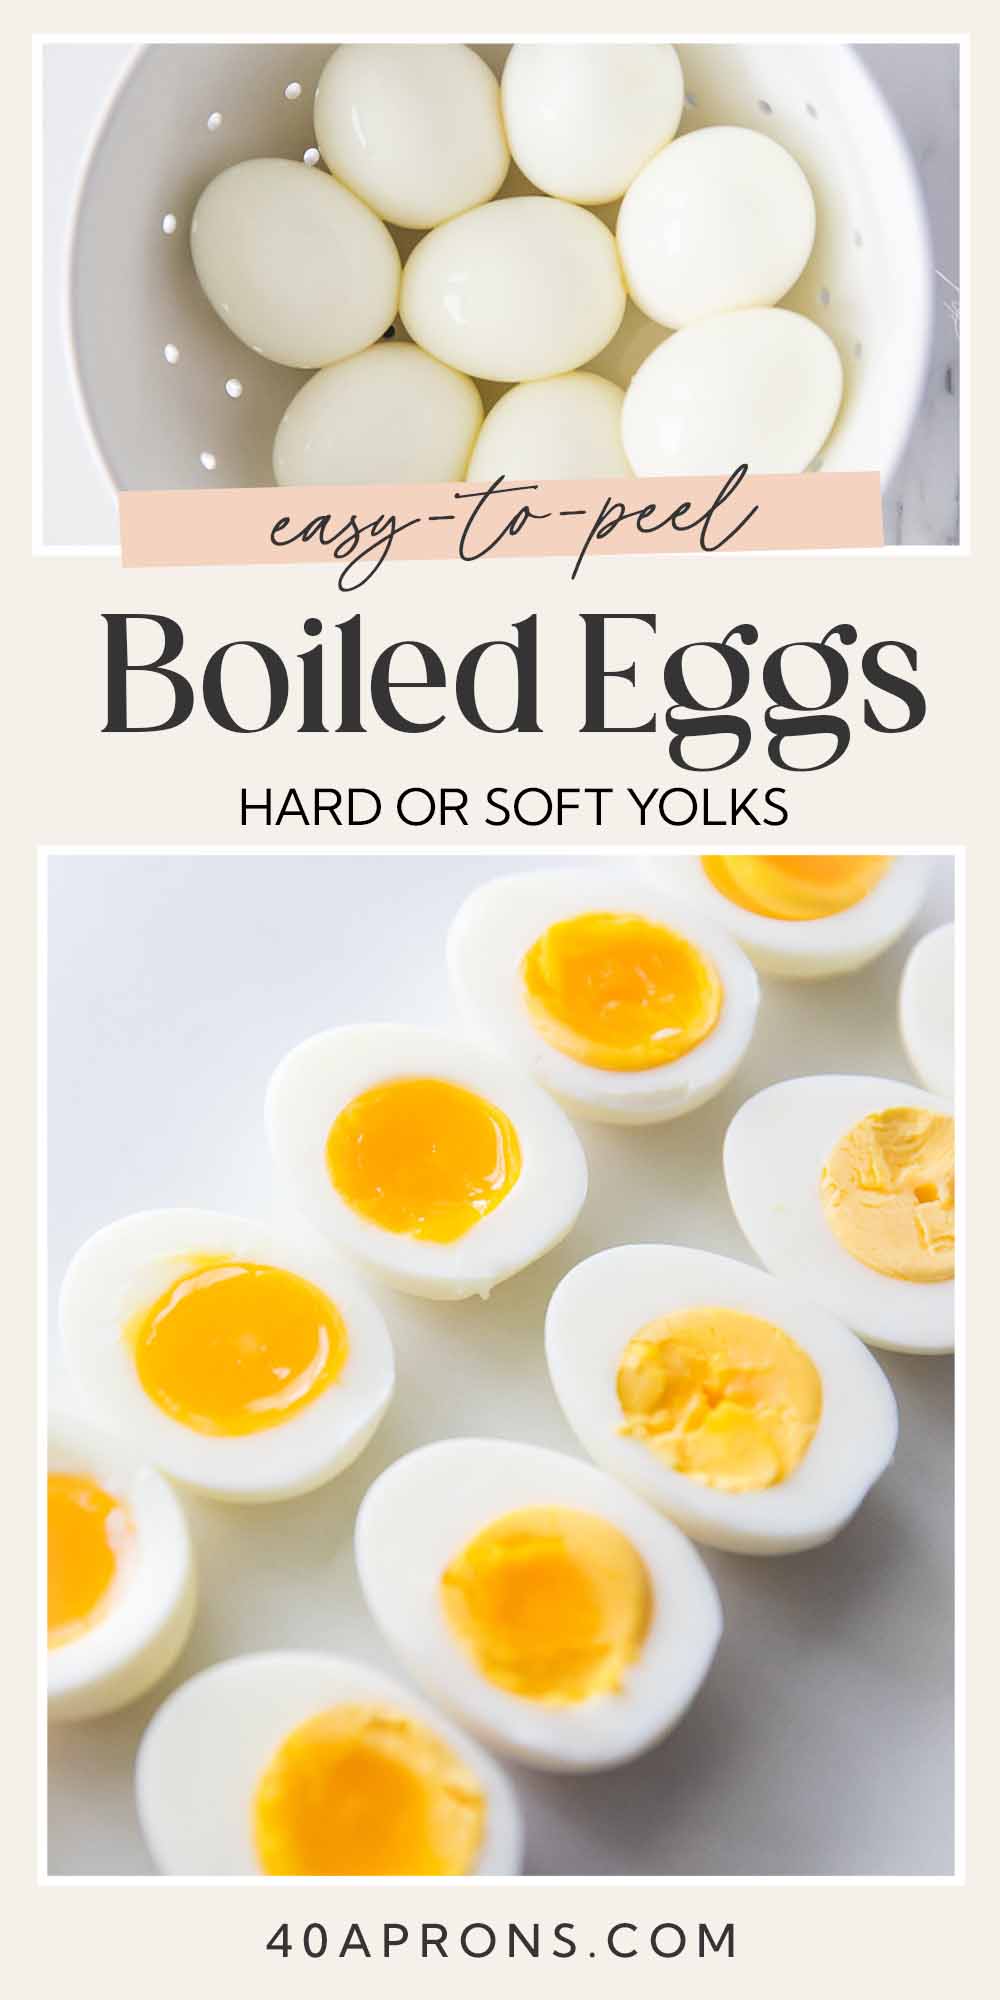
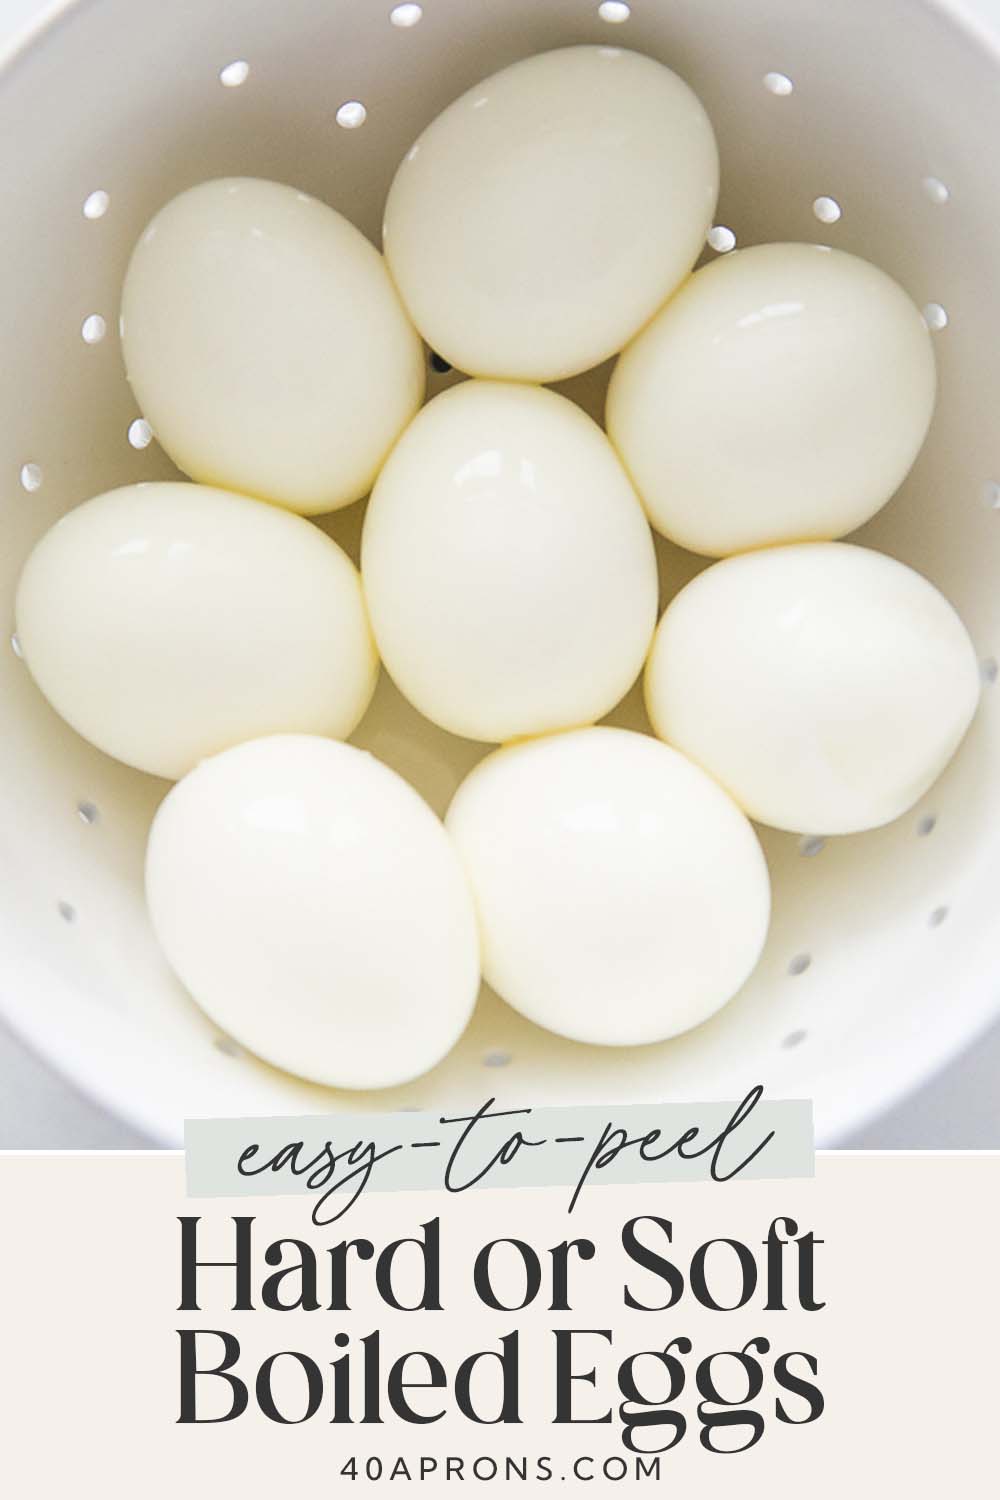
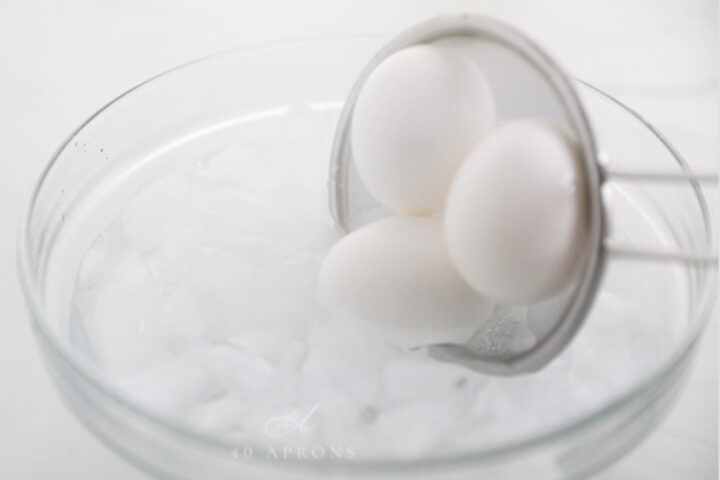
- When timer is finished, quickly but carefully transfer boiled eggs from saucepan directly into large bowl filled with ice bath. Let eggs sit in ice bath at least 5 minutes.
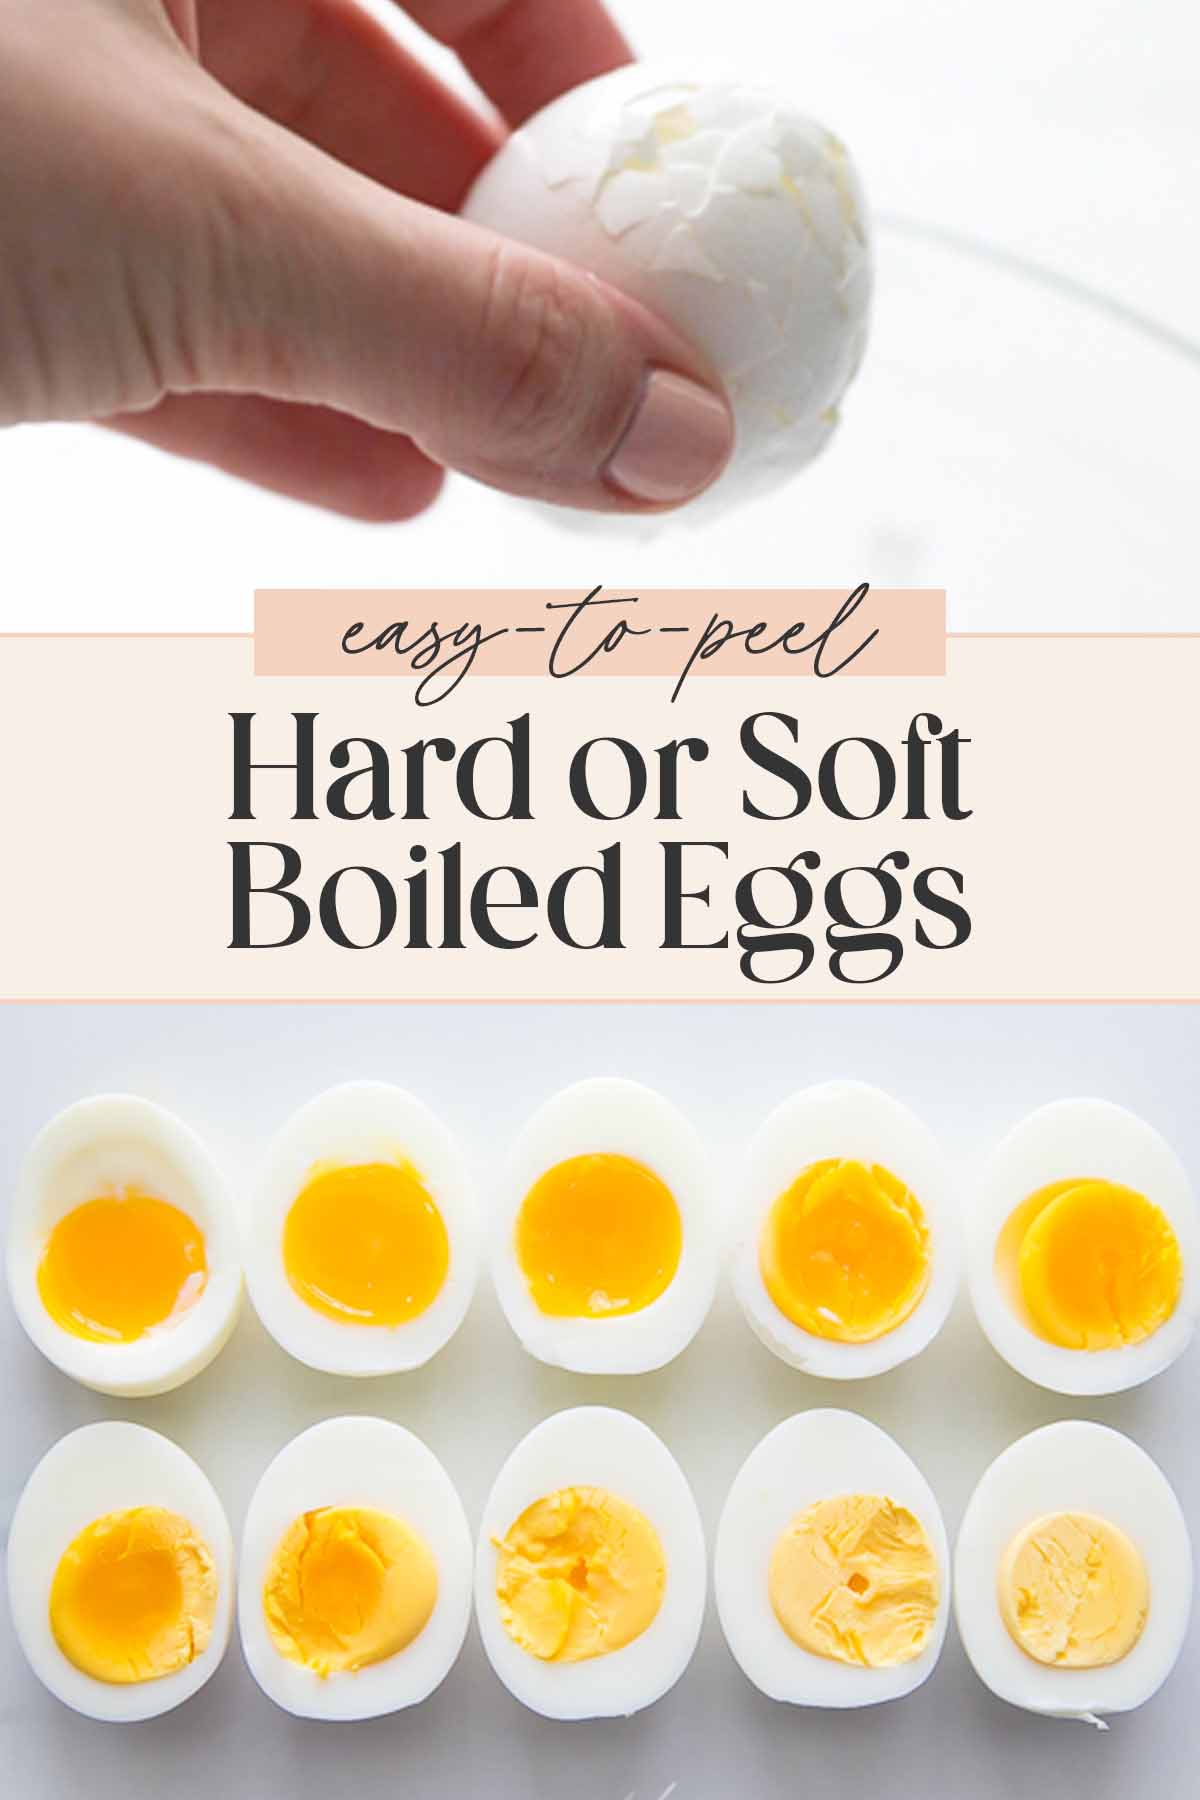
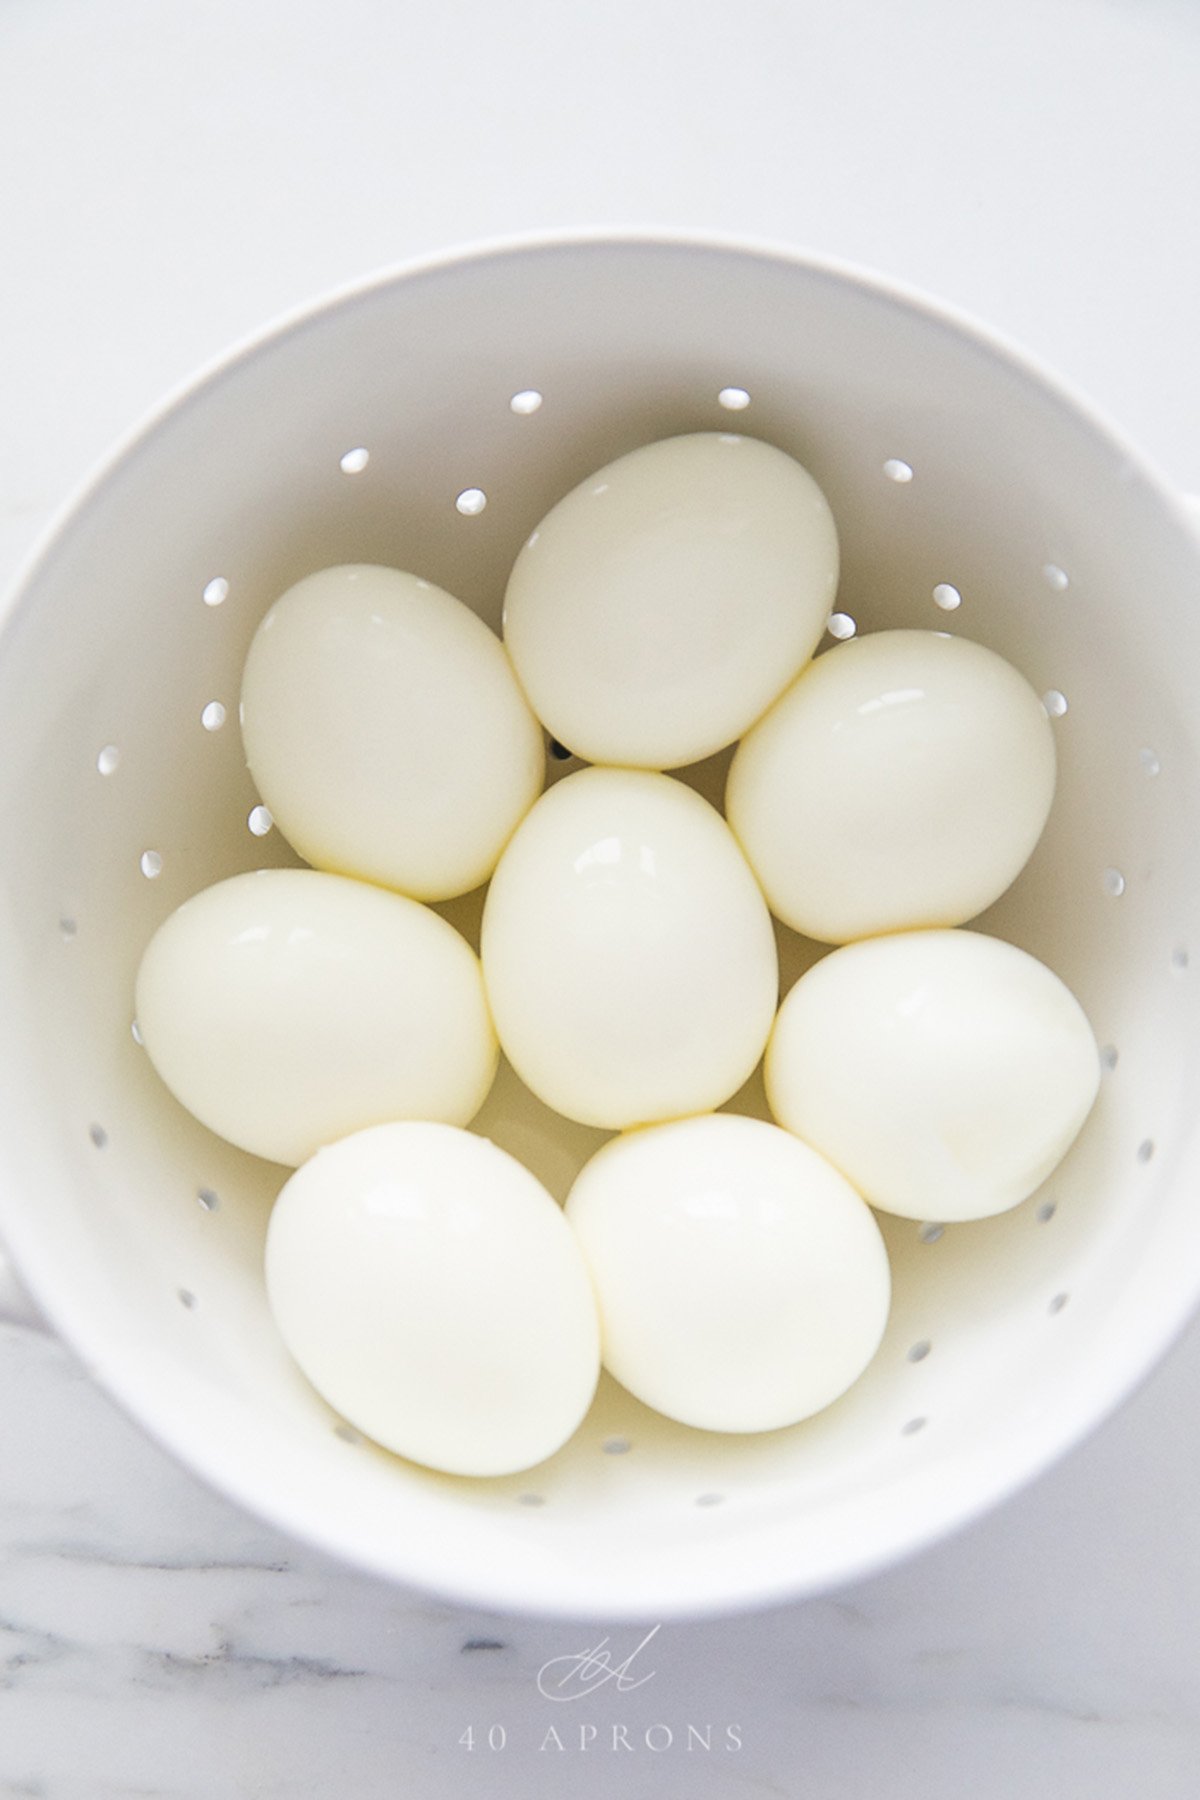
- Once eggs are chilled, drain water and remaining ice from bowl. Vigorously shake and toss eggs in bowl to crack shells. Continue until shells feel like mesh and have no large, intact pieces remaining.
- Gently peel away and discard egg shells. If needed, hold eggs under running water while peeling, using force of water to remove any small pieces of shell.
- Serve peeled boiled eggs immediately, or place eggs in airtight container and refrigerate until ready to serve.
Video
- Saucepan: Use a saucepan (or pot) that’s large enough to hold all of the eggs in one even layer, without the eggs being stacked. Work in batches as needed if you don’t have a large enough saucepan or if you need to boil a lot of eggs.
- Storage: Boiled eggs (peeled or unpeeled) can be refrigerated in an airtight container up to 1 week.
Boil Times & Egg Consistency
- 4 minutes: Mostly set egg white & super liquid yolk. Egg whites will not hold together.
- 5 minutes: Almost entirely set egg whites & runny, nearly-liquid yolk.
- 6 minutes: Set egg whites. Creamy, gooey yolk. Great for ramen and similar dishes.
- 7 minutes: Firm egg whites with jammy yolks. Great for eating alone, topped with your preferred seasoning and a nice pinch of salt.
- 8 minutes: Half-set yolk with solid, creamy edges and soft, slightly-jammy center.
- 9 minutes: Mostly set yolk with very moist center.
- 10 minutes: Majority of yolk is almost fully set and light yellow. Center of yolk is darker yellow and still moist.
- 11 minutes: Almost all of yolk is fully set and light yellow. Very center of yolk is more moist than rest of yolk.
- 12 minutes: The ideal hard-boiled egg! Fully set, light yellow yolk that’s super creamy.
- 13 minutes: Fully set yolk that’s less creamy.
- 14 minutes: Fully set yolk that’s starting to become dry and crumbly. I don’t recommend boiling eggs more than 14 minutes.
Approximate Information for One Serving
Nutrition Disclaimers
Number of total servings shown is approximate. Actual number of servings will depend on your preferred portion sizes.
Nutritional values shown are general guidelines and reflect information for 1 serving using the ingredients listed, not including any optional ingredients. Actual macros may vary slightly depending on specific brands and types of ingredients used.
To determine the weight of one serving, prepare the recipe as instructed. Weigh the finished recipe, then divide the weight of the finished recipe (not including the weight of the container the food is in) by the desired number of servings. Result will be the weight of one serving.
Did You Make This Recipe?
Tag @40aprons on Instagram and be sure to leave a review on the blog post!
Frequently Asked Questions
1) Add the eggs to boiling water – not cool water. 2) Immediately transfer them to an ice bath after boiling. 3) Shake them in the ice bath to start cracking the shells.
Definitely! Adding the eggs to already-boiling water makes it much easier to time how long they cook. That helps ensure you get your desired yolk consistency!
Let them cool first and peeling them will be much easier! As they cool, the boiled egg whites contract and pull away from the membrane on the inside of the shell.
Anywhere from 4 minutes to 14 minutes, depending on the texture and consistency you want. 4 minutes gives you barely-set egg whites and a super liquidy yolk. 7 minutes produces a jammy yolk and firm whites. At 12 minutes, the yolks are fully set but still super creamy.
Our Favorite Egg Recipes
Never Miss A Meal!
New Recipes Straight To Your Inbox
A curated selection of our most recent recipes, delivered straight to your inbox once a week.


I have used this method multiple times and each time I’m amazed how well it works. Flawless smooth hard boiled eggs. Thank you SO much for sharing this!
We’re so glad it’s been a repeat favorite! 😊
Very helpful. Thoroughly considered. Thank you!
We’re so glad it was helpful! Thanks for sharing, Reg!
How about the egg at room temperature of getting out of the refrigerator? Does that affect the cooking time. I am big fan of 6 or 7 mins. Always dilemma is peeling. Such and nightmare.
Say for 1 dozen eggs would 2 Tablespoon of vinegar would work? Or do we need more and I know you had mentioned salt – few pinches – Would that equal to 1 Tablespoon or 2 Tablespoon
This is written for 1 dozen eggs, so yes, 1-2 tablespoons of vinegar would work! As for the salt, ½ teaspoon of salt for 1 dozen eggs would be plenty, you definitely shouldn’t need as much as 1-2 tablespoons.
You didn’t answer the question whether the eggs are room temperature or straight from the refrigerator
Hi Jena! Room temperature eggs will cook slightly faster, while eggs straight from the refrigerator will take a minute or so longer. I hope this helps!
Two questions. Lid on after eggs are added? Back to boil after eggs are added, or simmer?
Even though I’ve tried this twice now and cracked at least two eggs right away, this is still a life-saver. I’ve tried everything to make eggs the right consistency and easy to peel every week for over two years now, and it’s been one of the most frustrating and time-consuming jobs ever!
This setup makes it almost fun and almost easy. Hugs!
Now just have to figure out how to keep eggs intact until they’re ready.
Two to three dozen each time, and we don’t have a large enough pot for all one layer (21 eggs max on the bottom), and I am definitely not spending two or three times the time! So that’s a drawback, but nothing to do with your excellent instructions!
Thanks so much!
Hi, Birdie! Thank you for such a kind review! Hopefully we can get the process dialed in so you get a full batch of perfect eggs every time! Are you getting cracked eggs when you add them to the pot?
No lid needed, and no, you don’t need to bring the water back to a rolling boil after adding the eggs! As soon as you’ve got your eggs added, start your timer.
Worked well except for my trepidation about time after adding 14 eggs… water was no longer boiling so I thought maybe it needs more minutes. ?? I wanted runny 7 min eggs but… I got much more done. SO my conclusion is start time after all eggs are added?
Start time when 1st egg is added regardless of boiling status after doz eggs are added?
Hi, Becky! Yes, that’s right – you’ll start the timer as soon as all the eggs are in the boiling water (see Step 2 of the recipe instructions). You’ll need to move carefully but quickly so the first eggs added aren’t in the water much longer than the last eggs added, which can be tricky if you’re boiling a large batch. The water will stop visibly boiling whenever you add anything to it, but don’t worry about that – as long as it came to a rolling boil before you added the eggs, it will still be hot enough to boil them like it should.
This is the Best Method I have ever tried. They really do peel so easily, makes it a cinch for easter.
Thanks for this recipie.
Thanks for sharing this great feedback, Marni! Glad it worked out for you!
Paper towel layers in the pot will keep the eggs from cracking as well.