
This Post May Contain Affiliate Links. Please Read Our Disclosure Policy.
If you’re not exactly sure how to boil corn on the cob, you’ve probably got a bunch of questions. Things like, how long do you boil corn? Should you salt the water first? How do you know when boiled corn on the cob is ready? We’re answering all these questions and more so you can cook perfectly juicy, sweet, tender corn on the cob confidently every time!
🌽 What Makes This Method So Good
- If you’re a fan of corn, then knowing how to boil corn on the cob is absolutely crucial! OK, maybe not crucial, but still. It’s one basic cooking method you’ll definitely want in your arsenal.
- Boiled corn sounds pretty simple, and it is! But not in a “bland, boring, boiled vegetable” sort of way. The simple method for how to boil corn on the cob brings out the natural juiciness and sweetness of the corn kernels in maybe the easiest, fastest way possible. This is quite possibly the best way to cook fresh corn on the cob.
🌽 How to Choose Fresh Corn
There are a few things to look for when it comes to choosing the very best corn on the cob to boil, but it’s not complicated at all! Whatever you do, don’t unwrap the husks to check the corn inside. It’s not necessary, and it leaves the corn in less-than-desirable condition for other shoppers.
Instead, look for these clues on the outside of the cornhusks to get an idea of what’s inside.
- The cornhusks should be bright green and a little wet. If they’re yellowed or dry, or if they have any brown spots or little holes, keep looking for better options.
- The silks should be light brown and feel a little sticky. Avoid any ears of corn with dark brown or black silks, or silks that feel really dry or brittle.
- Gently squeeze the corn, working your way from one end to the other, to make sure the kernels feel firm and plump. If you feel any soft spots, or if you find any areas that are missing kernels, put that one back and try again.
🌽 How to Shuck Fresh Corn
Part of the process of how to boil corn on the cob perfectly is to shuck the fresh corn. There’s really not any prep for this recipe besides that, and thankfully, even that is super easy.
- Grab the cornhusk with both hands at the top of the ear, where the silks are, and separate the husk into two halves. The halves don’t need to be equal, so don’t worry if they’re different sizes.
- In one swift motion, pull both halves of the cornhusk down to the bottom of the ear, revealing the corn inside. If the husk doesn’t pull down cleanly, that’s totally fine. Just go back and pull down any pieces that didn’t cooperate.
- Pull the husk all the way off the bottom of the ear of corn. Snap off the leaves and silks at the base of the corn and throw them away.
- Go back and clean up the corn on the cob, picking off any pieces of silks that may’ve gotten left behind. It’s ok if you can’t get them all, but try to get as much as you can.
If you have ears of corn that are particularly stubborn and difficult to shuck, you can microwave them for 1-2 minutes to loosen them up a little.
👩🏼🍳 Chef’s Tips
- For the best, most tender corn, use plain, unsalted water. Boiling corn in salted water can actually make the kernels tough and hard. You’ll have much tastier corn on the cob if you boil it in unsalted water, then add salt to taste before serving.
- Corn starts to lose its sweetness as soon as it’s picked. If you’re not sure how to boil older corn on the cob to get good results, don’t worry. This method still works! You can add 2-3 tablespoons of sugar to the water before bringing it to a boil. The added sugar can help revive a little of that sweet flavor. Also, depending on the age of the corn, you may need to boil it for 10 minutes or more, as opposed to 3-5 minutes for fresh corn.
- One other important thing to remember when it comes to how to boil corn on the cob perfectly – keep a close eye on it! Corn cooks pretty quickly, which means it’s easy to overcook. Overcooked corn can be gummy, mushy, or chewy, and can lose a lot of flavor.
🧈 Flavor Variations
Now that you know how to boil corn on the cob, the next step is deciding how to dress up your corn on the cob! Believe it or not, corn is surprisingly versatile. A few of my favorite flavors & toppings include…
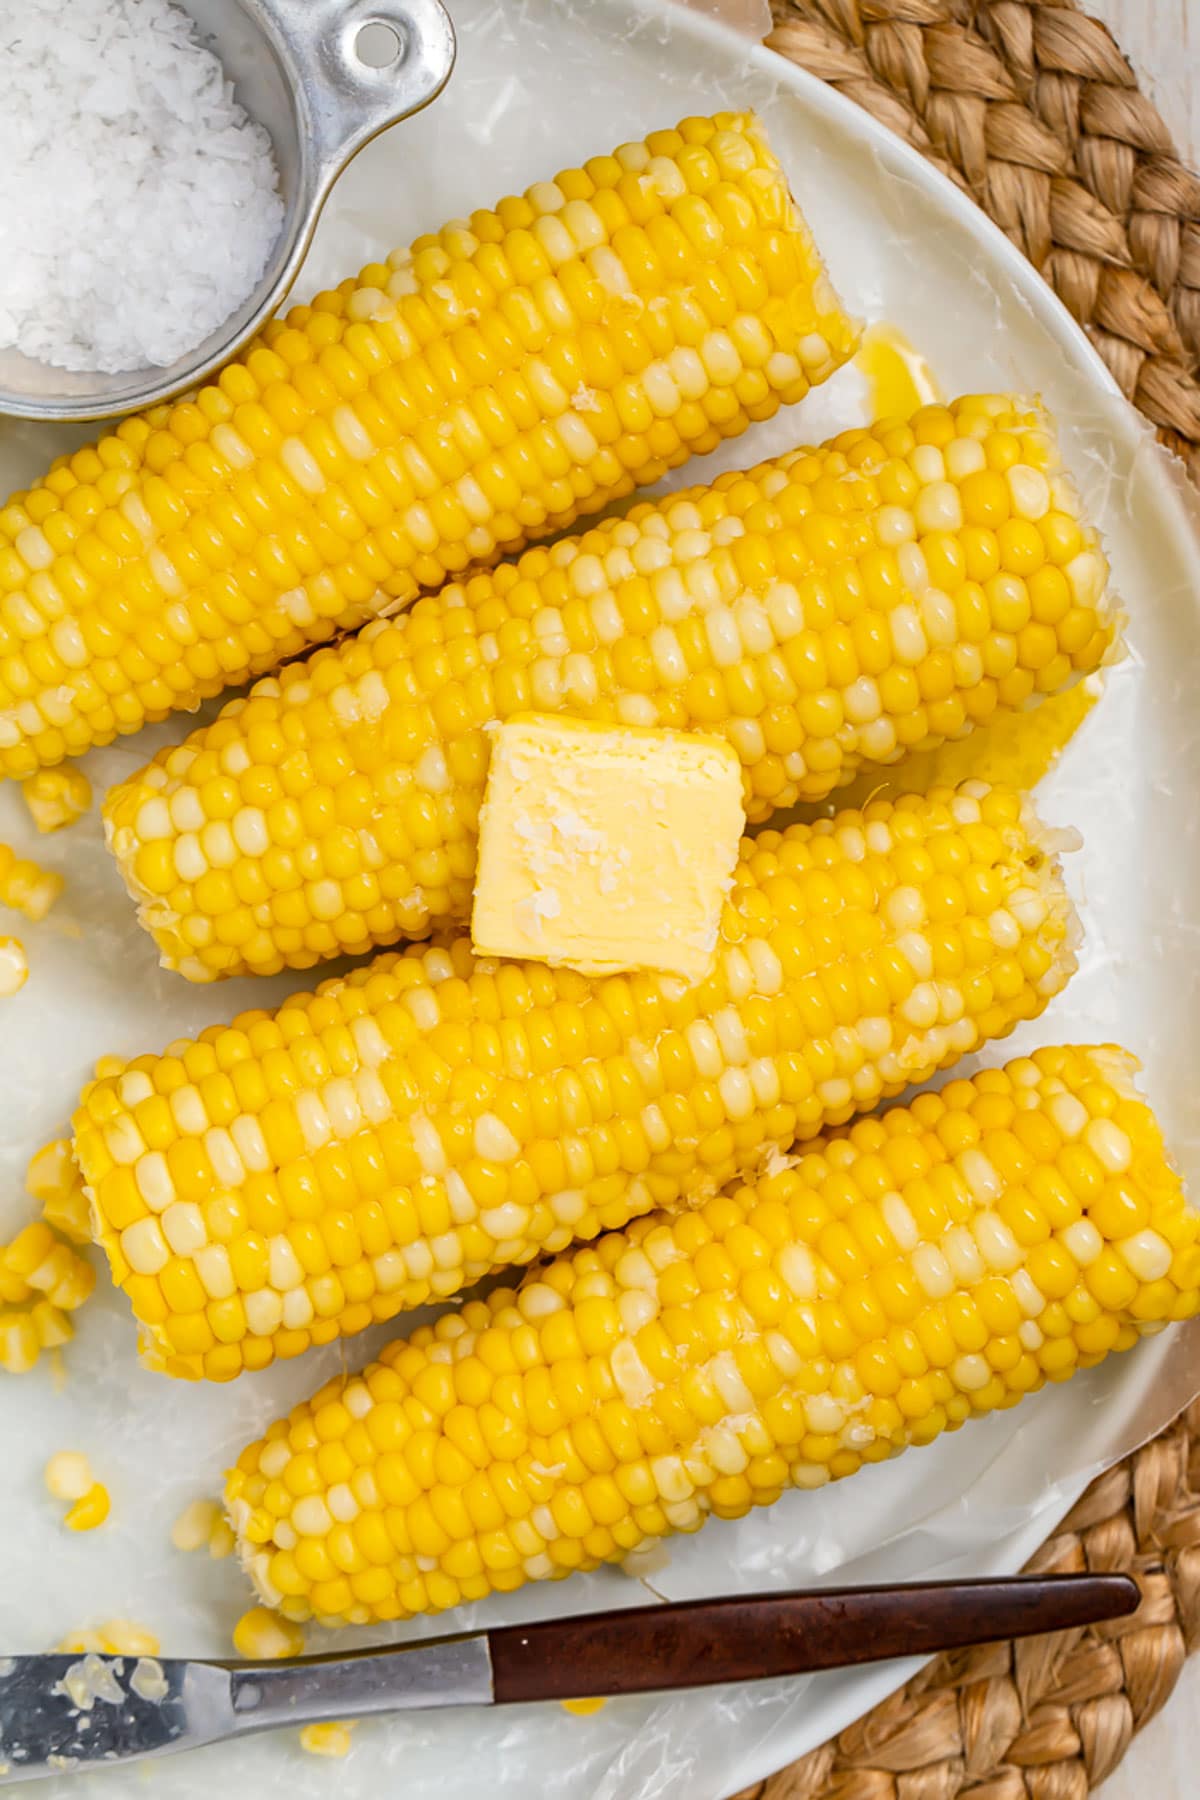
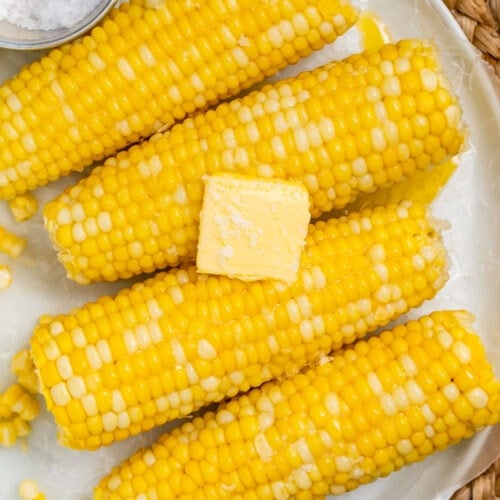
- Melted butter, salt, and pepper
- A mixture of butter, mayo, cotija cheese, chili powder, and lime juice for a little Mexican street corn flair
- Melted butter mixed with Tajin
- Melted butter mixed with a squeeze of lime juice and a little chipotle powder or chili powder
- A dash of hot sauce or sriracha
- Melted butter mixed with ranch seasoning
- Diced crispy bacon
- Mayo mixed with finely minced garlic and powdered parmesan cheese
- A pat of garlic herb compound butter
💬 Frequently Asked Questions
Fresh corn only needs to boil for roughly 3-5 minutes! For older ears of corn, you may need to boil them as long as 10-12 minutes.
You’ll know the corn is ready when it’s a rich, bright yellow color and the kernels are nice and tender.
You’ll find a lot of conflicting info on this one, but generally, no. You shouldn’t salt the water when you boil corn. Boiling corn in salted water can dehydrate the corn and make it tough.
Another source of corn-y conflict. Some people suggest boiling corn in milk, or in water with a little milk added, to bring out the sweetness in the corn and to make the corn buttery. I don’t find it necessary, though.

🌽 Some of Our Favorite Corn Recipes
- Mexican Corn Dip
- Savory Southern Cornbread Stuffing
- Air Fryer Corn on the Cob
- Corn Relish
- Creamy Corn Soup
- Elote (Mexican Street Corn)
- Cornbread Salad
- Instant Pot Corn on the Cob with a Honey Butter Glaze
- Corn Souffle
- Shrimp and Corn Soup
- Popcorn Soup
How to Boil Corn on the Cob
Equipment
- Large pot with lid
- Tongs
- Large plate
- Basting Brush optional
Ingredients
For the Corn
- cold water enough to fill pot
- 4 6-inch ears fresh corn on the cob shucked
Serving Suggestions (All Optional)
- melted butter or compound butter
- salt
- freshly ground black pepper
Instructions
- Fill large pot with cold water, leaving enough room in pot to add ears of corn without overflowing. Place pot of unsalted water on stovetop over medium-high heat. Cover pot with lid and bring water to boil.
- Once water begins to boil rapidly, remove lid and carefully place 4 6-inch ears fresh corn on the cob in boiling water. Recover pot with lid.
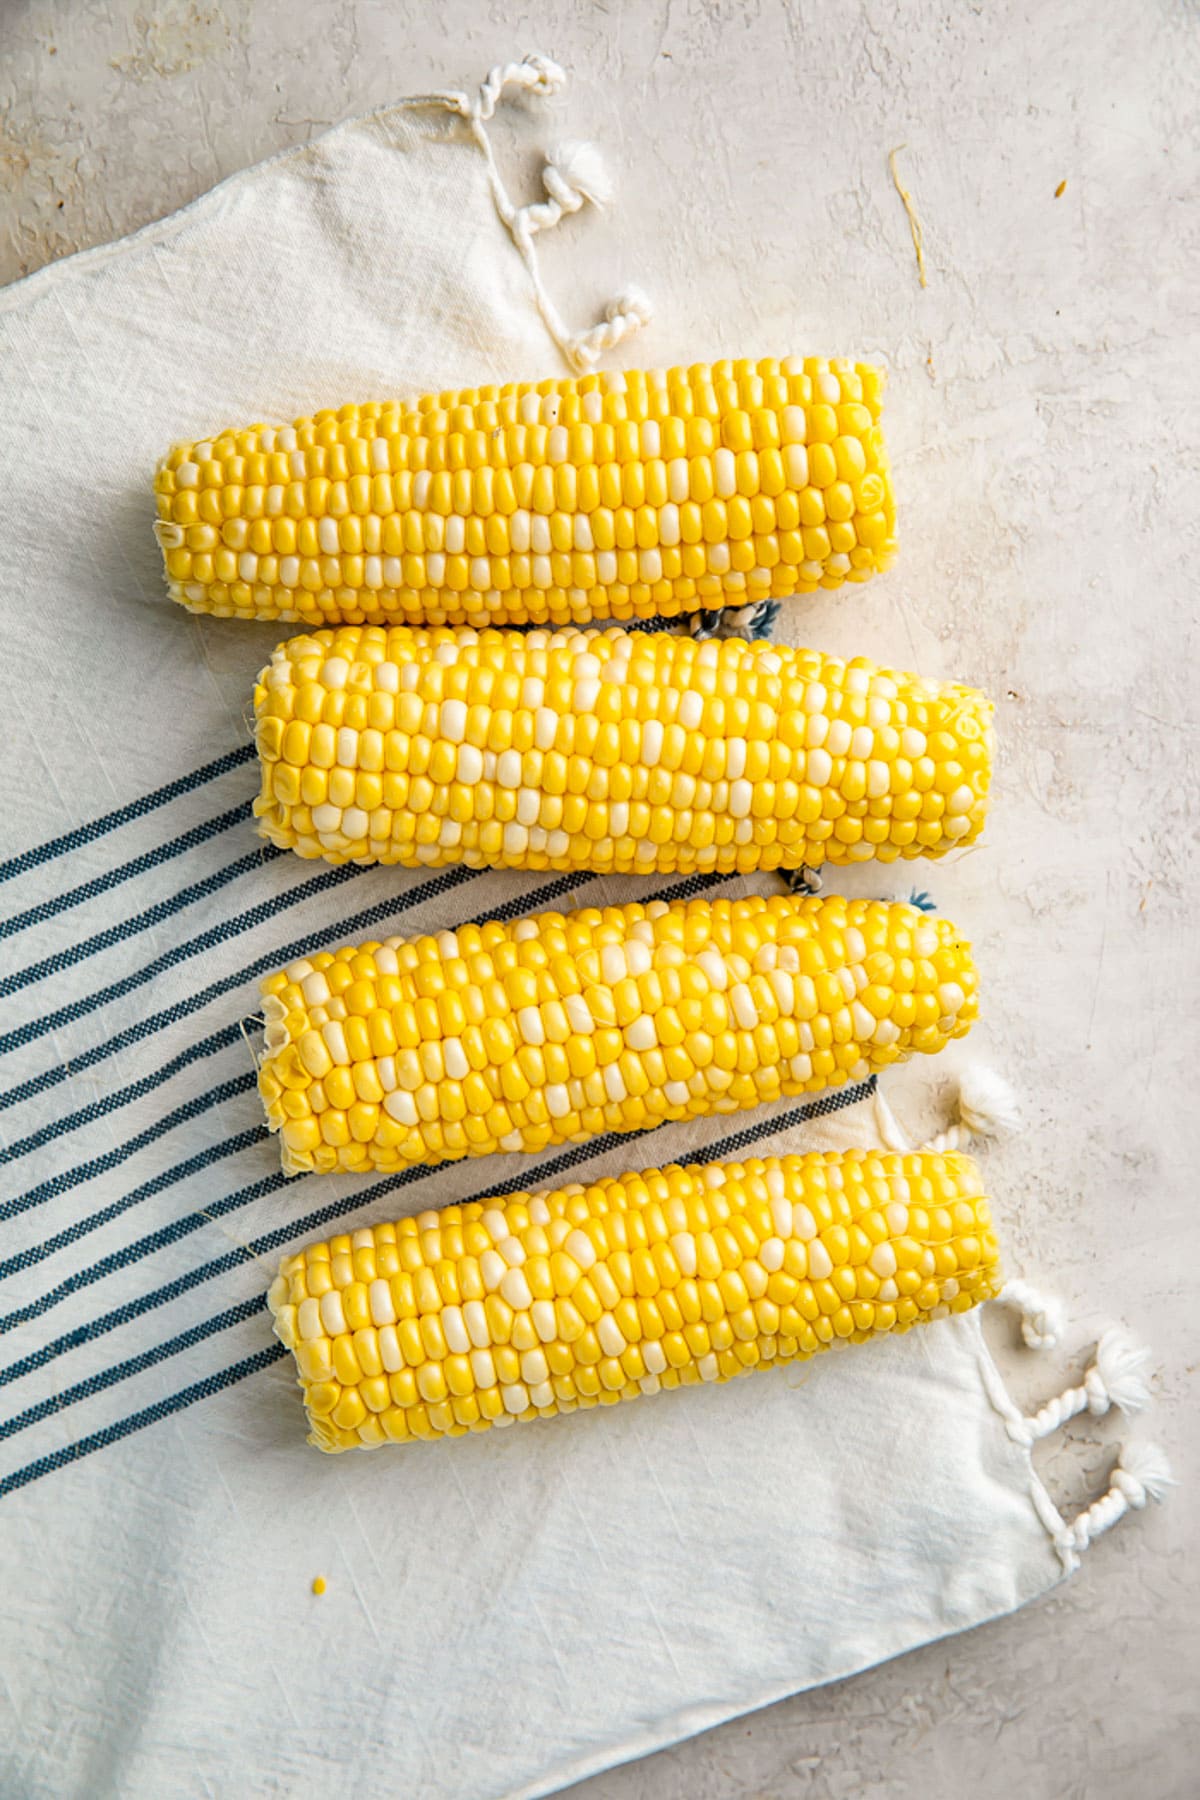
- Boil corn 3 to 5 minutes, until corn is bright, rich yellow.
- When desired color is achieved, carefully transfer corn from pot to large plate. If desired, brush ears of corn with melted butter and season with salt and freshly ground black pepper to taste. Serve warm.
- Salting the water can make the corn kernels tough or hard. It’s better to boil the corn in unsalted water, then add salt for flavor after.
- Depending on the type of corn you’re using, you can add 2-3 tablespoons of sugar to the water before adding the corn. Adding sugar to the water can elevate the natural sweetness of the corn. It’s not necessary for some types of corn, though, like sweetcorn.
- Overcooked corn can become gummy, mushy, or chewy, and can lose a lot of flavor.
- Corn: For the best results and the fastest cook time, use fresh corn that’s been picked very recently. The sugars in corn turn to starches over time, meaning older ears of corn can be more firm and may need longer to cook. Depending on the age of the corn, the ears may need to boil as long as 10-12 minutes.
Approximate Information for One Serving
Nutrition Disclaimers
Number of total servings shown is approximate. Actual number of servings will depend on your preferred portion sizes.
Nutritional values shown are general guidelines and reflect information for 1 serving using the ingredients listed, not including any optional ingredients. Actual macros may vary slightly depending on specific brands and types of ingredients used.
To determine the weight of one serving, prepare the recipe as instructed. Weigh the finished recipe, then divide the weight of the finished recipe (not including the weight of the container the food is in) by the desired number of servings. Result will be the weight of one serving.
Did You Make This Recipe?
Tag @40aprons on Instagram and be sure to leave a review on the blog post!


Never Miss A Meal!
New Recipes Straight To Your Inbox
A curated selection of our most recent recipes, delivered straight to your inbox once a week.
Thank you!
You have successfully joined our subscriber list.